Updating your wardrobe every season, you suddenly notice that there is simply nowhere to put new things. Throwing good quality clothes, but bought last season, does not raise a hand. You can solve the problem by assembling a wardrobe with your own hands.
Convenient and roomy designs will bring together the belongings of all family members, while occupying a very small space in the room. Basically this is a place that is underutilized and not very convenient for placing other furniture elements.
Construction options
 Built-in version
If you want to install in an apartment or home wardrobe, you need to make accurate measurements of the proposed installation location of the furniture and make an order in the company engaged in the manufacture of cabinets. The second option would be to measure the installation site, independent design of the structure, order cutting parts and installation of a wardrobe.
 Corner cabinet
You have a choice - recessed structures, corner cabinets and models of individual pass-through structures . When you decide on a choice, you can proceed to self-assembly.
The types of wardrobes differ in design. If you have never been engaged in assembling furniture, it is better to start with a walk-through model. This universal model can be installed in almost any room.
 Closing cabinet
In many apartment projects the hall was made small in the shape of a rectangle. If you put a regular closet with a hinged door, there is absolutely no place left. The sliding wardrobe with a sliding door was a real salvation. Its height basically goes to the ceiling, which gives maximum use of the area. Mirror canvas door visually increase the space.
Materials
 Materials Used
Even the pickiest buyer will be able to find the color and shade of laminated he needs in the market Chipboard, most often used for self-assembly wardrobe. For the back wall using hardboard. The choice of accessories in the stores has almost no boundaries - from the simplest to the exquisite fancy shapes. Door leaf can be made to order from any material.
For cabinets, 16 mm thick sheets of chipboard are used. Sheets are sold on the market with a height of 2450 or 2750 mm and a width of 1830 mm. If you want to save money by reducing material waste, consider these dimensions when designing a wardrobe.
Let's take a closer look at the option of assembling the wardrobe with a height of 2450 mm, a width of 2400 and a depth of 650 mm.
Detailing

In addition to sheets of chipboard, we need a melamine self-adhesive edge. To assemble the cabinet shown in the picture we will need the details:
- Two sidewalls 2433x650 mm in size.
- The bottom is 2367x650 mm in size.
- The cabinet cover is 2400x650 mm in size.
- The big shelf - 2367х550 mm.
- Seven small shelves - 778х550 mm.
- Two partitions - 1917х550 mm.
- Rear and front base / plinths - 2367x100 mm.
- Lateral parts of the box base in the amount of 3 pcs. and the size of 550x100 mm.
- Two edges of the base box with a size of 1159x100 mm.
Details of the back wall of hardboard:
- The wide part in two compartments is 1940x1595 mm.
- Narrow detail on one compartment - 1940x800 mm.
- The part for the upper part of the cabinet is 2395x410 mm.
It is better to order sawing up of parts of the future wardrobe compartment in the cutting service, which is always available at any building supermarket. Show the experts your design of the cabinet and accurate measurements. In our case, there is already detailing and it is better for the saw cutters to show it.
Facade system

You can make your own wardrobe door system, but is it necessary? If you plan to assemble not one but several cabinets, this can be beneficial. Doors for one cabinet will cost you much more than the ordered sliding doors in a company that manufactures, supplies and assembles sliding facades.
You need to visit the company's office and place an order specifying the exact dimensions of the clean opening and the number of webs. For our wardrobe, the net size of the facade is 2317 mm high and 2367 mm wide. We need to make two shutters of the same color as the laminated chipboard and one shutter mirror. There must be a seal, stoppers, guides. In general, the whole set necessary for the quality work of the sliding facade system.
Fittings

Everything about the facade has already been ordered, but for the interior design of the cabinet you need to purchase furniture accessories. For our project you need to buy:
- For fixing hardboard self-tapping screws or nails.
- In the middle compartment of the cabinet, for adjusting the shelves in height, you need hembles.
- Confirmats of sizes 70x5 mm.
- Bar holders.
- Self-tapping screws with a size of 16x4 mm.
- Two bars under the hanger in the size of 775 mm.
Preparing for assembly

When the finished parts are delivered, you can start preparing them for assembly. For work, you need an iron. Acquired edge gently attach to the end of the details so that the beautiful side was on top. Carefully walk on it with a heated iron. Look for the steam mode not to be on on the iron.
Press the heated edge well and wipe thoroughly. Cut off the edges gently handle with sandpaper. When preparing the parts do not need to rush. Try to achieve the highest quality of work so that your closet looks neat and beautiful.
From the parts of the base, assemble the podium base for the bottom of the cabinet. The base must be required.
Assembly
 Assembly of the structure
To assemble the cabinet you will need:
- Pencil and Rectangle.
- Drill and drill 5 and 8 mm.
- Tape measure.
 Tools
Tools
Instructions:
- For assembly parts in one whole design are used confirmatories. First, we look at our project and make markup of attachment points.
- When markings are put on all the details, we proceed to the drilling process. For holes in the plane we use a drill with a diameter of 8 mm. The hole should be through. The depth of the hole at the ends is not more than 60 mm, and the diameter is 5 mm. In the places of installation of poglotchik we make holes on several levels When the cabinet is ready, you can safely move your shelves to the desired level.
- To assemble the structure, you will need the help of one person. Work will go faster and build quality will be better. We connect all the details of the cabinet and install it in place. We expose the cabinet smoothly using the level.
- Now you can proceed to the installation of the facade. Along the edge of the cabinet cover fasten the upper rails. We retreat from the edge of the bottom of the cabinet with a maximum of 10 mm and fasten the lower guides. Before you tighten the screws, insert the stoppers in the roller track.
- Now you can put the facade in place together. One person drives the top of the facade into a guide, and the other sets the wheels into the desired track. Hex key is used to adjust the facade. Adjusting screws are located at the bottom of the front face. Raising or lowering the lower roller, we set the facade to the desired position.
 Performance of work
When the wardrobe is loaded with things, the adjustment will need to be repeated. That completed the installation of the wardrobe. Now you can proudly consider yourself a master and try to assemble a more complex structure. The experience is already there, it means that the assembly will be much faster and better.
Do you want to share with us your experience in assembling the wardrobe? Leave comments on the article. Our readers will be interested to learn the secrets of your successful cabinet assembly.
Video: assembly of the wardrobe
We offer to watch the video on the assembly of the wardrobe compartment.
Sliding wardrobes with your hands photo


Drawings


 Attachment scheme for the door mechanism
 Installation scheme of the compartment cabinet
 Assembling the compartment cabinet


Search
Related Articles
Oil impregnation of wood: types and technology
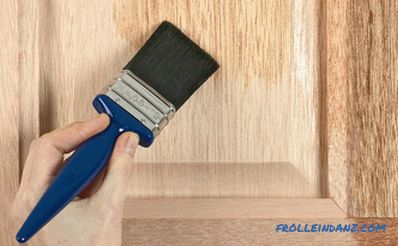
In the recent past, almost all dishes were made of clay or wood. The only exceptions were pans. This was the point: the food cooked in a clay pot had a special aroma. A wooden spoon never heated. I...
How to warm the facade of the house - how to warm the facade
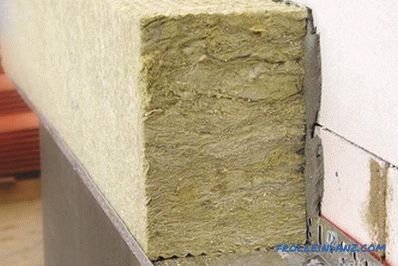
The problem of heat conservation is relevant for all people living in areas with a temperate continental climate. If the room has good thermal insulation, it will positively affect not only the comf...
Patio in the country with their own hands
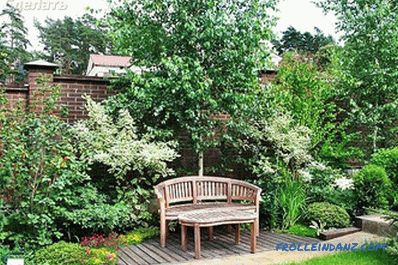
Patio is an equipped outdoor area among beautiful plants designed for relaxation. The main elements of such a corner for recreation are a flat, paved with natural materials playground and comfortabl...
How to choose a humidifier for an apartment or house + Video

In our apartments now there are a lot of appliances that increase comfort and facilitate life. For example, a humidifier is designed to get rid of dried air, which is especially common in winter. T...
tools, stages of work (video)
One of the most important stages of work during the construction of a log house is the processing of a log house, that is, its polishing. This operation should be carried out on a mandatory basis,...