The semi-dry screed is a floor leveling technology using a cement-based mixture. The main feature of this technology is the use of cement-sand mixture (CPS) with a very low water content. Moisture in it is so little that it can not be put in the usual way - pouring. The mixture is crumbly like wet sand.
The use of a semi-dry DSP provides advantages for which it is worth mastering this method, despite its unusual and seeming complexity. But first, a little theory.
Why a semi-dry screed
is needed For normal cement curing, moisture is necessary. If it is not enough, the solution will not gain the calculated strength. Excess moisture also hurts the cause. Too liquid mixture begins to exfoliate, in it the proportions of the components are broken in layers. Excess water, which is not involved in the hydration reaction, leads to the appearance of pores and capillaries, which reduces the strength of concrete, increases shrinkage and increases the risk of cracking of the screed.
The amount of water is characterized by the ratio of the mass of water in the solution to the mass of cement - the water-cement ratio (W / C). The more water in the mixture, the higher the ratio. Theoretically, cement should be cured by the amount of water corresponding to the W / C in the range of 0.2-0.3. But in practice, mixtures with a W / C equal to 0.45-0.7 are used for pouring foundations, manufacturing concrete goods, for masonry and plaster solutions. They contain more water than is needed for hydration, but they are plastic and comfortable to use.
A cement-sand mix for a semi-dry screed is prepared with a water-cement ratio less than 0.4 - this is the lower limit for most other applications. This technology resolves the contradiction between the requirements of the plasticity of the working solution and the strength of the finished product. Its use provides a number of advantages:
- a smooth surface that does not require additional processing;
- no shrinkage and minimal risk of cracking;
- a low-porous dense structure gives waterproofness;
- ease of forming inclined surfaces - gutters;
- short curing time, the possibility of operating the screed the next day after laying;
- you can walk in special scooter shoes during the work process.
How a semi-dry DSP
is prepared To obtain a working solution, it is important to mix the ingredients correctly and pay attention to their quality.
Preparing the components
The cement-sand mix for the semi-dry screed is prepared from M400 or M500 cement, pure water and pure sand. Water fits tap; should not take it from dubious sources. In the cement should not be lumps, if available, it must be sifted.
Sand should also be dry, clean, without admixture of clay, silt and dust particles. Any impurities can reduce the strength of the solution.
An increase in the clay content in the sand by 1% reduces the strength of concrete by 3-5%.
When preparing sand yourself, it should be sieved and washed. In the sand there should be no dust and particles larger than 3 mm. Larger inclusions will hinder the surface treatment of the screed
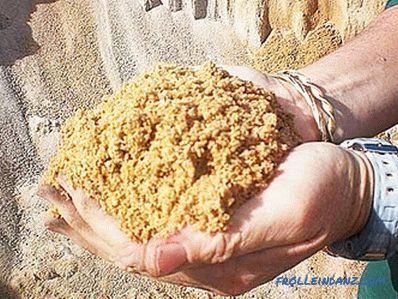
For a screed, a cement to sand ratio of 1: 3 is 1: 4. Recommended proportions are given on the cement packaging indicating the concrete strength class. The DSP coupler must have a compressive strength not lower than 150 kgf / cm 2 , which corresponds to class B12.5. Based on this, the recipe is selected.
If it is not possible to remove dust and clay from the sand, a decrease in strength will have to be compensated for by a greater consumption of cement.
In addition to the main components, synthetic or fiberglass fibers and plasticizers can be added to the mixture. From 0.5 to 0.9 kg of fiber is applied per cubic meter of solution.
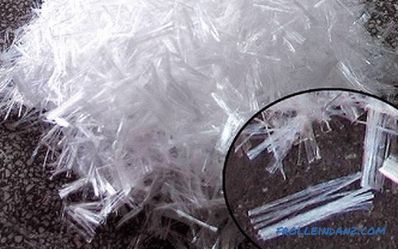 Fiber
Fiber
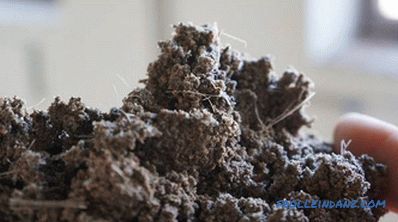 Fiber Solution
A plasticizer is added at the rate of 0.5 - 1% by weight of cement in the solution. The exact dosage is selected empirically.
The use of these additives does not lead to a noticeable increase in the price of the screed, but brings significant benefits. Fibration creates distributed bonds throughout the entire volume of the screed and reduces the likelihood of cracking, and the plasticizer facilitates the laying, compaction and leveling of the mixture.
How to mix?
It is better to mix the components of a mixture with a hand mixer in a large capacity. In the drum mixer it will stick to the walls, and this will complicate the work. Another option - mixing on the floor or on a metal sheet with a shovel. This method is more laborious, but with it you can immediately prepare a large volume of the mixture.
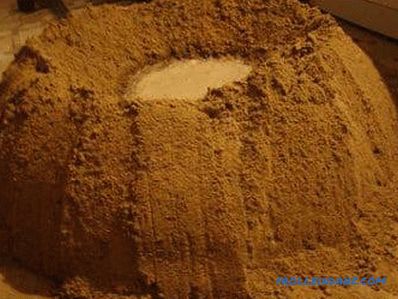 Mixing mortar on the floor
The larger the single dose, the better.
Ideally, the entire coupler is laid and leveled in one go, without interruption, in a single array.
We start preparing the mortar with sand and cement. Measured volumes of materials thoroughly mixed until a homogeneous mass.If fiber is used, we add it at this stage, fluff the fibers well.
Add water to the finished dry mix. Here the main thing - do not overdo it! Water is added in small portions with constant stirring. The plasticizer is added with the first portions of water so that the suddenly changed plasticity at the end of this work does not come as a surprise.
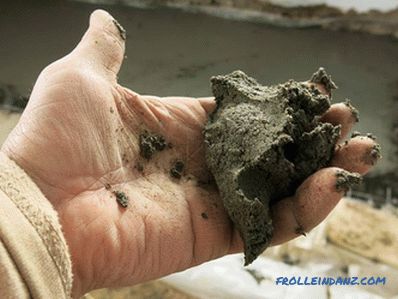
The finished semi-dry DSP looks like a uniform, moist, crumbly sand. If you squeeze the mixture in your hand, a tight, firm lump will form, but the palm will remain dry. If the palm is dirty, there is more water than necessary. If the lump breaks up, you need to add water
The process of laying and aligning the tie manually
The following is a step-by-step instruction on how to lay a semi-dry tie using simple tools.
Laying out and tamping the mixture
The finished DSP is poured on a previously prepared base and pre-leveled so that its level is higher than the calculated one. After that, the mixture must be sealed, otherwise it will remain loose. To seal it, it is enough to trample down the screed, protecting the feet with appropriate footwear.
It is convenient to use a light T-shaped tamper in the form of a short pole with a 10 × 20 cm horizontal plank fixed at its lower end. With the light strokes of this tamper, the surface is additionally compacted and large unevenness is smoothed.
As a result of this work, the DSP condenses, loses flowability, and a weak sheen of moisture appears on its surface. If there was a strong moisture in the form of a clearly visible film - this is a sign of excess water. Speaking on the surface of the moisture can complicate the final stage - grouting.
Surface alignment
After compaction, the alignment stage begins. For this work, a long rail-rule is used, as well as when pouring plastic concrete. At this stage, the irregularities left after tamping are smoothed out. The rake is moved by the movement "on itself" and removes the excess mixture. In this case, caverns remain on the surface. They are filled with loose mixture, which is collected by a trowel from unaligned areas. Portions of the mixture are pounced on top and compacted with light blows from the trowel. Then this section is again processed by the rule.
Finishing - Grout
After leveling, the surface is treated with grout. It is best to use foam or wooden tools for this. The size of the grout is selected based on the size of the treated area, the presence of columns on it and other obstacles. But in any case, this work is done with a small tool that is held with one hand.
The coupler is rubbed with circular or wide eight-shaped movements. Circular movements are used to smooth out small defects - protrusions or cavities. The protrusions are simply cut off, and the excess material is distributed to the valleys or collected on the untreated area. Larger caverns and valleys are filled with a free-flowing mixture, which is "slapped" slightly and rubbed again.
The smoothing with wide strokes in the shape of eight shows surface drops that are not visible to the eye, and are even poorly defined by the tool. Smooth irregularities are felt to the touch, according to how the grout moves. To feel this, a small practice is enough.
Control of the plane
In the course of work, it is necessary to regularly check the flatness of the surface. For this, the rule of 2-2.5 m is applied. A tool of shorter length is used only in narrow spaces - corridors, storerooms, staircases.
For checking, the rule is neatly placed with a thin edge on the tie. On irregularities indicate gaps under it. When preparing for tile laying, the gaps should not exceed 2 mm per 2 m length. For additional underlay materials, gaps up to 4 mm are allowed. You need to control the plane in different directions, rearranging the rule by half its length.
Preparatory work
The preparation of the semi-dry mix, its laying and leveling was described above, but nothing was said about the preliminary preparation for this work. Now this gap will be filled.
Before you make the mixture and start laying it, you need to perform a number of actions:
- prepare the base;
- determine the level of the tie;
- make markup horizon;
- prepare damping insulation of vertical elements - walls, columns, steps of stairs.
Such different bases
The base under the screed can be:
- concrete floor,
- previously laid screed,
- waterproofing,
- heat insulation or sound insulation,
- soil or sand "cushion".
Bases that have a strength higher than the strength of the screed are called strong. In the above list, this is the first and, for certain cases, the second paragraph. All other types of bases are fragile.
Preparing a solid foundation
Strong bases are distinguished by the fact that the screed rests on them due to adhesion - adhesion. The cement-sand layer is securely fastened to the base and "adopts" some of its strength.
To ensure adhesion, it is necessary:
- to remove fragile and exfoliating fragments;
- to clean the surface of oils, paint, dust;
- to prime the base primer.
You can use a metal brush to clean loose layers. Absorbent surfaces are treated with a penetrating primer. Non-absorbent, such as concrete floor slabs - adhesive bonding primer type "Betonokontakt".
What to do with an unstable foundation
The fragile bases are required only to be level, not to absorb water and to withstand the distributed loads created by the coupler and what is on it.
The screed also requires resistance to concentrated loads, the ability to withstand the circulation of people, the fall of objects, the pressure of the legs of heavy furniture. Therefore, it is made of increased thickness and reinforced reinforcing mesh with a cell of 10 cm or less.
Such a coupler can be made on top of bitumen or membrane waterproofing, on expanded polystyrene, on solid mineral wool, on the ground. It is a free floating plate that has its own flexural strength and thus maintains its integrity on a deformable base.
The floating screed is separated from the walls and other vertical structures with an elastic foam foam or foam pad. There is for this and a special damper tape.
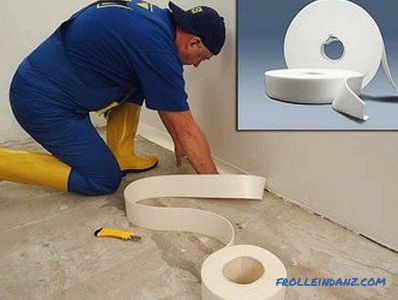
Such insulation is necessary to preserve the independence of the slab. Rigid connection with walls and columns creates extra stresses in it, leading to cracking.
The height of the screed and the marking of
The level of the surface of the screed is determined by its required minimum thickness and the design level of the clean floor, taking into account the thickness of the coating. When determining the level, the unevenness of the base is taken into account. It is important that the actual thickness of the screed anywhere is not less than the specified minimum. The minimum thickness for different options is given in the table.
| Construction of the screed | Minimum thickness |
| By concrete | 20 mm |
| Over concrete, with wiring pipes and cable channels | Pipeline thickness + 15-20 mm |
| Floating | 40 mm |
| With heating | Heating tube thickness + 50 mm |
When preparing the solution for yourself, it is difficult to ensure the normative strength, therefore, in case of doubts as to the quality of DSP, the thicknesses indicated in the table should be slightly increased .
Net screed height is marked on the walls with a clearly visible line. Hydro level can be used for marking, but it is better to use a laser rotational level or a plane builder. If the room is small, you can do only this markup. On a large area "losing" the plane will help the lighthouses.
How to install beacons
Beacons are landmarks and supports that help to form a given surface without continuous measurements. To align the screeds often use linear beacons - slats or metal profiles, which are fixed in a single plane. The distance between them is chosen slightly less than the length of the rights used and la. When aligning the screed, the rule simply slides along the guides and "automatically" forms a flat surface.
It is convenient to use CD-60 profiles for gypsum false walls as guides. Profiles are installed on slides of low-plastic cement mortar, aligned with the help of level, cord, rules. After setting the cement you can work with them. Plaster profiles are used for the same purpose. But they are easily deformed and need to be fixed more often.
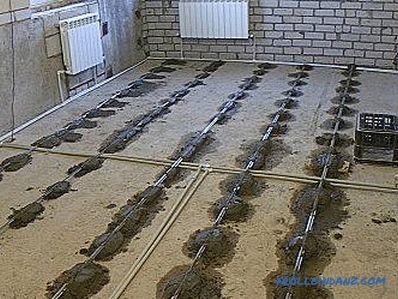
When working on concrete floors, it is useful to first install dowels with long screws in the plates. Self-tapping screws are height adjustable by rotation and their heads can be easily set to the desired plane. Then you can install linear beacons on them. The advantage of this method is the simplicity of the settings and the fact that even a profile that is accidentally plucked from place is easy to install into place without additional adjustment.
Self-tapping screws as reference points are suitable even without profiles. But point beacons require accuracy in work. They don’t get “automatism”, as with “rails”.
And if the beacons do not have anything to attach?
The method described above is good for solid reasons. And if the screed fits on the bitumen membrane, foam plastic or mineral wool? In this case, you can also install beacons, but without screws.
A floating screed is made with reinforcing mesh inside. Moreover, the reinforcement is located in the middle of the thickness of the screed.If you lay the grid on the liners, which will raise it above the base, and then put cement slides for the beacons, the fittings will connect these slides, will not allow them to move. It remains only to ensure that when working by chance not to raise the lighthouses with the grid.
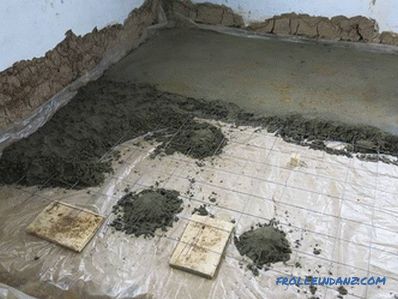
For the passage through the grid under it you can temporarily put small plates on which you can become without fear of damaging the reinforcement. As the area is filled with the solution, the plates are shifted to a free space and then removed. Another option is to stack the solution in two passes. First fill the space under the grid so that you can walk freely on it, and then work with the second layer. It is important not to take long breaks between the first and second layers. The working time of the cement mortar is 2 hours. During this time, you need to completely finish the started section.
How to make a tie without beacons?
You can also do without beacons if you have a laser plane builder with a sweep angle greater than 90 o , or better - a rotary level. Choose a point from where the laser level will “shoot through” the entire room, take any suitable ruler, set it to the level of a clean tie and mark it on the line of the laser plane.
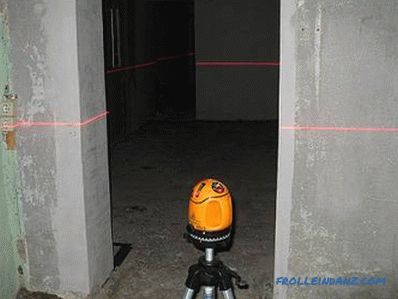
When placing this ruler on a coupler at any point, you can immediately see whether its level coincides with the design level, and if it deviates, then where and by how much. With this method of leveling the floor, it is important to provide a constant support for the level, the position of which will not change until the end of work.
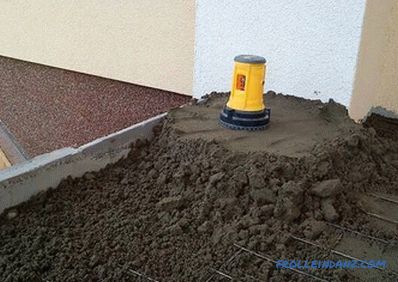
The same can be done with the help of a hydraulic level, if you work with an assistant and agree to lower accuracy.
Care during hardening
Semi-dry cement mortar contains little water, and it evaporates quickly due to the large open area. To prevent premature drying of the screed, it must be kept wet at all times. If there is waterproofing at the base, it is enough to cover the tie with polyethylene. If there is concrete below, it is necessary to moisten it periodically on the first day in order to compensate for the capillary suction of water.
To avoid cracks: the principle of chocolate
When cement hardens, with temperature changes, the screed changes in size. The bill goes on millimeters and fractions of a millimeter, but with the rigidity of concrete, this leads to stresses that can destroy the product. To avoid this, expansion joints are cut in the coupler, which release stresses, arrange the deformations and make them harmless.
The cutting of the expansion joints divides the tie into even regular sections with an area of 20-30 m 2 . Cutting done after grouting. To do this, you can use a steel trowel, the edge of which is carried out on the solution, leaving a smooth furrow. Cutting depth - 1/3 of the thickness of the tie.
Such a groove creates slack along which a crack will pass during deformation. Uneven cracked edges do not allow vertical displacement of maps. That is why the seam is cut to only one third of the thickness.
Follow the simple cutting rules:
- seams (maps) separated by seams should have a simple form, without branches and turns;
- the length of the card should not exceed its width is more than 1.5 times;
- the maximum section length is 8 m;
- T-joints are not allowed;
- adjacent rooms are separated along the line of the doorway ;
- seams are cut along the walls and around the columns (if there is no insulating cut-off); line joints page itelnyh structures and gaps in the reinforcement.
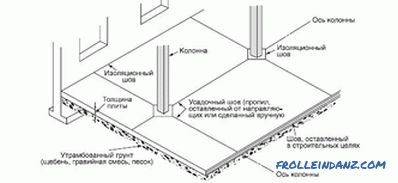
If the room has a simple shape, without columns and alcoves, and its area does not exceed 40 m 2 , then cutting is not needed.
There is another type of seams - structural. This species is mentioned in the last paragraph of the list above. An example is the joint between the flight of stairs and the platform.
Structural or technological joints are made during breaks in work. If it is impossible to lay the tie on the whole room at one time, then its edge is formed with a special corner rail with an angle between the shelves 30 o . If you continue the work the next day, the rake is removed and the installation continues. Hardened edge, profiled rail, fixes the adjacent layers in height, but allows horizontal displacement.
A simple flat rail can also be used. But in this case, metal rods about 20 cm long are inserted into the end of the screed. They enter up to half, and the outer part is covered with bitumen or any other compound that prevents adhesion of the cement to the metal.
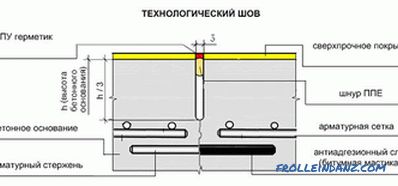
After gaining full strength, after 28 days, the seams are sealed with an elastic cord and sealed with a polyurethane sealant.
