A great many people are thinking about how to create home furniture on their own. The reasons for this decision may be different: some are not satisfied with the range offered by furniture stores, others believe that the price of furniture is too high, and someone is not satisfied with the quality of products. Representatives of these categories of consumers are offered instructions on how to make a round table with their own hands. Perhaps it will be the first item that will mark the beginning of a whole exclusive collection of furniture, emphasizing the individuality of its owner. Making the table, the technology of which will be described below, is not difficult for a person who has at least some idea of working with carpentry tools.
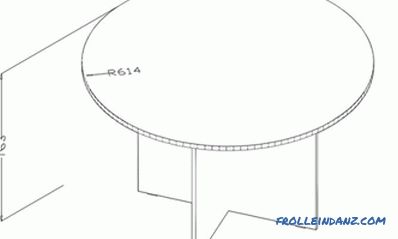
Figure 1. Drawing of a round table.
Table with legs made of uneven bars and tabletop made of plywood
So, we make a table of plywood and wooden bars. Do not be afraid that such a product will look unpresentable. A table top and an underframe will be created from the key material. We should not forget that plywood is made of wood, therefore the surface pattern of a plywood tabletop conveys its structure well. In addition, the plate will be monolithic, in contrast to the table top, glued from boards. Immediately it is worth adding that by choosing a wooden array for its manufacture, you risk to buy an insufficiently high-quality glued slab and end up with a tabletop with long longitudinal cracks. Assembling an array with your own hands, you will spend a lot of time on the selection of material and its bonding, so the choice of plywood is the best option. With proper finishing the tabletop will look like it should be.
Preparation of tools and the choice of material and fasteners for blanks
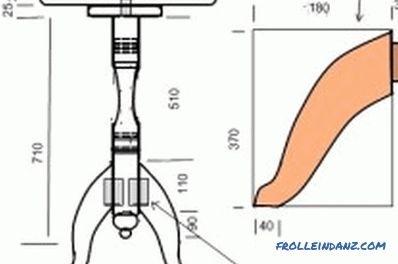
Figure 2. Scheme of assembly of a round table.
Before you start work, you need to prepare all the necessary materials and tools, because in the process of assembling the table it would be unwise to run to the hardware store because of some missing part, so put the following tools:
- hand or electric drill;
- screwdriver;
- bits and drills;
- jigsaw;
- grinding tools (tape or disk machine with emery nozzles);
- marking tools and a pencil.
If you have a router, then you can create edges of various reliefs, but without it you can make a round table of a very decent design (what the structure looks like without a router, shown in Fig. 1).
It does not matter if you do not have a large compass to delineate the edges of the table top and undersolding. It will be replaced by a nail or a button, fixed in the center of the future circle, a cord length in the radius of the desired circle and a pencil attached to the thread. For processing the legs of the table and the slats, in addition to the grinding tools mentioned in the list, you can use a manual or electric planer.
The simplicity of the design lies in the fact that you do not need to make any spikes, grooves, notches and whiskers. All connections are made using confirmets capable of withstanding high loads. The construction tightened by them will serve not one year. The length of confirmators is selected based on the thickness of the joined blanks. Of course, before you make the table, you should prepare the other materials:
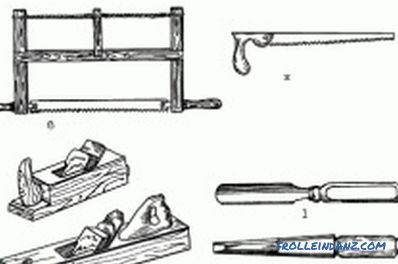
Tools for making the table.
- bar for legs 120x50 mm (3.05 m);
- 30 mm birch plywood for the table top (1.525x1.525 m);
- 20-mm plywood for underframes (1.27 x 1.27 m);
- Timber or plywood 120x20 mm (up to 2.3 m).
The length of the crossbars will depend on the distance between the opposite legs. In addition, you have the right to make the supports and vertical, and deviated from this position. In the latter case, you will have to coordinate the cutting angles of the ends of the crossbars and legs.
Do not forget to stock up on compounds to protect the structure from moisture and its antiseptic treatment, stain and varnish or paint. It should be noted that the linseed oil remains the best way to protect wood from moisture. Soak it with plywood and boards several times before applying the finishing layer.
Cutting blanks and assembling the table
In fig. 2 shows a diagram with an indication of the length of the legs and the height of attachment of the transverse bars.
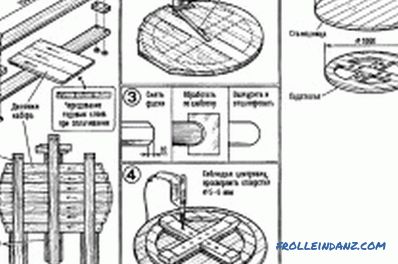
Scheme of manufacturing the table top for a round table.
It is clear from it that the crossbars are located one above the other, and not connected by a cross. Such an arrangement does not weaken the rigidity of the structure, but you can connect the cross-pieces with each other by sawing them in the center to a depth of 60 mm.
The width of each slot should match the thickness of the bar. The fastener is screwed into the material only through pre-drilled holes to prevent splitting of the workpieces. True, first they need to be done.
The manufacture of the table top and the ring of the underframe is not difficult.
To cut the top plate, draw a circle with a diameter of 1.5 to 1.525 m with a compass or an appropriate fixture and cut the circle with a jigsaw. For the sub-base, you must outline 2 circles. The inner diameter of the ring can be from 1 to 1.15 m, and the outer diameter - 1.27 m. Cut the ring with an electric jigsaw, but do not discard the remaining circle, since its central part can be used as a blank for crossbars, cutting a strip along the diameter of the circle 240 mm wide and dividing it lengthwise into 2 halves.
All surfaces cannot be ground once. If you apply a varnish on them after the first treatment with an abrasive, the previously invisible burrs will pop in. Do not rush, because you absolutely do not need marriage.
Sand the surfaces in several steps. At the end of the process, apply the finest grinding material. Now you can treat the ends of the legs and crossbars with antiseptics, assemble the table together and spend several times impregnating with hot (50-60 °) linseed oil on all its faces. After that apply a finishing coat.
Didn't find the answer in the article? More information on the topic:
-
How to build a reliable house from boards?
A plank house is considered environmentally friendly and cozy to live in. It is built quickly, it is not necessary to acquire expensive materials. Be sure to provide insulation.
