Laminate flooring makes the interior of the apartment attractive and modern. Beautiful and practical material is quite simple in the care and installation, but with the manufacture of the basis for it will have to work hard. To ensure high-quality laying of slats, it is necessary to level the subfloor as much as possible. Changes in its level can cause loosening of the laminate system. As a result, gaps will appear between the panels, and over time the coating will finally break down and require replacement. The substrate under the laminate can not compensate for significant pits and protrusions, therefore, should be carried out smooth and durable screed. After reading this article, you will learn how to make a screed under the laminate with your own hands.
Methods for leveling the base for laminate
 Beacon tie
Make a solid foundation under laminated lamellas having a flat surface can be done in several ways:
- In small rooms, dry screed made of expanded clay poured onto a plank floor is made; plywood sheets are laid on top of the filler.
- The traditional cement-sand screed is indispensable for significant base differences.
- Self-leveling mixtures - ensure a smooth and smooth surface, but are allowed for use with a thin layer, with a height difference of no more than 2 cm.
Preparation for screed
Before beginning making screed under the laminate need to carry out preparatory work on the layout of the room. Using a bubble or laser level marks the horizontal level of the surface. You need to focus on the highest point of the subfloor.
 Screed waterproofing
Before starting to lay the mortar, the surface must be cleaned - remove all rubbish and sweep dust. The base is primed with a special compound that improves adhesion. Laying a layer of waterproofing will reduce floor moisture. This factor is important for the laminate, excessive moisture penetrating through the screed will damage the base of the panels. The second reason for performing protection from moisture is to prevent it from leaking to its neighbors. For this procedure, suitable plastic film, laid over the entire area with an overlap of 30 cm, the joints are glued with tape. Canvas waterproofing should go on the wall. If you do not plan to perform waterproofing of the entire floor, then fix the special tape on the walls so that it protrudes 15 cm above the screed. Another option for protecting walls from damp is to coat them with special polyurethane mastic.
 Exposing beacons for a tie-down scheme
Next, metal pre-fabricated beacons are exposed. Guides are installed parallel to each other at a distance of 1-1.5 meters, this value depends on the length of the rule used, if its size allows, you can position the profile at a greater distance. Choosing places for lighthouses, try to arrange them so that the end point is at the entrance. When installing them, check the horizontal level more often. This will be the most crucial and time-consuming stage of preparation, because the accuracy of the installation of the guides will determine the evenness of the base under the laminate, and drops are excluded here. Metal beacons are stacked on a layer of cement mortar, the distance from the wall to the nearest lighthouse is 50 cm.
Preparation of cement-sand mortar
 Preparation of mortar
The concrete mixer will allow you to prepare a good solution with little effort. The proportions of the components of the mixture for screed 3: 1, for three parts of the sand there is one share of cement grade M400. Increasing the amount of cement is not worth it, it will not lead to the strengthening of the screed, but to its cracking. You just need to dilute the mixture of cement and sand with water and turn on the unit, after a few minutes everything will be ready to perform the screed. The resulting solution should not be too liquid.
Leveling the floor with large differences
It's time to figure out how to make a tie under the laminate if the floor has differences of more than 2 cm per m 2 . The finished solution has the consistency of thick cream, it spreads between the lighthouses and is drawn by the rule, the ends of which slide along the guide beacons. In the process of distributing the solution, it is necessary to ensure that there are no voids left. If plasticizers are added to the solution, it will be easier to reach. Work on leveling the poured solution occurs before the formation of a flat surface. Moving from row to row, you need to perform a screed throughout the room.
If a large number of defects remain after the alignment rule, you should pour another layer and stretch the solution again. Small cracks and irregularities on the surface are cleaned with a trowel and trowel.
 Alignment with the long rule
When the whole room is covered with a cement-sand screed, walk the long rule leveling the overall floor level.After the solution grabs, and it will be possible to move around it, the lighthouses are taken out, their place is sealed with the same composition as the entire floor. The screed is left to dry; this can take a period of 10 to 20 days. The difference in term is affected by:
- thickness of the screed layer;
- room temperature;
- degree of humidity.
We propose to watch a video illustrating the process of making such a tie:
Using a self-leveling mixture
 Leveling level
The screed alignment under the laminate is performed using a self-leveling mixture consisting of a balanced system of components and allowing you to quickly smooth out all minor irregularities. The self-leveling floor is used when the difference is not more than 2 cm, it makes the surface smoother. Before applying the leveling compound, the coupler is primed, this will allow to bind the two solutions more tightly and reduce the consumption of expensive material. The mixture for leveling is prepared according to the manufacturer's instructions, the work is performed by a mixer. The finished solution is poured onto the surface and rolled out with a special spiked roller. This contributes to the simultaneous alignment and removal of air bubbles.
 Self-leveling screed
The self-leveling mixture dries quickly, you need to pour and distribute it in a short time.
Such a surface will be perfectly flat and will provide a reliable base for the screed.
 A perfectly flat screed will turn out
The laying of the laminate will start after the full floor has dried and its smooth surface is ready to the laying of the substrate and does not require additional work on alignment. You can look at the video in which the skilled builders or simply experienced craftsmen reveal the subtleties of work.
Video
Search
Related Articles
How much does it cost to build a roof
You can often hear that the foundation is the main thing in the house. But the roof of the house also plays an important role, because it protects from wind, rain, snow, sun and other factors. It mu...
types, device, how to choose, rules of work

Cutting sheet metal with hand scissors or a grinder is a difficult, time-consuming and traumatic process, but the greatest difficulties arise in the processing of corrugated and profile metal produc...
Mini circular saw do-it-yourself: assembly
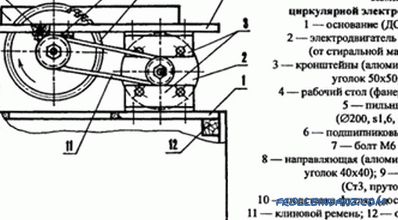
During repair work, a circular saw may be needed to help produce a good cut of the required surface. Such a tool is required infrequently, but it is expensive. To save your own savings, you can ass...
How to install snow protectors - installation of snow protectors on the roof

Roofing a house is a very complex structure. There may be various devices and devices. One of the roof designs are snegozaderzhateli. This is an optional, but necessary element. The fact is that dur...