During repair work, a circular saw may be needed to help produce a good cut of the required surface. Such a tool is required infrequently, but it is expensive. To save your own savings, you can assemble the saw yourself. A circular saw made with your own hands will help to easily resolve all issues arising during construction / repair.
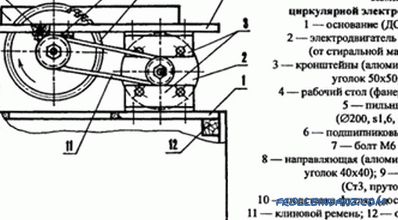
The design of a self-made circular saw.
We assemble the saw with our own hands
The circular saw is intended for sawing logs or various wood products. The thickness of the material being cut will depend on the power of its electric drive, i.e., the higher it is, the thicker the product can be sawn. Increase the performance of the saw can be not only a powerful engine, but also installing a camshaft.
Any circular saw consists of 2 parts - upper and lower. In the upper part is a desktop, a saw blade and a shaft with a pulley. In the lower part of the device installation of all electrical equipment is performed. The structure of this equipment includes:
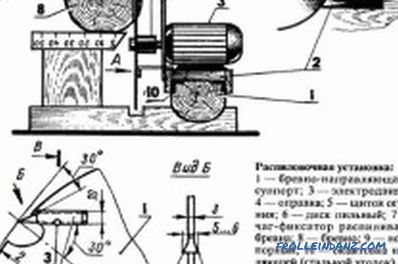
Drawing of a self-made disk power-saw bench.
- electric motor;
- transformer;
- current starter.
The frame of the cutting mechanism should be made from metal corners 25x25 mm or 30x30 mm. The dimensions of the desktop should be 650x450 mm, in the corners of which you need to weld pipes with a diameter of 18-20 mm.
On the prepared frame of the mechanism 2 small angles should be fixed, the length of which should be 20-30 mm, and the distance between them will be determined by the shaft dimensions. These angles will help fix the bearings for which you want to use clamps.
To improve the smoothness of the saw and improve the quality of work, it is necessary to use closed bearings. This will not allow the bearing cage to be clogged with shavings and sawing waste.
The lower part of the saw
The lower part of the saw mechanism must be made massive, this will increase its stability and reduce vibrations that occur during operation. For these purposes, the most suitable corners, the cross section of which is 40x40 mm or 50x50 mm. To mount the motor, you must install 2 transverse corners.

Table layout for a circular saw with a lifting-lowering mechanism.
The motor itself is best to use a three-phase asynchronous, the power of which will be 1.5-2 kW, and the maximum number of revolutions - 2000 rpm. A pulley should be mounted on the motor shaft, the stream of which is 80-100 mm, it will allow the use of a wide and reliable belt.
A small steel plate should be welded on the vertical stand of the bed. It will be mounted trigger. The wires must be laid carefully so that they do not get caught on the motor shaft.
Then the lower and upper parts of the saw must be connected to each other, this can be done with the help of pieces of pipe of the corresponding diameter. They need to pre-drill holes on 2 sides. Bolts are inserted into these holes, which will allow to pull the entire mechanism of the circular saw.
After both parts are connected, you need to tighten the belt. Stretching it should not be very strong, otherwise it will lead to its rapid rupture. The trigger mechanism must be provided with capacitors, which will help to smooth the increased starting currents. To increase the torque and output currents, you can use a transformer for 500-600 watts.
Other types of circular saws
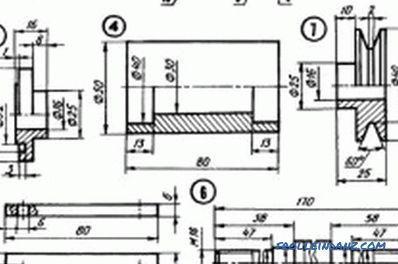
Diagram of the bearing unit of the circular saw.
You can make a circular saw of the pendulum type. This type of saw is designed for sawing thick wood. In pendulum devices, electric motors with increased power are used, the torque from which is fed to the saw shaft through a belt drive system.
The bed of a circular pendulum saw should be very powerful and made of thick steel channels. This is due to the fact that all the cutting and rotating load of the mechanism will fall on it. Moreover, this model can be equipped with a saw blade lifting device.
But it is not always necessary to have large and serious saw devices. In this case, a mini circular saw is a good solution. The mini circular saw allows to work at the place, at the same time there is an opportunity to carry out a cut at various angles.
The presence of such a sawing mechanism will save the space used in the workshop. At the same time, it can be easily moved throughout the free space of the room. The presence of such a device will help to simplify all repair and construction work. And the quality of the cut will be quite high.
Assembling the mini-device

Circular saw application scheme.
Before you start making a mini-saw, you need to do floor preparation in the workshop. The floor in the room must be level so that the saw does not sway during work, since it does not have a heavy bed. Swinging the mechanism will not only interfere with the work process, but may also lead to the appearance of various kinds of injuries.
You can use any old table and metal goats as a bed for a mini-device. These elements need to be interconnected with a thick board (40-50 mm).
Also the tabletop can be made of 2 steel plates, the thickness of which is 4-5 mm. Good for this fit and thick bars, which need to be interconnected plywood jumper thickness of 25 mm. Between the sheets / bars should leave a gap of 10-15 mm, it is needed for the passage of the saw blade.
When performing this work, you should achieve a flat surface and parallelism between the inner edges of the plates. The mechanism must be fixed in such a way that the circular saw is in the middle of the prepared gap.
To attach the sawing element to the table, it is necessary to drill holes on its surface. With the help of bolts you need to make it secure.
Mounting the engine and completing work
A device that transmits torque is provided to fix the motor to the hand saw. In some cases, circular saws can be mounted directly on the motor shaft, but this will reduce the power of the entire device.
As such a mechanism that transmits rotation, you can use the spindle from the bicycle carriage mechanism. It must be cut with a hacksaw. An asterisk is also required in further work.
The spindle is required to be equipped with an adapter sleeve, which will allow the cutting disk to be tightly fixed on it. The sleeve must be attached in several places, this can be done by welding. A metal plate having a thickness of 5-6 mm is mounted on the resulting spindle assembly. On the drive shaft, you need to install an asterisk, the size of which will be 2 times smaller than the asterisk on the spindle. Then these asterisks are connected by a chain. To do this, you can use a regular bicycle chain. Now the mini-circular saw can be considered ready and begin its operation.
A circular saw made in this way will be very convenient and useful with your own hands.
In order to make a mini-circular saw, you need to show a little imagination and ingenuity.
All assembly work will not take much time. The resulting mechanism will speed up repair work and save money.
Didn't find the answer in the article? More information on the topic:


