") Shed roof
Shed roof
In this article we will explain how to build a roof for a bath, consider various options: shed, gable, frame roofing designs, as well as demonstrate the schemes, photos and video instructions.
A single-roof roof is most often mounted for a bath, which is used only in summer. In this case, the roof can be used as a place for fire. It can also decompose various fruits, vegetables or mushrooms to dry them. And the water tank installed on the roof, which has a small slope, can be used for a summer shower, the water in such a tank will be sufficiently heated on hot days.
On a shed roof, you can use turf laid in two layers as a roofing material: the lower of which is laid up and the roots down. Caring for such a coating is similar to the care of a conventional lawn. Such "green roofs" are quite popular in Europe, but are not widely used in our country, although they were used everywhere in ancient Russia.
Basically, roofs of saunas are built with two-slope rooftops. In the attic it is good to dry bath brooms, store home equipment, and in rainy weather it is a great place to dry clothes. The attic also provides additional thermal insulation for the building.
Shed roof
") Slotted construction
Slotted construction
During the construction of the bath, many decide to build a lean-to roof. Unlike other types, it is much easier to make a single-shed one. So, for its arrangement there is no need to build a complicated roof system. And if the bath is attached to another structure, then this roof will be an extension of the existing one. But despite its apparent simplicity, it is important to take into account when making it a number of nuances, for example a slope.
The angle of the slope of the roof is determined on the basis of several factors, for example, how large the snow and wind load is in your area. Also on the definition of the angle affects the selected roofing material. If in your region the amount of snow is large, then the angle of inclination should be made steeper from 15 °. This will allow the snow to quickly go off the surface, and also simplify its cleaning. If strong winds prevail in your region, then the roof, on the contrary, needs to be made more gentle.
Below is a chart that shows the permissible angle of inclination of the roof with a particular roofing material:
") The plot of the slope of the roof
The plot of the slope of the roof
Roof construction
")
The construction itself is very simple. The angle of inclination is created by the difference in height of two opposite walls. At the same time, it is also possible to equip an attic room (optional). If the attic is not, then the roof at the same time may be the ceiling of the bath. Inside it will need to be insulated and hemmed. If the attic will be equipped, then it is necessary to additionally make the overlap between the attic and the room.
The roof has a support on the rafters, which are placed on the walls of the bath. The rafters are mounted in steps from 0.6 m to 1.2 m. From above the rafters, the sheathing, waterproofing layer and roofing material are made.
If the length of the ramp exceeds 4 m, then an additional support should be installed under the rafters.
You can use sheeting, metal roofing, shingles, and ondulin as roofing. It is extremely rare to choose slate, since this material significantly weights the weight of the finished single-pitch roof.
To manufacture such a roof, you need to have the following set of materials and tools:
- board 40 * 60 mm for making rafters and floor beams;
- waterproof plywood or board
- waterproofing material;
- roofing;
- ceiling filler;
- vapor barrier film with metallized coating;
- insulation - basalt, glass or mineral wool;
- jigsaw;
- stapler;
- hammer;
- tape measure;
- knife ;
- screwdriver;
- antiseptic to cover tree.
Step-by-step instruction
")
Formation of a shed roof begins with the construction of walls, i.e., you perform one higher. If the bath is rectangular, then usually it is one of the long walls. Next, the construction process is as follows (for example, the construction of timber):
- If you plan to complete the attic, then at the level of the low wall it is necessary to make grooves along the entire perimeter for the ceiling beams. The distance may correspond to the distance between the rafters. The groove is carefully treated with wood preservative.
- Further, according to size, cut out the beams from the thick cut board.
- The ends of the beams will fit into the grooves made. To do this, they must be impregnated with polymer waterproofing mastic and wrapped in roofing material.
- Fastening is done with metal clips or studs to the wall.
- Rafters (Mauerlat) are laid on the upper beam. To pull them you can use metal plates or studs. If the length of the slope between the ceiling beams and rafters exceeds 4 m, then additionally install struts or supports.
") Installing rafters
Installing rafters
- The roof gable can be sewn with boards.
- If the attic is equipped, then a ventilation window is made in the gable. Otherwise, steam will accumulate under the roof, leading to condensation.
- You place a waterproofing film across the rafters from above. It should sag a little. On top of it, fix the bars to the rafters, and then, plywood, for a solid crate or board with a step of 0.5 m. A solid crate is necessary for laying a soft roof, and thinned - for Ondulin, metal tile, etc.
- After that installation of the roofing material chosen by you is carried out. If it is a metal tile or corrugated flooring, they should be overlapped on one wave. For mounting using special screws with sealing rubber.
- After the installation of the roofing material, it is necessary to fix the wind, curtain rail and ridge.
The final stage will be the weatherization. About the intricacies of doing this work, will be discussed in this article.
The roof of the frame bath
")
If you are building a frame bath, then in the manufacture of the roof there are also some nuances that are important to consider. It is worth noting that with such construction it is best to build a gable construction with a slope of 20-23 °. This will allow precipitation not to linger on the roof, but to go quickly. So, the truss system of a frame bath roof will be supported on the walls. Rafters are made of boards 150 * 40 mm. At the top, the rafters will rest on the ridge beam, and at the bottom on the wall frame. The crate is made of board 150 * 25 mm with a pitch of 300 mm.
") Construction of a frame bath
Construction of a frame bath
Immediately before installing the roofing material, a heat insulating layer and a hygroscopic waterproofing film are laid PVC On top of it, the rails are nailed to form an air gap. The pitch of the wooden batten is selected depending on the selected roofing material. For example, for metal tile, the batten step can be 200-350 mm.
If the roof area exceeds 60 m 2 , then it is important to make additional ventilation ducts. Otherwise, condensation may form in the attic.
For the construction of the roof of a frame bath, it is best to make the truss structure on the ground on a flat surface. After that, it will need to be lifted onto the ends of the walls and secured.
Heat insulation
")
The roof of the bath should have good steam and thermal insulation properties. For insulation, you can use:
- glass wool;
- extruded polystyrene foam;
- mineral wool.
All these materials are distinguished by ease of installation, durability, moisture resistance, and durability. One of the best options is extruded polystyrene foam, as it does not absorb moisture. It is not recommended to choose foam plastic when insulating the roof of a bath, as it emits harmful substances under the influence of high temperatures.
") Thermal insulation of the ceiling
Thermal insulation of the ceiling
For example, consider the principle of thermal insulation of the roof with mineral wool. It is advisable to lay the cotton wool in two layers in a staggered manner (in the case of slab wool, if rolled, then the second layer across the first) - thus, you completely prevent the formation of a cold bridge. For insulation use cotton wool with a thickness of 10 cm.
If the insulation of the roof is made in an already built bath, then all work will be done from inside the roof in the attic. And the sequence of its installation remains the same, using steam and waterproofing.
The heater is placed close between the rafters so that there are no gaps and cracks. Upon termination of warming from above a heater the film with overlaps keeps within. When laying several layers of insulation material, each subsequent layer should be positioned so that it overlaps the junction of the previous one. The same principle is used to warm the ceiling in the bath.
When the roof is fully built, you will receive a complete aesthetic pleasure from the work done.
See also:
- how to properly roof the roof with metal tiles;
- to bake in the bath.
Video
You can familiarize yourself with typical mistakes when building a bathhouse roof in the following video:
Photos
") Bath with a loft
Bath with a loft
") A gable roof on a log house
A gable roof on a log house
") Fold roofing
Fold roofing
") The gable roof is small baths
The gable roof is small baths
") Roof of corrugated
Roof of corrugated
") Slate roof cover
Slate roof cover
") Tiled roof
Tiled roof
") The two-sided roof
The two-sided roof
") Gable boarding
Gable boarding
") Construction of the log of the roof
Construction of the log of the roof
") Ondulin for roofing ban and
Ondulin for roofing ban and
") Trussing
Trussing
Drawings
") Drawing of a gable roof
Drawing of a gable roof
") Drawing of a shed construction
Drawing of a shed construction
") Hydro and vapor barrier of the roof
Hydro and vapor barrier of the roof
") Layout of roof elements
Layout of roof elements
") Sequence diagram of the construction of the roof
Sequence diagram of the construction of the roof
Search
Related Articles
How to insulate the basement of the house - the choice of material and insulation
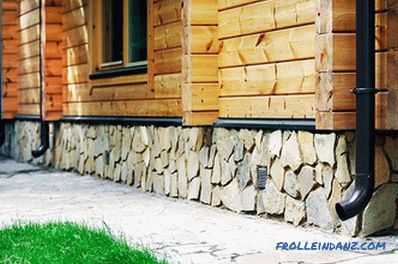
The foundation of any home must be strong, reliable, durable. The microclimate inside the building will depend on these indicators. As the statistics show, up to 20% of heat can be lost through an u...
Fastening the wall paneling: several ways
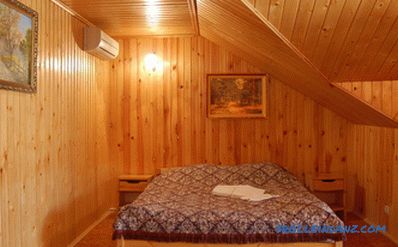
Wall paneling is a very common lining material, widely used for wall decoration inside and outside rooms, balconies, loggias, and ceilings. This material is made of wood and plastic. Lining...
Making shelves do-it-yourself: features
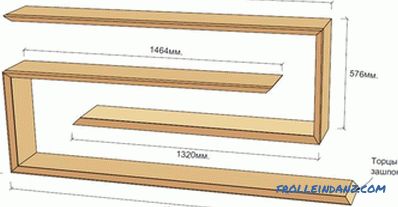
Nothing is simpler than the implementation of a carpentry project. However, he, like other undertakings, requires an indicative planning and budgeting. Making your own shelves requires similar plan...
How to install balusters on the stairs
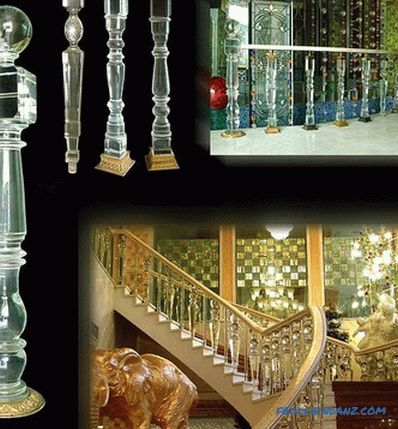
Being engaged in arrangement of the house, the person first of all thinks of comfort and safety of each family member. Especially carefully considered the issue of security in the construction of st...
Combining a bathroom and toilet - how to make redevelopment (+ photo)
It is good if the room for personal hygiene is spacious. However, not in all cases it is. Therefore, a large number of residents decide to combine the bathroom and toilet. As a result, you can optim...