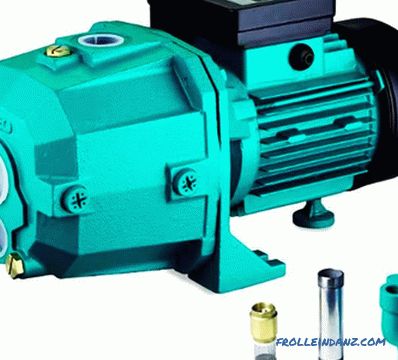
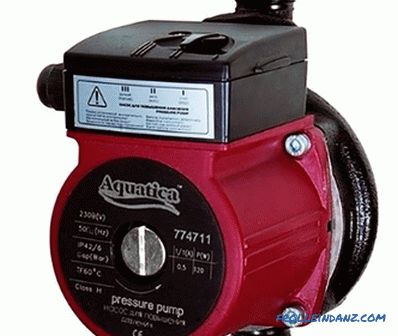
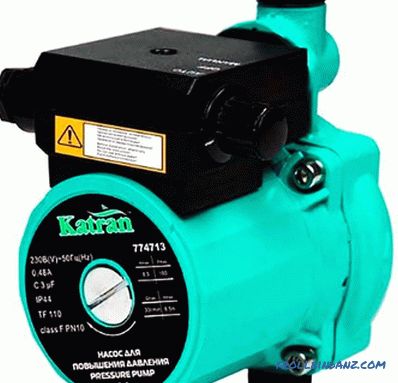
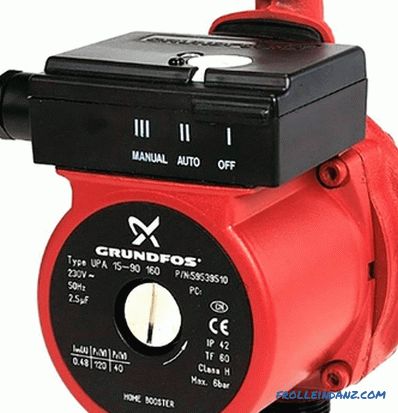
If you are tired of the weak water pressure in the faucet, and you want to solve this problem, then you can immediately suggest installing a pump to increase the water pressure. It can be said that this is the simplest solution, however, it is not possible in all cases. For example, what to do if in your city or microdistrict according to the schedule turn off the water? The pump does not completely solve the problem of water scarcity. In this case, there is a need to create an additional source of water. Or, at least, then you should purchase equipment for backing up a small amount of water.
If you have decided everything and in your case the installation of the pump is an ideal solution, then it is important to become familiar with all the subtleties of choosing this device. However, first of all, it is necessary to deal with the causes of low pressure. Although the main focus of this article is the choice of a pump, we will consider this issue with you in a complex and wider way. In particular, we will examine what the optimal pressure should be in the faucet for normal operation of household appliances (washing machine, dishwasher), ease of use of plumbing fixtures and so on.
Water pressure - what it should be
 What should be the pressure in the plumbing system
In general, pressure is measured in atmospheres or bars. So, 1 bar is equal to 0.99 atmospheres. If we are talking about apartments in multi-storey private houses, then there are norms that regulate the level of pressure on the entrances to the house and the entrance to each apartment. These regulations are described in SNIP 2. 04. 02-84 and SNIP 2. 04. 01-85.
The table shows the pressure in different areas, as well as in the apartment and house:
| Measurement sites | Indicators and calculations of pressure |
| Input to a private one-story house | The pressure level should be around 1 atm |
| Entering into a private high-rise house | If the house has 2 floors, then you need to increase the pressure by 0.5 atm total 1.5 atm. So much is added to each subsequent floor. |
| For a house with 9 floors | At the entrance to the house there should be a pressure of 4.6 atm. |
| For each individual apartment | The water pressure is around 0.3-6 atm. This is for cold water, and for hot to 4.5 atm. However, in reality, there is no large pressure, as the water passes through a complex pipeline system. |
| For a mixer | 0.2 atm is enough. |
| For a faucet in the bathroom and in the shower room | 0.3 bar is required. |
| For the toilet cistern | The water pressure should be 0.2 atm. |
2 atm of pressure is enough for home plumbing and meeting daily needs. However, there are exceptions. For a shower cabin with hydromassage function, as well as for a bathroom with a jacuzzi, pressure up to 4 atm is required.
Some may believe that the more pressure there is in the system, the better. But there is also a reverse side of the coin. If the pressure is too high, for example, from 6.5 atm or more, the fittings on the pipes and other connections may not withstand. Faucets, faucets and other plumbing equipment may also fail.
How to determine the water pressure
Given the data above, it is important to be able to determine the water pressure at home. This task is simplified if there is already a measuring equipment - a pressure gauge at the entrance of the water supply to your apartment, as can be seen in the photo:
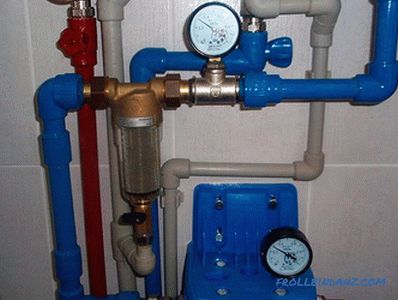 Installation of the pressure gauge on pumping equipment
However, as practice shows, rarely does anyone have such equipment. For this reason, in this section, we offer you several methods for determining the level of water pressure.
Stationary pressure gauge - the best solution
If you install or replace a pipeline, then you can install a stationary pressure gauge to measure the water pressure in the system. In this case, you will not need to resort to improvised means.
Ideally, if a pressure gauge is installed near each plumbing fixture. However, from an aesthetic point of view, this is a clear disadvantage. Plus, this is quite a costly pleasure.
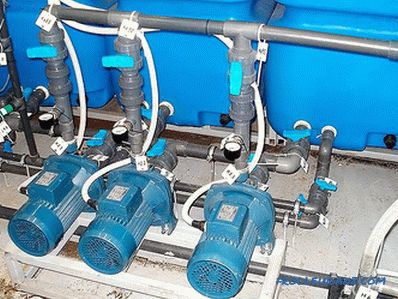 Stationary pressure gauge can be installed on pumping equipment
If follow the practice, the pressure gauge is installed immediately at the entrance to the apartment. With this up to the counter. Why? It's very simple: the filter, the check valve and the meter itself are already knocking down the pressure. Therefore, if you are interested in the indicator directly at the entrance, the pressure gauge is installed this way.
But remember, on all consumers, the pressure will be different, as it falls, passing through many barriers in the pipeline.Most of all, the following elements affect the decrease in water pressure: places with a change in pipe diameter;
Given all this, the indicator of water pressure at the entrance to the apartment and at the exit from a particular consumer will be different. If you do not have a pressure gauge installed at all, then below we provide for you 2 measurement methods for which a portable pressure gauge and a hose are required.
Video: operation of stationary pressure gauges
Pressure gauge in the shower for testing
One of the simplest methods for measuring pressure is to install a pressure gauge instead of a shower head. To do this, you need to prepare the following:
- thread extender;
- water gauge up to 6 atm;
- adapter to 1/2 thread;
- fum-tape.
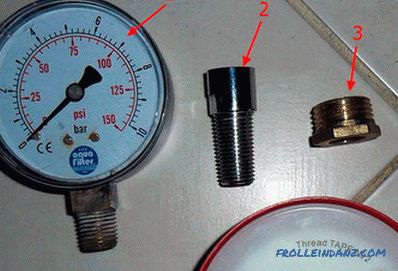 Equipment for assembling the pressure gauge
All these elements are between a should be connected. To do this, fasten a metal extension to the pressure gauge, and then go to 1/2 thread. To seal the thread necessarily use fum-tape. It is important to make a tight connection, otherwise it will not work to make accurate measurements.
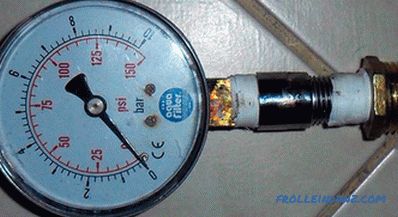 The assembled pressure gauge is ready for testing
After that in the shower stall unscrew the watering can and fasten our construction with a pressure gauge instead. It is important to be careful not to lose the sealing rubber in the nut under the watering can, it looks like this:
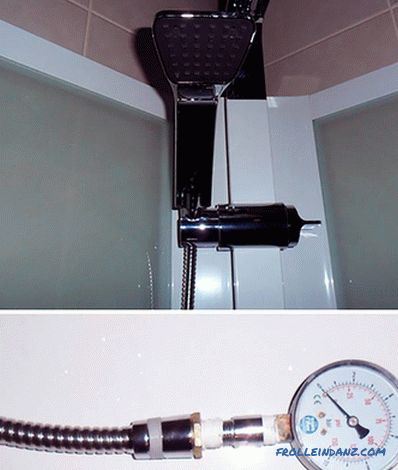 The pressure gauge is connected to the shower hose instead of the watering can
Now you can open the tap and measure the water pressure. At the same time it is important to perform one operation: in order to avoid air in the shower, switch the water supply from the shower to the tap several times. The air will come out and you will be able to find out the pressure.
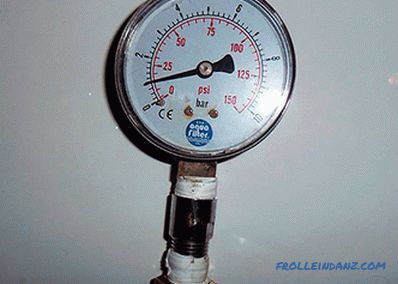 The obtained measurement result on the pressure gauge
But here you shouldn’t rush to conclusions. The fact is that water enters the shower through a complex piping system. Moreover, it is known that the more turns the water passes and the thinner the pipe (the diameter of the hose is much smaller than the diameter of the entrance pipe to the apartment), the stronger the pressure drops. Therefore, in this way you will be able to find out only the pressure indicator on this sanitary device. If such an operation is performed, for example, near a washing machine, then the indicator will differ slightly, since the diameter of the hose is larger than that of the shower.
This method is convenient because you can determine if there is a blockage in the pipe. For example, you notice that the water pressure in the bathroom is good, and the kitchen is relatively low. By installing the pressure gauge and comparing the indicators, you can easily determine on which section of the pipeline there is a blockage.
Immediately before disconnecting the shower head from the hose or dismantling another plumbing fixture, do not forget to turn off the water. Otherwise, you can not escape the flooding.
Video: a homemade pressure gauge for
Using a hose to calculate pressure
If not accurate, then approximate pressure measurements can be made using conventional hose length of 2 meters. This method is mainly used only to measure the pressure at the tap water outlet.
An important condition is the use of a transparent hose. This will make the necessary measurements.
The measurement process proceeds as follows:
| Work steps | Workflow |
| Stage # 1 | At the first stage, you must put the hose on one end of the hose. The diameter of the hose must be such that it can be easily put on the mixer gander. |
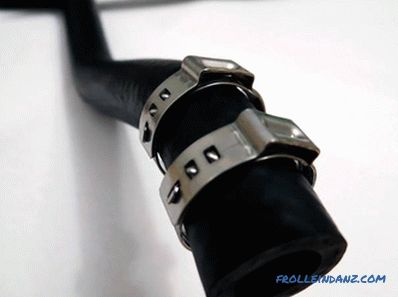
| Stage №2 | Now you need to worry about reliable sealing. To do this, put on the hose can be fixed with a metal clamp. |
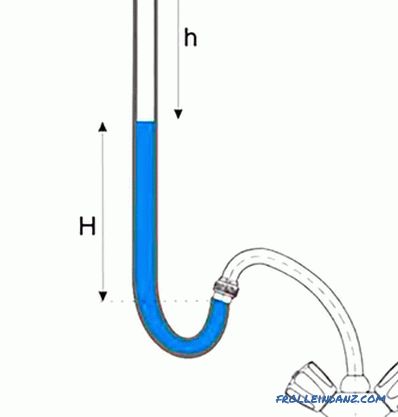
| Stage 3 | After that, the hose rises to the vertical position. Top it should be plugged with a cork. |
| Stage 4 | Now you can open the water by fully unscrewing the tap. After a short time, the water in the hose will stop at a certain level. |
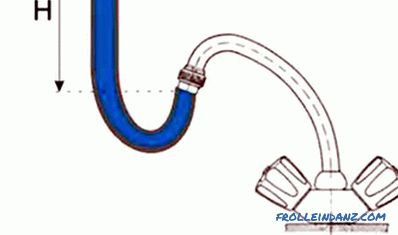
| Stage 5 | Further, some calculations are made.First of all, the length of the hose is determined from the zero level to the cork (this is the place that is on the same level with the water outlet from the gander), look at the diagram: The length of the hose from the plug to the water level in the hose is also measured. |
Having all the measurements, you should perform some calculations using the formula:
Р = Ратм * Н0 ÷ H1.
In this formula:
- P is the pressure in the pipeline at the outlet of the valve, measured in atm;
- Ratm - the pressure in the hose until the valve is opened, measured in atmospheres;
- Н0 - the length of the hose before the test starts from zero;
- Н1 - the length of the hose between the plug and the established water level.
But remember that such calculations will be close to reality; more precisely, pressure can be measured using the methods described above.
Causes of low water pressure in the water supply
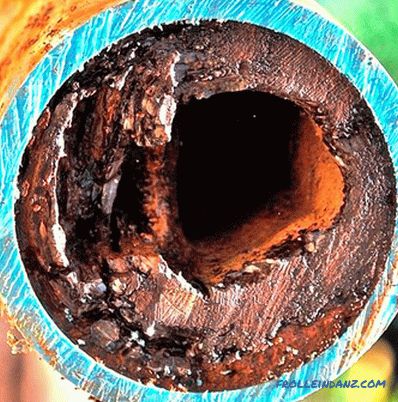 There are many reasons for low water pressure, one of which is clogged pipes
Before taking any action, it is important to determine the cause of the low pressure. In some cases, the purchase and installation of pumping equipment will not completely solve the problem. The reasons can be various:
- water leakage on the water route;
- overgrowth of the internal diameter of the pipes;
- the water filter is clogged;
- the tap is faulty or other valves.
Often the reason for low pressure is poor quality service to the water supplier. For example, utilities can deliberately shut off the operation of one or more pumps in order to save. As a result, the consumer receives water, however, its pressure leaves much to be desired.
It is noteworthy that, according to the provisions of SNIP No. 2. 04. 02 of 1984, as well as State Resolution No. 307 of 2006, the minimum water pressure for a single-story house is 1 atm. If the house has 2 floors, then 2.4 atm.
Now we will consider several methods of how to increase the water pressure, and also consider in detail the option of installing pumping equipment.
Video: causes of low water pressure in the pipeline
This video tells you that the water pressure can be low due to a clogged aerator:
Here you will learn that the water pressure may drop due to a clogged filter designed for coarse cleaning:
And here it is told why there can be a weak head due to the non-return valve:
How to increase pressure
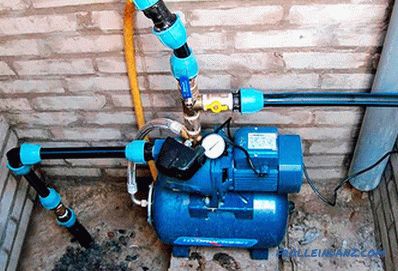 One solution to increase pressure is to mount the pump
Assume that the installation of the pump is absolute Her problem of low pressure, it would be absurd. This option is possible only in one case - when water flows into the pipeline without interruption. With constant shutdowns of water, if we are talking about the city highway, pump idling can lead to its breakdown. If there is no water, the pump simply overheats, and the motor burns. Water is a natural cooler. However, there is a way out here - installation of special automation, for example:
- relays for protection against dry running;
- water level sensor;
- water flow control.
This equipment is designed to turn off the pump in the absence of water. As a result, the pump will be fully protected from possible damage.
Video: protect the pump from running dry
If you live in an apartment building, installing a pump to increase the pressure significantly affects the quality of the water supply of your neighbors. To prevent this, some measures can be taken. At the same time, solutions for an apartment and a private house should be different. Why? Now see for yourself.
The nuances of installing the pumping station
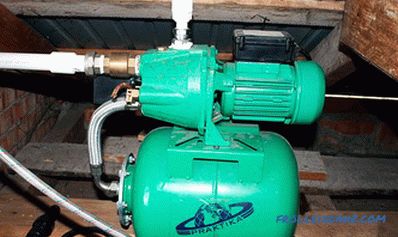 Installing the pumping station can solve the problem of low pressure
In this case, the centrifugal pump of self-priming type is an essential component. This equipment will allow even at zero pressure level to raise water from a certain depth to the entrance. At the same time sufficient water pressure will be provided.
Additionally, this station is equipped with a pressure switch. Due to this, when the pressure in the pipeline decreases, the pump automatically switches off / on. Plus, in the storage tank will be created a stock of water under sufficient pressure. It is spent only in those cases when there will be its absence in the highway. As a result, this installation provides a small supply of water and the necessary pressure. But this method is relevant only for private homes.
Consider the following example: as you know, on the upper floors of a house, tenants most often experience water shortages.If they begin to solve it in the aforementioned way, then soon the whole house, at least among the tenants, will have a battle for the water stream. As a result, this may result in fines from utilities for you. After all, the installation of pumping equipment without the appropriate permits is prohibited. Plus, installing a pump will cause an imbalance throughout the line. Also keep in mind that self-priming pumps have technical limitations. They are able to raise the water to a height of about 8 meters. So, if you live on the third floor, it will work with a stretch, not to mention the floors above.
Video: installation and start-up of a pumping station
Installing backup water - how to properly implement
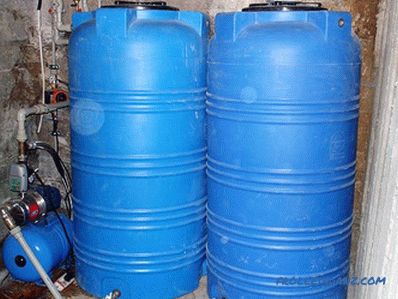 Plastic drums are an excellent solution for creating a backup water supply
This system is most effective when you turn off the water in time. The installed tank is filled with cold water. All subsequent water flow will be carried out from it. It is equipped with a pump and other equipment. At the expense of it the sufficient pressure of water in all house or apartment is provided. Plus, this solves the problem of turning off the water, you will have it round the clock. It will not be only in the event that electricity is turned off.
Installation of backup water is easier to implement in a private house. The apartment is quite problematic to allocate space for the installation of reserve capacity. Unless you have many rooms, and you can allocate one for such needs, or you live on the last floor and the capacity can be installed in the attic. Such a solution will not cause an imbalance in the water riser.
To implement the project, it is necessary to select a suitable capacity. Most often used for this plastic tank. Today you can find models of different displacement. The choice of tank volume will depend on the estimated water consumption in your family. For a family of 3-4 people enough capacity to 500 liters.
Video: back-up water in the apartment
Place to install the tank
 Storage tank can be installed on the roof, but be sure to warm
For apartments, a suitable place could be a balcony / loggia, a storage room, a bathroom and other rooms where there is free access to her. If you live on the last or the penultimate floor, then it makes sense to consider the option of installing a tank in the attic. However, in this case, the container must be carefully insulated and concerned about safety measures so that it is not stolen.
If the backup drum and pumping equipment is installed inside the apartment, then it is important that the pump be noiseless. Otherwise, it will annoy you and create discomfort to your neighbors.
As for a private house, everything is much simpler here. The chosen place can be a basement or other technical room. The main condition is that it is heated.
Installation of the storage tank
So, in addition to the storage tank, it is necessary to purchase a pump, preferably a silent one. In this category, you can find equipment such trademarks:
- Grundfos MQ;
- RENS;
- Pedrollo 3 CPm and the like.
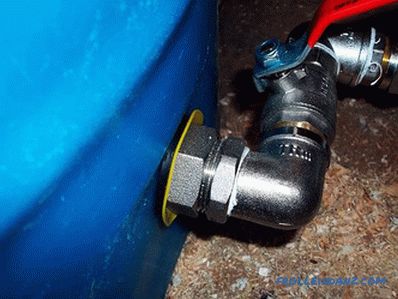 The connection of the tank must be made tightly
You must also install automatic equipment which surely includes the relay of protection of the pump against the dry course. This relay will signal the pump on / off. Thus, the pumping equipment will be protected from breakage.
To prevent the pump from turning on with minimal water flow, the system can be equipped with a hydraulic accumulator. Its volume will directly affect the frequency of switching on / off the pump.
So, the whole scheme of the storage tank will work according to this principle: as soon as the water in the faucet or mixer turns on, the pump turns on and gives out sufficient pressure. If the water storage capacity is exhausted, the relay sends a signal to turn off the pump. As a result, the operation of the entire system will be safe and economical.
Video: features of installation and assembly of storage tank
As for the barrel, it is necessary to complete it with a float. As soon as it fills, the float shuts off the water supply. The system is fully reminiscent of the principle of the toilet tank on the toilet. A coarse water filter is also installed. It is mounted at the entrance of the highway to the house, as well as in front of the pump. Thanks to this, no connections will penetrate into the storage tank, as well as into the pump, which can damage it.
You can install an additional filtering system, this is optional. But keep in mind, the presence of filters will slightly reduce the pressure.
Also, the water storage system is equipped with shut-off valves, non-return valves, necessary fittings and other components. You can find out more about the connection by looking at the schemes presented in the article.
Schemes: connection of a reserve water storage tank
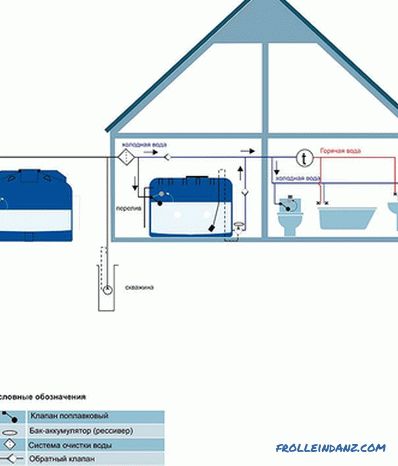 Connection diagram of a tank in parallel to the water supply system
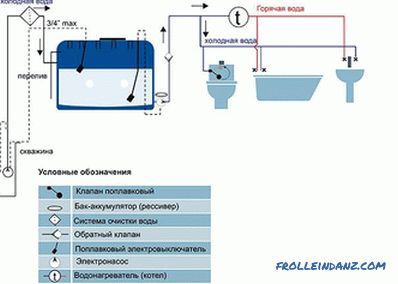 Tank connection diagram using a well
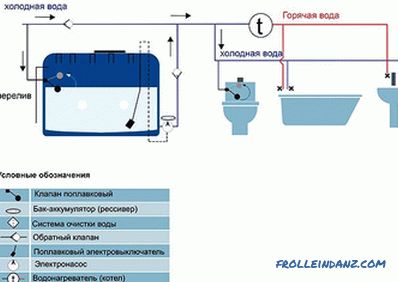 Connection diagram of a tank with a trunk pump
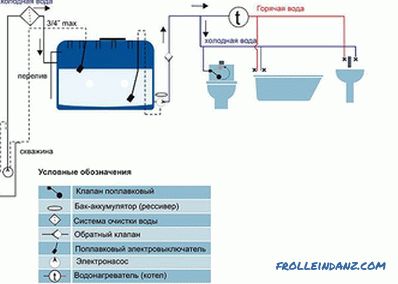 Connection diagram of the storage tank for backup water storage
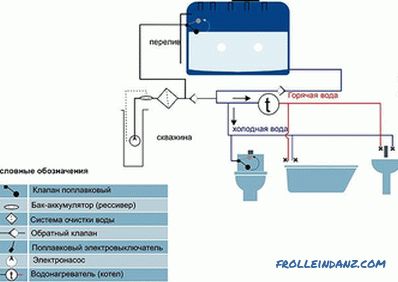 Connection diagram of the hanging tank
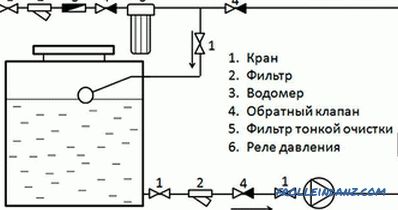 Connection diagram of the storage tank
Pumping station for the entire riser
Another option to increase the pressure of water in a flat assembly is in the basement powerful pumping stations, a large storage capacitance and the accumulator. In this case, the necessary pressure is maintained throughout the riser in the stairwell, and water will be around the clock. Although this solution seems the best solution, it is extremely difficult to implement. Not all of your neighbors will agree to produce such large-scale work, due to financial considerations. And for some, such as the elderly, and such pressure of water in the tap is enough.
The principle of protection of the dry-running relay
The relay is designed to control the water pressure in the system. If the pressure drops below the set point, the relay is activated and the supply circuit is broken. The pump is turned off and thus protected against dry running. One of the main elements of the relay - the membrane. Directly she responds to the contact group and pressure. If the water pressure decreases, the membrane presses on the contact group, turning off the power as a result.
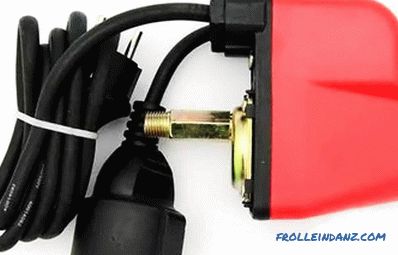 Relay to protect the pump from dry running
Based on factory settings , the relay can react to pressure in the range from 0.1 to 0.6 atm. At this pressure, the relay is activated and prevents the pump from running dry.
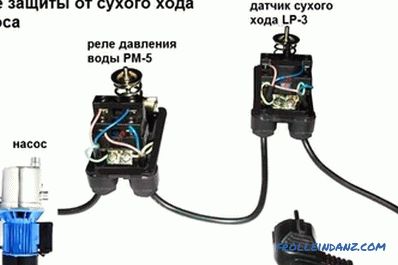 Connection circuit of the dry-running protection relay
Video: relay dry
relays and hydroaccumulator: can you combine into one
system? If you use a hydroaccumulator in your system, the relay will not provide the pump with 100% protection against dry running. This is due to the feature of the system. The relay is installed in front of the accumulator and pressure switch. There is usually a check valve between the protection and the pump. As a result, the membrane inside the relay is always under pressure, which is created by a hydroaccumulator.
For clarity, let’s see the following situation: there is a small supply of water in the accumulator, while there is no water in the well / reserve capacity. Moreover, the lower threshold of pressure is usually set in the region of 1.4-1.6 atm, the membrane in the relay does not work, since in fact there is pressure in the system. This will cause the pump to run dry. The pump will turn off only in two cases: when water is used up from the accumulator, or when the pump is burned. If this happens when there is water in the system, then there is no danger. Another thing when this happens in the absence of water. For example, at night the tank was drained, hands were washed, the tank filled with water. In this case, the pump, of course, turns on, but there is no shutdown signal. In the morning, the pump is likely to be broken.
Given this, if the system is equipped with a hydroaccumulator, it is preferable to use other devices for protection against dry running.
Video: why do you need a hydroaccumulator, how to connect it and calculate
From this video, you can find out what role the hydroaccumulator plays:
This story tells about the principle of the accumulator:
And from this video you can learn how to calculate the capacity of the accumulator:
Level sensor water - an alternative to dry-running relays
Such sensors are mounted in reserve tanks, as well as in the case of using wells / wells. In our case, we consider the float sensor, although there is its analog - electronic.
The float sensor can be of two types:
- For emptying (this sensor prevents the pump from running dry).
- On filling (this sensor prevents water overflow).
In our case, the sensor for emptying is just the right option to completely eliminate the dry running of the pump:
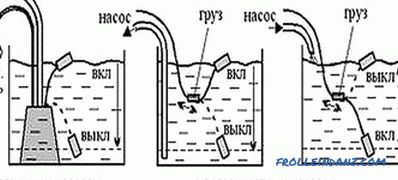 Circuit using the sensor on Emptying
The principle of operation is simple: when there is liquid in the container, the float sensor is at the top, when lowering the level, so that the circuit of the electrical network is disconnected, the sensor is lowered. As a result, the pump will be completely shut off.It will not turn on until the level is restored to the required indicator, and the sensor again gives a signal to turn on.
To prevent the pump from idling, the float cable is connected to the disconnection of the phase conductor.
Video: float protection of the pump against dry running
Water pressure switch to monitor pump operation
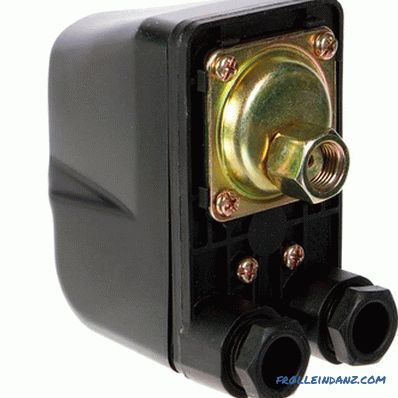 Water pressure switch
The pressure switch consists of two elements: one hydraulic, the other electric. In the hydraulic part there is a membrane. It presses on two springs (small and large). Due to this, a signal is given to turn on / off the pump. As for the electrical part, here is a group of contacts that close / open the electrical circuit, see the diagram in more detail:
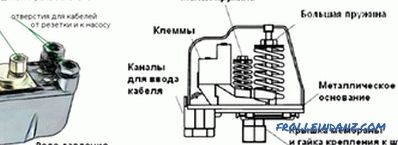 Diagram of the water pressure switch
It is worth noting that the relay is available in two types:
- electronic;
- mechanical.
Given that the mechanical relay is cheaper, it is more often used in the construction of plumbing systems.
Connection diagram of pressure switch
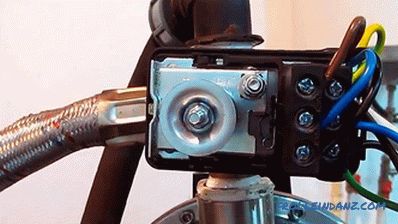 Connection of pressure switch
Based on its structure, it becomes clear that the connection takes place in two stages, first to the electrical part, then to the water supply. This device does not need to be moved, for this reason its installation is carried out permanently. Consider how to make the connection to the electrical and to the water supply.
Connecting the electrical part
This is not necessary, but it is better to organize a separate electrical line for the pressure switch, as it is more likely that it will last longer. To do this, the wire is fed to the switchboard, and an individual RCD is mounted.
When connecting a pressure switch, grounding is imperative. This is explained by the fact that this device combines water and electricity, which is already unsafe.
Inside the relay there are 3 pairs of contacts, each of which has its own purpose:
- Grounding.
- For connecting the neutral and phase wires from the control panel.
- For wires from the pump.
The connection is made according to the scheme from the manufacturer.
We connect to the water supply
The easiest and most affordable way to connect the pressure switch to the water supply is to install a special adapter, which has the necessary outputs. For this purpose, a connecting socket is used, see the connection diagram:
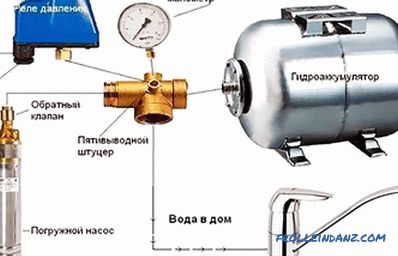 Wiring diagram of the relay to the water supply
Connects to this fitting: a pressure gauge, a hydraulic accumulator, a pump, an outlet for a water supply network inside the house, and the pressure switch itself. Thanks to the pressure gauge, it will be much easier to monitor the pressure in the system and regulate the relay.
Such a connection scheme has its advantages. Water will flow into the house, bypassing the hydroaccumulator. First, the water will flow into the taps, and only then the tank will be filled.
Video: connecting the pressure switch
Adjusting the relay
The adjustment process is illustrated by the example of the pressure relay model РДМ-5:
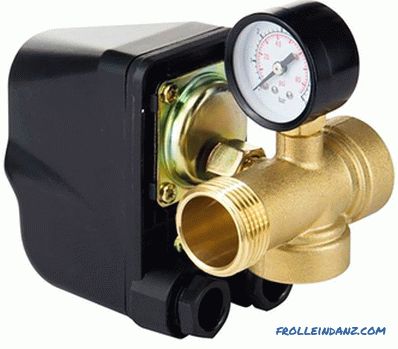 Pressure switch RDM-5
In it, you can make individual settings for a particular plumbing system. As a rule, the new (factory) relay has standard settings, it has a minimum pressure threshold of 1.5 atm, and a maximum threshold of 2.9 atm. If it is not necessary, these indicators can be independently reset.
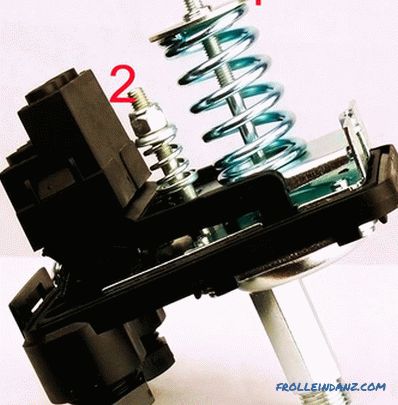 Two springs for adjusting the pressure switch
As we said above , the relay has two springs - small and large. So, the adjustment is carried out by tightening the nuts on the springs. If the nuts are loosened, the pressure drops, if tightened, the pressure increases. One turn of the nut is on average 0.6-0.8 atm. For this reason, do not turn them much.
Classification of pumps for increasing water pressure
The technical characteristics of which the pumps are distinguished are distinguished:
- operating mode;
- cooling principle;
- application.
| Pump classification | Types of devices |
| According to its purpose | Such pumps are divided into two types:
|
| By the cooling method | The devices have different cooling systems, in particular , the following types stand out:
|
| By operating mode | Here are two types of pumps, manual or automatic:
|
Pump and pumping station: advantages and disadvantages
The pump and pumping station have their own characteristics, which are noted in the table:
| Pump type | Advantages | Disadvantages |
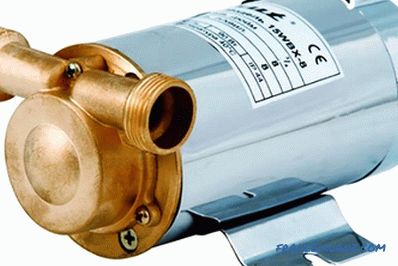
| Pump for increasing pressure | Here you can note the small size, which allows you to install it in different rooms. The pump is lightweight. Some models are silent. This is especially convenient for apartments. You can mount the pump directly on the water pipe. Such equipment has a relatively low cost. | One of the obvious disadvantages is that such pumps are not able to raise the pressure level by several orders of magnitude. |
| Pump station | One of the differences in this station is that it is able to provide living space with the necessary pressure. Her work is carried out in automatic mode, which greatly simplifies the process of operation. | There are more shortcomings, however, they are rather relative. Pumping stations are more difficult to install. It also has a large size, which limits its use. When working produces a considerable noise, which is unacceptable for apartments in high-rise building. Given this, to install the station is better to allocate a separate room. Among other things, it has a high price. |
Pumping station: working principle
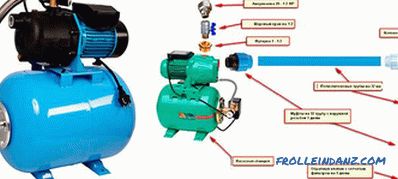 Pumping station for increasing the water pressure
As for the pumping station, it takes a lot of effort to increase its pressure. However, the result of the increase in water pressure in the pipeline will be impressive. So, for its implementation, additional equipment is required:
- relays for system control;
- centrifugal pump;
- accumulator.
When using it, the consumer uses the water that accumulates in the hydroaccumulator. Its use completely eliminates the possibility of pressure surges. You will be able to use the water, even if the water supply is interrupted. The work of the pumping station is regulated by a relay. If the pressure drops, the pump shuts off.
Types of pumping stations
All pumping stations are divided into 2 types:
- ejector stations with a remote or built-in ejector;
- ejectorless.
As for the ejector ones, they are equipped with a jet centrifugal pump (self-priming). Models with a built-in ejector are less sensitive to the presence of air in the system and provide high water pressure. Minus - the inability to raise the water from a great depth and loud noise during operation.
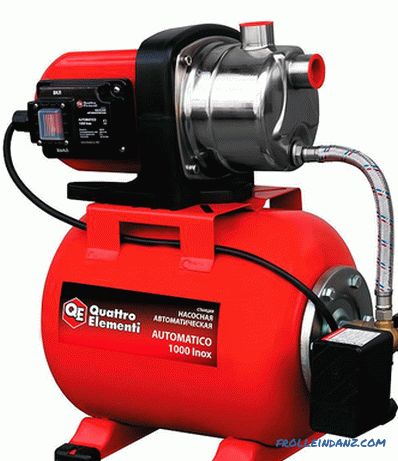 Ejector Pump Station
To raise water from a depth of 20 or more meters, you will need a station with a remote ejector. This pumping station can be placed at a remote distance from the well to 40 m. If we talk about the shortcomings, this is a high sensitivity to dirty water and the presence of air in the system.
As for non-ejector pumps, a special multi-stage design is used for water supply. Her work is virtually silent. This pump consumes less power. However, the depth of absorption is not more than 9 meters.
Pumping stations are divided by the type of tank used:
- Cumulative. The tank is mounted separately from the station, mounted under the ceiling, installed in the attic and the like. Such a drive is practically not used today, as it is heavy, poses a risk of flooding and does not provide sufficient pressure.
- Diaphragm tank. Capacity is mounted in the basement, as the water level is regulated by the battery. The tank is small. Mostly used for shallow wells.
In addition, pumping stations are divided by water source:
- Depth. The presence of a reliable case. The device can be completely immersed in water.
- Submerged. The ejector is placed on top, and the hose is lowered into the water. However, this pump can be used when the water is located no deeper than 9 meters.
What to look for when choosing a device
If you have already come to buying a pump to increase the pressure, then it is important to pay attention to several important parameters:
- pipe diameter section;
- maximum power and output pressure;
- operation;
- what noise level is produced during operation;
- for which water supply systems can be used hot / cold water;
Be sure to consider the fact that the pump you bought, on average, can increase the water pressure to 4 atm and up to 40%. Therefore, their use is possible under conditions of constant pressure of water in the pipeline of 1.5 atm.
Among other things, you should determine the quality of your wiring. Often, a newly installed pump is not able to deliver the required pressure due to low voltage. Therefore, it may be necessary to conduct an individual line.
Important technical specifications
The table below lists some technical specifications that you should definitely pay attention to when choosing a pump:
| Specifications | Description of the parameters |
| Maximum head | This indicator indicates the maximum increase in water pressure in the system. An extremely important characteristic, especially if you have a house in two floors, and the pump will be installed in the basement. If the wrong pick, the pump will not fulfill its main purpose. |
| Maximum Flow | This characteristic indicates the volume of water that the pump is able to pump over a certain time. Measurements can be specified in the following formats:
But be careful here, as the maximum value is usually indicated. To determine the real parameters, divide the indicators by two. |
| Power (nominal / maximum) | Measured in watts (W). This indicator indicates the performance of the motor that drives the impeller. Prefer the most powerful pump models. This will guarantee high pressure. |
| Temperature condition | The pressure increase pump can only be used for hot or cold water. Therefore, pay attention to the mark, which is denoted in degrees. |
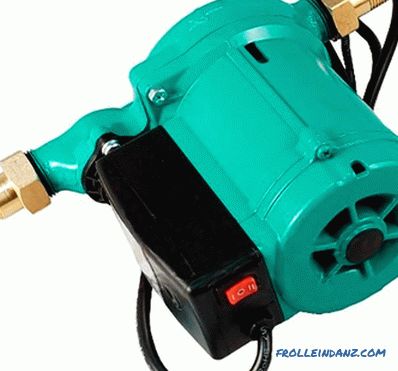
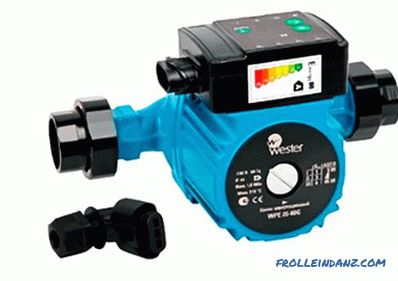
Models of boost pumps
Now consider the models and features of various water pumps that can be used to boost pressure. It is also worth noting that prices may vary slightly in each individual region of our country:
| Model | Specifications |
| | This is a vortex pump that can be installed in an apartment in a high-rise building. It differs in the following technical parameters:
|
| | Used for installation in a private house:
|
| | Often used for installation in a private house to increase the water pressure and for the normal functioning of plumbing:
|
| | Can be installed both in a private house and in an apartment:
|
| |
|
| |
|
| |
This type of pump can operate in different modes:
|
Video: features of boost pumps
Independent installation of the boost pump
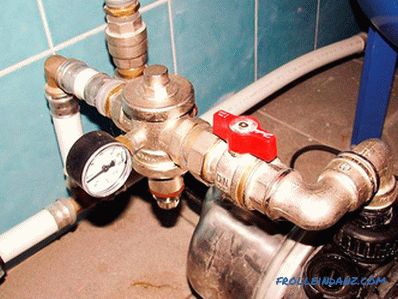 The pump for increasing the pressure can be mounted by yourself
Pump mounting technology for the pressure increase is practically no different from the installation of a conventional circulation pump. The work process consists of several consecutive stages:
- Choosing the right place for the pump and the accumulator.
- Installation of the accumulator.
- Pipe installation for connection.
- Fasteners for the pump.
- Strapping of pump and hydroaccumulator.
Such a pump set, in essence, resembles a normal pump station.
So, the work is done in this order:
- First of all, fix the household pump in the selected location, some pump models need to be mounted only horizontally, so be sure to consider this parameter.
- You install the hydroaccumulator.
- Given that the pump is mounted on the water supply, then a check valve is mounted immediately when entering the house.
- Already after the line connects the pump to increase the pressure.
- Next, the crosspiece is connected, and a check valve is also mounted in the direction of the pump.
- The remaining 3 outputs on the cross will be directed to the hydraulic accumulator, the pump control relay and towards the water sources.
- All electrical connections should be as tight as possible.
- This system can be completed with a stationary pressure gauge to measure the water pressure in the system.
- An individual RCD is installed on the control system (relay).
The principle of this connection is based on the diagram below:
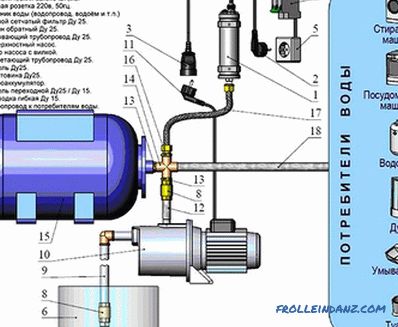 Connection diagram of the pump
It is important to consider some nuances if you are working in a private apartment. At the input must be installed crane. Immediately before starting work it should be blocked. When installing the booster pump, do not confuse the direction of the arrows, which should be directed away from the feed.
All connections should be as tight as possible to avoid leakage of water and pressure. Therefore, carefully pack each joint. Other details of the editing work can be found in the proposed video for this article. You will learn how to install pumping equipment with automatics on your own.
So, we have considered with you the issue of increasing the pressure in the water supply system from different sides. Of course, all situations cannot be described. If you have other experience in this area or have remembered other nuances of work, be sure to write comments on this article.
Video: installation features of a pump for increasing pressure
