The lack of space often occurs in apartment owners, especially when it comes to furniture. A desk book with your own hands, which is not too difficult to do, can help solve this problem. This table takes up very little space when folded, therefore it is the best option for small apartments or where several tables are required at once.
")
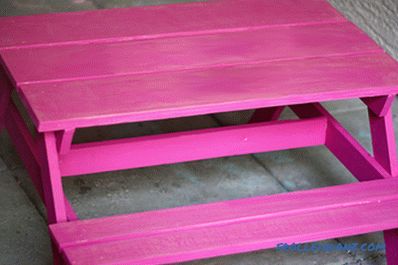
The table-book, due to its simple and compact design, is perfect for small rooms, for example, for the kitchen, since it can be folded if necessary.
The table itself is not inferior to a regular table, if it is made qualitatively, but it also saves living space. In order to make such a table with your own hands, you will need the following materials and tools:
- jigsaw;
- drill;
- iron;
- stationery cutter;
- square;
- pencil; marker;
- level;
- tape measure;
- screwdriver;
- chipboard sheet;
- furniture edge;
- self-tapping screws; screws;
- furniture hinges;
- corners.
From a standard sheet of chipboard, if it is properly cut, it turns out 2 tables, so fearing that the material might not be enough, it’s not worth it.
How to make a table book: a preparatory process
")
Folding table layout.
The purchased chipboard sheet must be cut to size, you can entrust it to the craftsmen in the workshop, but if you have an electric jigsaw, it will not be difficult to make an independent cut. Chipboard for the table is preferable to take laminated and moisture resistant. When marking and sawing, it is enough to adhere to some rules, knowledge of which will greatly facilitate the work.
All lines applied to the sheet before the final sawing are required to erupt. When working with an electric jigsaw, to make a table with your own hands, the file should not be clearly along the contour itself, but retreating 2-3 mm from it to the outside. This will allow the resulting chips to be outside the part.
Chips with an independent sawing will inevitably appear, therefore it is better to back up your work.
The butt after cutting is necessarily treated with sandpaper with a fine or medium structure.
To make a table a book, you need to cut the following parts: a narrow central part of the tabletop, which acts as a binder and two large covers for the table. Additionally, you will need racks for the central part or main supports and crossbars for the main part in the amount of 3 pcs. Racks for retractable legs will need 4 pcs. strips that connect them to the sides, also 4 pcs. To strengthen the design of retractable legs, used another 2 strips.
How to make a table: assembly
")
Drawing of the table-book.
Before the book is assembled at the table, the ends of all the parts that have been cut before are processed by applying a furniture edge. In order to achieve maximum accuracy when working, the parts are clamped in a vise, making them felt so that they do not leave any marks. The tape placed at the end must have an allowance of at least 2 cm for each treated area, this is due to its ability to shrink.
A hem tape is placed on the end of the workpiece down with a glue part. Then the tape is smoothed along the entire length with a hot iron for at least 15 minutes. The iron should not be too hot, after processing the edge is additionally smoothed with a dry cloth to improve grip. The excess is cut with a sharp knife. Defects that appear on the edge of the edge can be emery paper.
To make a table a book, its sliding legs are assembled with the help of euro screws. A through hole is made on the front side of one of the parts for this. On the second part the same hole is drilled, but of a smaller diameter. The parts need to be fixed with the help of confirmat and then close the place of its location with a cap. All areas where fastening is carried out using a Euro-screw should be treated in the same way.
The next step, in order to make the table, should be fixing the legs of furniture hinges, which will require 2 pieces on each leg. In order to assemble the central leg, the lower lintel is mounted in a horizontal position, the height from the floor is 10 cm, with the uprights its location should form a right angle.
On both sides of the rack edge, 7 cm recede to accommodate the central jumper. The next jumper is mounted relative to the bottom vertically, and the last edge is fixed in the center. It is located between the worktop and the second jumper
The finished base under the table is placed on top of the central part of the worktop. From the edge of the table, the supports should be at a distance of 3 cm on both sides. The whole structure is connected by corners, for each side they are taken in 2 pcs.The central part of the table with the help of furniture loops, butterflies connected to the covers. Before you make the table, turn it over, in this position, fasten the covers and retractable legs-supports.
Didn't find the answer in the article? More information on the topic:
-
")
Skeleton country house: do-it-yourself installation
You can build a frame country house with your own hands over the summer. Frame construction involves the use of fairly lightweight materials: wooden bars, OSB sheets, insulating mats.
-
")
How are wood veneers made?
Information on how to make veneer. Three ways of industrial manufacture of veneer. Making veneer your own hands. Finishing veneer of various surfaces.
-
")
How to make floors in a
frame You can make wooden floors as well as other materials for this. If bricks were used to organize the foundation, the beams are placed immediately behind the basement floor.
Search
Related Articles
selection of materials, sawing and assembly (video and photo)
Regardless of the financial condition and capabilities of a person, there is always the desire to create something with his own hands. With the advent of the child, his needs grow day by day, whic...
We decide what is better house or apartment + Infographics and Video

Previously, 20 years ago, living outside the city in your home was not considered prestigious. Now everything has changed - a country mansion with all modern communications has become a symbol of pr...
Insulation for a frame house: which one is better
Anyone who has faced a frame construction at some point has to think about which insulation is better for a frame house. To make the right decision, it is necessary to know the properties of the mai...
Motoblock or motor-cultivator what to choose, what is better and what is the difference

Means of small-scale mechanization, which have become popular in recent decades, greatly facilitate the life of summer residents, farmers, and residents of villages and villages that have certain ar...
How to remove the wallpaper from the wall
Repair in a house or apartment is always troublesome. It is necessary to remove the old coating in order to apply new quality. It does not matter the type of previously used wallpaper, or the type o...