To make the wardrobe bed, you need a drawing. For this, experts recommend using millimeter paper.
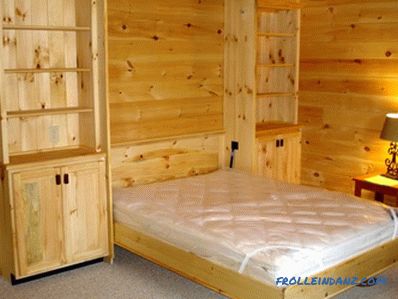
The wardrobe bed is the ideal solution for those who have a small apartment, since its design allows you to fold the bed in the form of a wardrobe if necessary.
Preparatory work
We make the bed closet with the following tools:
- punch and drill (diameter 10 mm);
- anchor fastenings (diameter 10-12, and length - more than 80 mm);
- screwdrivers;
- tape measure;
- construction angle;
- level (length more than 500 mm;
- iron;
- pencil.
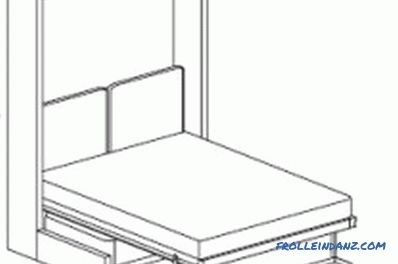
Drawing of the wardrobe bed.
The wardrobe is made by hand using furniture accessories. Installation of such products is easy with your own hands. To do this, you must use the scheme that comes with the fittings. Details of future furniture are made of 18 mm thick chipboard.
The material is treated with a melamine edge (thickness 0.5 mm). To do this, the last product is applied to the end of the parts (down the glue side). The iron is heated. The edge is ironed and pressed to the surface with dry material. Excess edges trimmed. Chamfer cleaned with sandpaper. To make a wardrobe bed, you should consider the parameters of the mattress. The standard dimensions of the last product are 2000x1600x220 mm.
Basic work
The manufactured construction is designed for a mattress with a metal frame. You must first determine the installation location of the bed cabinet. The flooring should be even (an error of 5 mm per 1 m length is allowed). Otherwise, the furniture will quickly break. The following components are distinguished from the components of the product (mm):
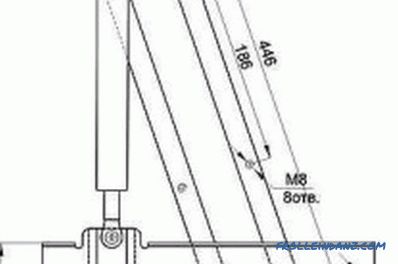
The lifting mechanism for the bed cabinet.
- 2 sides of the cabinet (2282x420);
- bottom and top (1695x420);
- front (1685x2235);
- 2 sides of the mattress frame binding (2038x150);
- rear and front frame binding (1605x150);
- 2 stiffeners (1690x350).
When choosing a lifting mechanism, the force of the gas springs is taken into account (see table). To make a wardrobe a bed, confermats (5x70), screws (4x16), furniture corners (20x20), and front elements of the decor will be required.
Stiffeners, the lower and upper parts are drilled into the end face with a 5 mm drill. The side elements are equipped with a drill (in the plane) by 8 mm. For the tie box will require confirmations. The resulting structure is set in place. The cabinet is fixed to the wall with anchor bolts and reinforced corners.
Before mounting, measure the verticality of the sides and the right angles between them and the horizontal elements. In that place where installation of a box is provided, the plinth is dismantled. If the base is connected with a long end, then the resulting furniture is used as a bedside table.
Important moments
Fixed elements of the mechanism are mounted on the sidecuts. Similarly, the installation of the frame of the mattress. Orthopedic base strips are fixed to the harness using a diagram (from the manufacturer). Then fasten the movable part of the bed cabinet. The mechanism rises. Holes for hidden legs are made at the top of the strapping. To do this, apply the first drill to 18 mm.
The parts that form the frame are coated with glue. The pins used to assemble the product should have a rectangular shape. To give the future bed extra strength and reliability, screws are screwed into the frame. Before installing the mattress will need to mount the limiters. To do this, use a rail with a cross section of 100x50 mm. Then install the longitudinal crossbar and transverse elements in increments of 50 cm.
The next step is to fit and fasten the front panel. Pre-fixed to the outer part of the strapping with 4 furniture corners (out of 10). Then measure the gaps. If necessary, adjust the corners. Hidden supports are inserted into the prepared holes.
Experts do not recommend installing a mirror on the facade of the cabinet, since it cannot withstand dynamic loads.
The panel can be decorated with special patches. The place of fixing the handles is chosen independently. The main thing is that the wardrobe-bed is easily transformed. Furniture makers recommend buying reliable and high-quality accessories. When selecting it, the force of the gas springs and the weight of the whole structure are taken into account. The last element can be replaced with furniture hinges.
Didn't find the answer in the article? More information on the topic:
-
How to make a corner cupboard with your own hands
Instructions on how to make a corner cabinet with your own hands. What materials can be used? The complete process from cutting to closing edging. Features of the workflow.
