In a small apartment you cannot do without pieces of furniture that can be transformed from small to large (especially for tables). Folding table can be placed in a small room of the living room or kitchen, and if necessary - take him the whole family. Pay attention to the image of the table, the manufacture of which will be described below (Fig. 1).
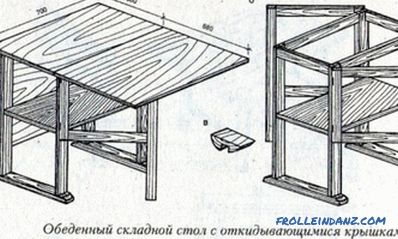
Figure 1. Layout of the folding table.
Tools and materials
For work you will need:
- bars;
- plywood;
- laminated chipboard ;
- screws;
- shkanty;
- furniture corners;
- edge.
Preparation for work
In order to make a table for a transformer, it is necessary to prepare bars with a section of 40x40 mm, which will go to the legs. The final height of the structure is 730 mm, so you will need to use 4 legs, the length of each of which should be equal to 710 mm. 20 mm plywood should be used as a base. A table top and frame should be made of 18 mm chipboard. Elements made of plywood, as well as legs to be processed and tinted, so that the details match the color of the tabletop.
The table of a transformer can be laid out by means of full roll-out guides, which are used in the manufacture of drawers.
Figure 2. Diagram of the device guides for the folding table.
Two sets are needed, the length of each is 300 mm. The fastener will be hidden, for this reason you can use in the process of working screws 4x50 mm, 4x16 mm and dowels 8x40 mm.
To work it is necessary to prepare the elements sawn without chipping. Therefore, there must be a cutting machine to work with chipboard. The final dimensions of the structure in the folded state are 900x700 mm, whereas in the unfolded it is 1300x700 mm.
Detailing of elements from chipboard (all dimensions are in millimeters):
- worktop items (2 pcs.) - 450x700;
- removable part - 400x700;
- the side parts of the boxes (4 pcs.) - 420x120;
- the ends of the boxes (2 pcs.) - 600x120.
Detailing of parts made of plywood:
- end elements of the frame and strip (4 pcs.) - 498x120;
- side frame elements (2 pcs.) - 830x120.
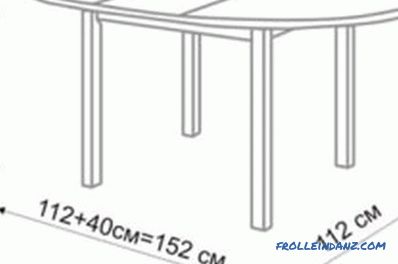
Figure 3. Drawing of the sliding table.
When making a table for a transformer, it is important to pay attention to the thoroughness of the processing of plywood blanks, as well as the wooden legs. The elements should not be treated with a mixture of moisture-proof characteristics, but sanding the surfaces is necessary. It is recommended to carry out double polishing before and after varnishing. Wood fibers that have risen under the first coat of varnish should be removed using fine-grained sandpaper. Only then can you start applying the second layer.
The process of assembling the structure
The end elements and strips need to be fixed between the sides of the frame. The end must be installed flush with the edges of the sidewalls. As for the slats, they need to be installed almost in the center of the frame, on the same level with the lower edge, taking the elements apart from each other by 120 mm. The removable part of the tabletop on the formed platform will be well kept, however, in order to remove it, you have to tilt one of the sides. This necessitates a minimum spacing between the slats.
The legs should be attached to the frame from the inside, and then screwed through the frame from the outside, using self-tapping screws 4x50 mm. As a supplement, you need to install the corners on the surface of the frame-legs. At this stage, it is necessary to check how stable the structure is. If necessary, you can adjust the length of the legs.
When making a folding table, you need to prepare the elements of the tabletop. These works presuppose the initial holding of pasting by edge of the fragments of the table top and the elements of the boxes. To do this, lay the edge to the surface of the ends of the blanks, wrapping the front side towards you.
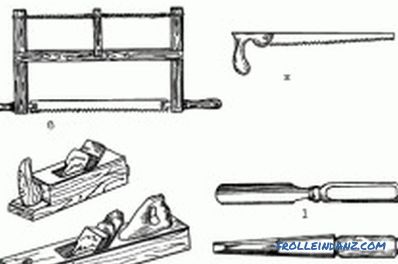
Tools for making a folding table.
Next, the edge should be pressed with an iron that is not fully heated. Until the edge has not yet had time to dry, you need to carefully iron it using dry rags. This will firmly strengthen the edges. After the excess you need to cut with a knife, while it is necessary to ensure not to damage the chipboard. From the rough edges you need to get rid of the method of processing sandpaper.
Folding tabletops should find holes that should be placed on the inner ends of the elements. Holes must be formed on both sides of the inner fragment. This is necessary for installing 8 mm dowels. The depth of the holes must be 30 mm. Then you can glue the dowels in the left side of the tabletop, and also in the middle - on the right side. This will allow to join the tabletops with each other with the presence and without the presence of an average tabletop.
The assembly process should begin with the installation of U-shaped boxes made of chipboard. You can purchase decorative caps, which can have any shade. This will mask the screws.
The rollout guides are divided into 2 parts, but the installation axes of them coincide (Fig. 2). Wider elements to be installed on the basis of the folding table. The axis of the installation should be located with a distance of 20 mm from the bottom mark of the base.
On U-shaped boxes made of chipboard, you need to install the response components of the mechanism. The chipboard box should protrude 2 mm upwards with respect to the frame so that a place for corners is formed. The tabletop at the same time will not "crawl" on the frame.
Now you can click the guides and check the docking of the boxes.
For sliding boxes, the tabletop can be fixed to the corners by doing this from the inside. Comfortably, this operation will take place with shifted boxes and a tabletop laid on top.
You can make a table for transforming your own hands simply using the technology described above, but the design can be supplemented with some amenities. So, the corners of the tabletops can be rounded and snap-edged. In addition, tabletops can be multi-colored or contrasting. The whole structure can be mounted on wheel bearings, and the dimensions of the table can be altered altogether.
Folding camping table
There is one more variant of the folding table (fig. 3). Its dimensions in the unfolded form are as follows (d / w / w): 1000 mm, 580 mm, 530 mm. When folded, it resembles a suitcase, and its dimensions are 580x500x80 mm. To carry out the work, it is necessary to prepare a 10-mm plywood and a birch bar, whose cross-section is 30x30 mm. Plywood should be used to make 2 parts of the table top with dimensions equal to 500x580 mm, while the bar should be cut as follows:
- legs and overlay frame elements - 500 mm;
- internal frame components (4 pcs.) - 520 mm.
When assembling the frame, you need to tighten them with 4x50 mm self-tapping screws, installing one fastener at each corner. In the external surfaces of the frame, it is preferable for them to arrange through 5-mm holes, this will eliminate the possibility of splitting the bar. Before installing the loop-butterflies to fill the legs, which should not fall on each other when the tabletop will be in the unfolded form. The hinges can be installed using 4x25 mm self-tapping screws; to do this, halves of the structure must be folded together. The next step is to install the handle.
You can choose the option of a folding table depending on the purpose for which it is supposed to be used. Dimensions can be changed to the dimensions of the room, and in the latter case - to the size of the trunk.
Didn't find the answer in the article? More information on the topic:
