Do you have a desire to improve the yard? In this case, you should understand how to organize the laying of paving slabs. Maybe it will seem to you that it will take a lot of time and effort, however, in fact, everything is quite simple. You can pave paths literally over the weekend, and you do not even need a handyman. Today, there are many types of pavement paving tiles, so choosing the right color and texture will not be difficult.
Deciding on a tile. We assemble the tool
 The choice of paving slabs
When choosing a tile, focus not only on your preferences, but and on the performance properties of the material. What part of the yard do you need to equip? Ask the manufacturer: can paving tiles withstand heavy equipment, such as a car? Or is it designed solely for the weight of the person? This is important, since the path along which your car will drive must be particularly durable, unlike the usual garden path, on which only the human foot will walk.
To successfully pave paving tiles, you will need the following tools and building materials:
- Cord ordering.
- Trowel.
- A mallet made of wood or metal.
- Manual or mechanical tamper.
- Construction level.
- Pipe of any diameter or I-beam.
- Wooden or metal pegs.
- Broom and rake.
- Sand and cement.
- Watering hose or watering can.
 Garden path plan
Before you buy the right amount of paving slabs, calculate the dimensions future tracks and sites, as well as think over the layout of the site. For this, you may need a track drawing. The easiest way to create it, is to move the plan of the territory adjacent to the house on graph paper, and then draw on it the intended tracks.
It is very important that the paths from paving slabs are paved under a certain slant, with a calculation of 0.5 cm per meter. Thus, water will be freely diverted to lawn or wells.
Mark up the paving area
 Required tool
After the drawing is ready, and the necessary building material and tools have been acquired; you can start marking the tracks and platforms.
Try to stick to the created project as precisely as possible. If we are talking about the paving of paving slabs in the garden, it is better to make the path winding.
To avoid cutting the tile, make the length and width of the paving plane multiple of the tile size itself. So you can make a more durable pavement. Then mark the tracks. Use pegs, tape measure and cord. Do not forget to leave a margin corresponding to the width of the border. Now you should dig a small ditch around the perimeter.
Walk along the planned route and consider whether such moves are completely suitable for you on the section. Then you can proceed to the next stage.
Getting down to the construction of the base
 Layer-by-layer arrangement of the paving walkway
First , remove debris, rocks and sod from the marked area. To level the area of the outlined tracks you should remove excess soil in elevated places and sprinkle it on the hollows. In the process of work, do not forget about the slope necessary for the flow of rainwater. It is better to make it to the side of the street, and not to the house. Level the base using a rake. Then tamp it down. If you have to work with soft soil, then dampen it with water before tamping. This will help you to avoid uneven subsidence of paving slabs.
Calculate the depth of the base with a margin, because the compaction process will cause the pavement to shrink. Usually for paving tiles do 20-30 cm recess, based on the layer of sand and the thickness of the tile. The angle of the track can be longitudinal, transverse or longitudinal-transverse. At this stage, if there is such a need, carry out all communications. In order to avoid the growth of weeds, before laying sand, lay geotextiles on the base.
 Using the marking cord
Now you need to measure the height of the sandy embankment, which can not exceed 7 cm. Tighten the cord between the stakes. Pour sand over the whole area of the track, and then level it using a rake. Fill it with water, and so that it formed a puddle. If you are lucky and this day is sunny, then you can begin leveling the surface after 3 hours, make it a profile. When the weather is gloomy, the alignment should be started only after a day. As a result, you should have a smooth and even surface.
In the next step, you need to prepare a sand-cement mixture in a ratio of 8: 1.The height of laying of this mixture should not exceed 4 cm. For convenience, measure the indicated height of the mixture on pegs and pull the cord again. Fill it up and level the plane using a channel. As a result, you should get a flat surface again. Tamp each layer carefully!
Set the curb. We lay tile for the pavement
 Installation of curbstone
At the marking stage you had to dig a trench along the entire perimeter of the track. Thus, you can emphasize the accuracy of the geometric shape of the laying area. The ditch should fit 40% of the entire height of the curbstone, where the five-centimeter layer of sand at the base of the trench is also taken into account. To improve the strength of the curb, install it on the concrete solution, carefully pouring the base.
And again, before embarking on the process of laying, you should pull the cord along the chamfer, at a predetermined height. Start laying paving stones from the curb. Pay special attention to the first row, strictly adhere to the height of the cord. Stick to the diagonal direction. In order to avoid stabbing the base by the handler, start the work “from yourself”.
 The principle of laying
Strictly monitor the tightness of the tiles, gaps more than 2 mm are unacceptable. Of course, it’s impossible to meet these requirements when cornering and bending, however, minimum gaps should be made here too. Press each tile firmly to the base, for this you can use a rubber mallet.
When paving paving slabs, you can use crosses, this will allow you to create perfectly even gaps between them. If in the process you notice irregularities, then, using a trowel, remove or, conversely, report a layer of sand under the tile and tamp it down. To carry out these processes, use a mallet and building level.
 Filling the joints between the tiles
When you finish laying, check the path for unevenness. If they are, then immediately eliminate the shortcomings. Now pull the crosses out of the gaps and sprinkle them with a mixture of sand and cement. Sweep paths and water them. Re-conduct the inspection of the masonry, and if the solution in the joints has subsided, then add it to complete.
It is unacceptable to use sand with impurities of salt, because during operation white streaks will appear on the tracks and platforms, which will spoil the appearance of the masonry.
Now the laying of paving slabs is complete! After three days you will be able to begin active exploitation of new tracks! Now you can think about starting a business, because you have already received a certain amount of knowledge on paving pavement paths!
Do you have experience in working with tiles for laying pavements? Have you had difficulties in the process of work? What helped to cope with them? Have you come up with an innovative laying method that simplifies the process? Share your experience with us! We appreciate your skills and work! Write your comments on the article.
Video
How to lay paving stones along a string, you can see below:
Photo
 Preparation of the sand base
 Leveling the base
 Laying pattern using geotextiles
 Laying with pattern
 The principle of multi-directional styling
 Track from red-white tiles
Search
Related Articles
How to lay the furnace at the cottage of bricks
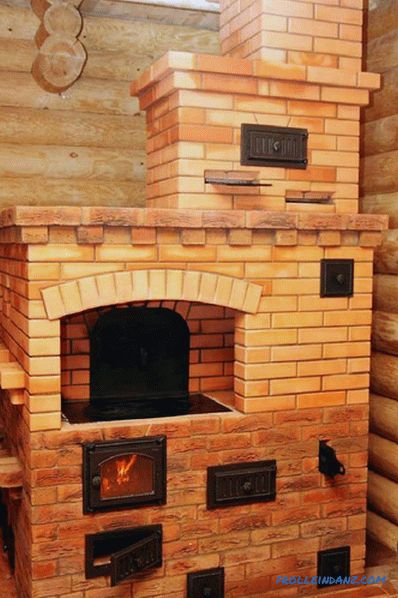
Modern stoves are in most cases gas, wood or oil-fired boilers, supplemented by electric or gas stoves. However, recently, due to the large financial opportunities and the expanded selection of high...
How to make a fence of unedged boards
Today, constructions made of various materials are used to protect suburban areas and suburban areas: stone, metal, corrugated flooring and various types of wood. However, more often the owners of h...
Half-timbered house with their own hands - how to make + photo

The technology of building half-timbered houses came to us from the Middle Ages. Although the first buildings of this type appeared in the 12th century AD, they were most prevalent in Germany in the...
Impregnation of wood with waste oil: processing features

The rules for wood processing have existed since the beginning of the construction of houses from wooden log cabins. The tree was protected from rotting, dampness, beetles, burning by various means...
Land zoning - features and nuances

In order for the land zoning to justify all the tasks, you need to think out a clear plan of action. After all, the main thing you want to achieve is that your yard is both comfortable and beautiful...