Today, various options are used to level the floor. Most often, concrete pouring is performed, but it begins to lose its popularity due to the fact that its cost is significant, and a lot of time is required for work. In addition, the process itself is "wet." A more modern and convenient option is to install plywood flooring on logs .
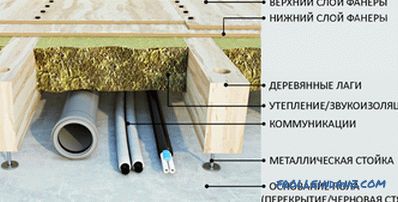
Plywood floor device on logs.
This design allows to level any surface. The weight of the floor will not be as significant as that of concrete. There is the possibility of laying communications under the surface of the coating. The process of laying the plywood floor is simple, it does not take much time, and the set of materials requires the most common.
Advantages of floors on lags
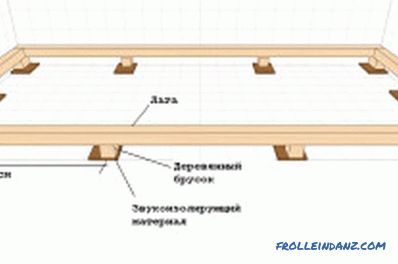
Calculation scheme distance between lags.
Leveling floors on logs have numerous advantages:
- You can level the floor in a wooden or shabby structure, which imposes certain requirements and restrictions on the weight of the structure. The floors on the logs have a small weight, but their strength is not inferior even to concrete screeds.
- A minimum finish is required.
- During installation, it is possible not only to level the floor, but also to lay hidden communications, perform insulation using a variety of thermal insulation materials.
- It is possible to level the base quickly and easily, without the use of “wet” processes.
- After installation, excellent underfloor ventilation is provided.
- Only wood is used for work, i.e. a completely natural material.
- The construction cost is much lower than with the use of a pouring of concrete, self-leveling polymer floors.
- After installation, there is no need to apply solutions that require a long time to dry.
Materials for creating floors on logs
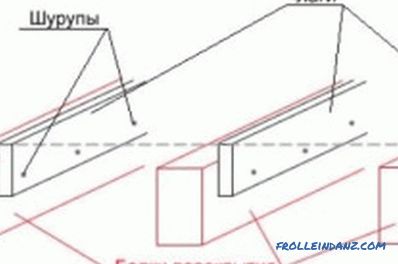
Laying lag on the beams of the bottom trim.
In order to use plywood and logs for leveling the floor, it is necessary to prepare:
- The logs themselves, which are made of wooden bars. The height after installation is usually 10-15 cm. The value depends on the unevenness of the floor, the requirements for alignment. The amount of lag is determined by the area of the room, the installation step bars.
- To fix the structure, it is necessary to prepare self-tapping screws, nails, brackets and other fasteners.
- Plywood of the selected type.
To perform installation work, you should prepare a set of tools:
- Bulgarian for cutting wooden boards and plywood squares.
- A screwdriver for fastening screws. Many may argue that the screwdriver fits well, but it will be difficult to fix the entire floor surface with such a tool. It is better to use a screwdriver, though not the most expensive.
- Drill for preparing wood for installation.
- Construction Level and Roulette.
- Metallic ruler, simple pencil.
- A set of anchors and screws for fasteners.
- Special metal U-shaped elements for installation.
- Antiseptic for impregnating wooden logs.
Installation of the floor lag
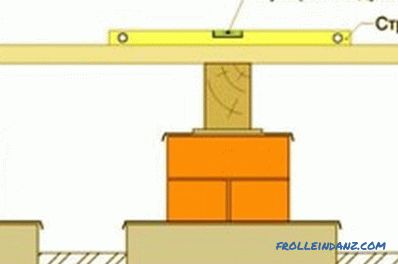
Installing the lag and checking the horizontal position before laying the floor.
The floor on the logs is simple: there is no need for complicated preparatory work or the use of "wet" processes, which causes a lot of inconvenience. Wooden bars and special metal fasteners are used for installation, which allow to properly align the base.
The plywood floor on the logs is performed in the following way:
- First, the wooden boards are prepared, they are cut to the required length, and then treated with an antiseptic. While the wood is drying, marking is required on the surface of the base. The same rule applies to walls. Using the building level and a simple pencil marks the future level of the floor.
- Lags are mounted in 50-60 cm steps, which is quite enough to get a solid surface. First in place are fixed special mounting metal elements, which will keep the bars at the required height. They are attached to the floor with anchors, put in small steps, as they must perfectly withstand the intended load.
- When installing, you must ensure that the extreme elements from the wall are at a distance of 30-40 cm, you do not need to continue to make them. The installation of the floor on the logs is best carried out in the perpendicular direction to the natural light. The method of fastener depends largely on what the basis will be used. Anchors are used for concrete base, and for wooden floor can be purchased and screws.
- The floor is slightly raised above the base. This allows you to adjust its height, if the base does not differ the necessary qualities.After all the room is decorated, you can proceed to further work on sewing.
Surface cladding with plywood
The plywood is fixed after the base of the floor is completely ready.
Pre-floor can be warmed, for this between the lags fit the heat insulator of the selected type.

Plywood specifications.
It is best to use bulk materials, such as expanded clay, cellulose insulation. They are tightly poured onto the surface of the base. The listed heaters do not leave gaps, do not absorb moisture. In this case, the resulting insulation allows you to make the room more comfortable, save on heating.
The very process of laying plywood on lags will be as follows:
- You should first carry out the markings, draw up a floor covering scheme. Large sheets are not used, plywood must be pre-cut into small squares. It increases surface strength, makes work easier and more comfortable. Laying should be carried out in such a way that the joints of individual plates are on wooden logs. The fastener pitch should be equal to 10-30 cm.
- After the marking is done, the floor lining can be started. To do this, first lay the whole sheets in a staggered order so that at one point 4 sheets do not converge.
- During laying, there is a gap between the individual sheets of 2 mm and between the sheets and the wall approximately 1 cm. This is necessary for temperature compensation. After laying the gaps between the plates and the wall will be completely closed.
- The latter are mounted small pieces of plates, which are cut in accordance with the size and shape of the remaining sections of the skin. Fastening is carried out by screws to the logs, with the fixing point should fall in the middle of each beam. Self-tapping screws will have to be drowned a little into the tree: in no case should they protrude above the surface.
- After the lag is finished, you need to grind the floor surface with a grinder. Then you can proceed to further work on the installation of the selected floor material.
Plywood is great for leveling the floor. You can use it by itself, but it is best to do the flooring on the logs. The work does not take much time, the leveling quality is high, and there is no need to use "wet" building processes. Such a floor can be insulated, conduct communication under its surface. The weight of the structure is not too large, it can be used for dilapidated and wooden buildings.
Didn't find the answer in the article? More information on the topic:
