During operation, all things or materials begin to lose their original appearance. And if you made repairs a few years ago, then over time everything needs rework. And repairs should begin with a plasterboard ceiling. Cracks and holes may appear on it, it may sag, or you may observe the effects of flooding. In order not to redo the entire ceiling, you can repair it. And so that you do not spend money on the masters, we will tell you how to make the repair of the ceiling from drywall with your own hands.
What disables the ceiling
Your ceiling has cracked? Are there spots on it? He sagged and holes appeared? Why is this happening? Here are a few reasons:
-
 The ceiling that needs to be repaired when installing the frame, plasterboard trim and finishing the work technology was broken;
 - high humidity and wrong choice of material;
- sharp fluctuations in temperature during installation;
- flooding by neighbors from above if you live in an apartment;
- building shrinkage;
- poorly sealed joints between sheets;
- no primer was applied before the putty;
- constant vibration caused by the movement of the machinery;
- weak dowels were used.
All this leads to the fact that your ceiling needs to be repaired.
Major problems
All of the factors above cause your ceiling:
- It starts to sag.
- Small and large cracks are formed on it.
- Holes appear in drywall.
- It is stained.
If we talk about sagging, then the formation of "waves" occurs for three reasons. First, a rare step crates. If the sheet is attached only at the edges, it bends under its own weight, and the plaster that is on it only strengthens the process. Secondly, it sags after flooding , as drywall picks up moisture and becomes soft and heavy. Thirdly, these are the consequences of improper fasteners. When the screws are screwed into the sheet deep, the cardboard breaks. And since the caps of the screws are small, the sheet in this place can tear itself away from the profile.
 Cracks
Small cracks form when the wrong choice of material for plaster, as well as when installing and putty was made at low temperature. The formation of large cracks mainly occurs at the place of the joints of the sheet to the sheet. This happens due to the fact that the reinforcement tape was not glued at the joints, or the fixing with hardware was done in increments of more than 30 cm. Another reason is that the joint is on the frame. And if the frame is made of wood, then under the influence of moisture, the tree bends and twists, which leads to cracks.
Holes are the result of careless handling. These can be unsuccessful attempts to nail something to the ceiling, or damage by dimensional objects when moving them (cupboard, refrigerator, etc.). There were cases when holes appeared after opening a bottle of champagne, the cork of which did its job.
 Appeared mold
And the spots are the result of being flooded again, or appeared mold or fungus.
The source of these problems is the human factor. If you want to save money, are not attentive, careless and do not comply with the technology, you will not avoid such problems. But what's done is done. Now the main task is to eliminate the defects that have arisen, and it is not at all difficult.
We struggle with slackening
 Deformation
To eliminate this drawback, you can use several ways:
- It is necessary to disassemble the ceiling and strengthen the frame. To do this, all sheets of drywall need to be unscrewed from the base, and the frame to make with mesh 50 * 40 cm. Then the sheet to the frame will be attached 5 times in width and length. Thanks to this, the ceiling will be securely fixed and even if you are flooded again, it will not sag.
- Replace one or more fragments. It happens that the deformation succumbed to only one sheet. In this case, dismantle the entire ceiling does not make sense. It is enough to remove the damaged fragment and install a new one in its place. In this case, too, will have to strengthen the frame.
- Level with mortar from plaster. This is the easiest method. Disassemble does not need anything. It is enough just to apply the solution in the hollows of the ceiling until everything is leveled. To fix the gypsum mortar on the ceiling, its surface is pasted over with a reinforcing mesh and plastered.
- If the installation technology of the frame was broken, it is made of raw wood or metal profile, you must complete dismantling.
 It is necessary to strengthen the frame
The cases with sagging are the most difficult to work in order to perform them need patience and effort. But after doing such work, you can be sure that this will not happen again in the future.
Elimination of cracks
 Fill the cracks
Often you can see a spiderweb on the ceiling small cracks. Agree, they do not give attractiveness to your ceiling. Moreover, painting in this case does not bring long-term success. Over time, the problem reappears. Therefore, we must act radically.
To work you need:
- primer;
- abrasive paper;
- knife;
- acrylic paint;
- spatula;
- putty for seams;
- roller;
- brush;
- finishing putty.
For a better putty with putty, the crack needs to be widened. Using a nail, scratch the damaged area. Then the crack needs to be covered with a primer. For this purpose, you need a small brush. After a few hours, the area must be putty putty putty for seams (it is much stronger than usual). Using a trowel, level the putty to the level of the ceiling.
When everything is dry, the putty layer will settle, as a result of which the defect may tread again. Therefore, you need to apply 2-3 layers of putty. After applying each layer, wait until it dries.
The last layer is applied not level, but in a thin layer, slightly protruding from the base. After drying the place is ground in a circular motion. This is done with sandpaper. You just have to primed the surface and then paint it.
Fill holes
 A small hole
Oddly enough, this is one of light types of ceiling repair. Depending on the size of the damage, there are 3 methods for sealing holes.
 Hole after leak
Small hole. Old newspapers and plaster plaster will help to eliminate it. To do this, you need to:
- align the edges of the hole, clean them from chips and crumbs, then prime;
- then crumple the paper and tamp it in the hole so that it is flush with
- with a starting putty, smear the edges and the paper itself;
- after 3-4 hours you will have a solid base on which you need to apply a couple of layers of gypsum mortar;
- then put a layer of the finishing solution;
- when it is dry, the place is ground and covered with a primer;
- at the end you just have to paint.
 Phased repair of a hole in drywall
If the hole is large, up to 50 cm, you need insert patch. Procedure:
- from a sheet of drywall you need to cut a patch that is slightly larger than the size of the hole (it must be a regular shape, square or rectangular);
- after which it needs to be attached to the ceiling and draw a pencil cutting line;
- along the intended contour of the patch make a cut using a jigsaw;
- clean the edges of the hole, prime the ends;
- put 2-3 pieces in the hole mounting plate or board, screwing them along the edges of the hole in drywall;
- insert the patch into place and secure it, attach it TIV to the bar;
- can only seal the gap filler, sanded and primed site restoration;
- the final touch - surface finish.
There is no point in repairing holes larger than 50 cm. It takes a lot of time and effort. It's easier to just replace the drywall sheet with a new one.
Remove stains
 Apply a couple of layers of putty
If a stain has formed during flooding, it needs to be cleaned and painted over. Procedure:
- scrape off all that is peeling;
- go through the place of flooding with an anti-bacterial primer, and then with a usual penetrating;
- apply 1-2 layers of acrylic putty;
- paint over the spot formation.
Believe in yourself
As you can see, you can repair the ceiling with your own hands. At first glance, this task may seem complicated, but all the work can be easily performed without the help of specialists. Just believe in yourself and follow the instructions for performing the work. If any of you have already done this repair, you can share your experience in the comments. How long have you been doing it? Is it hard? Is this a newcomer?
Video
An example of a drywall ceiling repair is below:
Search
Related Articles
Autonomous sewage in a private house

Today we will find out how to choose an autonomous sewage system in a private house and what method of disposal of liquid wastes generated in the process of life activity of its inhabitants is the b...
Waterfall in the country with their own hands

Want to give a sound to your garden? Make it your pride and decoration of the infield? Then you should think about the construction of the soul of the garden - about the arrangement of the waterfall...
How to choose a substrate under the laminate for the apartment
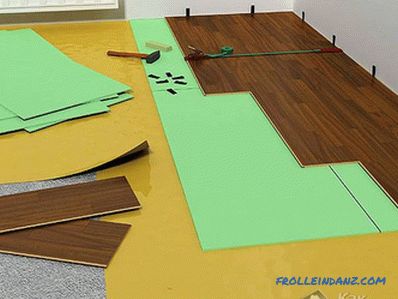
Laminate has a porous structure and can be deformed, for example, from exposure to moisture. To create natural ventilation to remove moisture trapped under the laminate and to protect the flooring f...
preparation and process (video and photo)
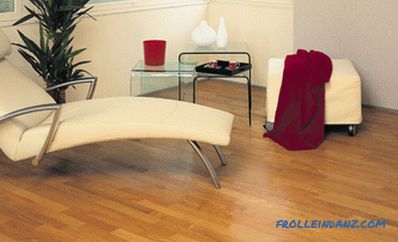
One of the most attractive flooring is parquet. These are strips of small size from natural wood, which can be used to create different patterns. How to lay the floorboard according to the rules? I...
tools, materials, work order (video)
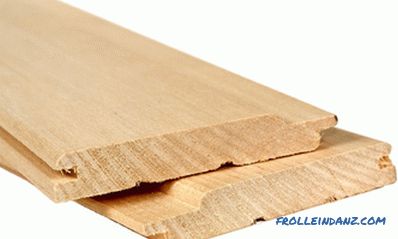
For the installation of wooden lining their own hands do not need to be a specialist in wood processing. It is enough to have the skills to use some tools that are often used in everyday life....