If you decide to build a greenhouse, we recommend that you read the instructions given in our article.
Selecting a place to place
The choice of place should be made taking into account the fact that it will grow and ripen cultural plants. So, it is better to stay on a flat plot of land, protected from the wind and with a sufficient amount of sunlight.
The installation of the structure on the soil with a slope will cause its destruction.
The fact is that in winter the load of snow is unevenly distributed, and for middle latitudes it is often weighty. A shaded place is not suitable for a greenhouse, for example, near trees, buildings or a fence.
For better arrangement of a greenhouse, conduct water and electricity into it. To save on this process, locate the greenhouse not very far from energy sources. To grow plants in the winter, you need to build a heated structure. In this case, you have to make sure that the snow does not stand on the cover, because otherwise sunlight will not penetrate into it.
We determine the shape and size of the greenhouse
 A small greenhouse made of polycarbonate
Greenhouses differ in size, shape and materials used. However, the main difference is the temperature level, which they maintain. In general, such constructions can be divided into 2 types:
- Unheated greenhouse - there is no heating in it, because of which the soil freezes through in winter. In the spring, the soil warms up due to sunlight, and the greenhouse helps keep it warm. This prolongs the seasonal period of growth of cultivated plants. Such designs are usually used for growing early vegetable crops and flower seedlings.
- The heated greenhouse is designed for heat-loving plants. They can maintain a certain temperature, which is most favorable for the growth of thermophilic cultivated plants.
Choosing the shape of a greenhouse:
- Gable roof constructions are an ordinary type of greenhouse with vertical walls.
- Attached to the wall of a building with a gable roof - provides a great opportunity for light and air.
- A greenhouse with a lean-to roof is an extension to the wall of the house. For better solar heating it should be installed on the west or south side of the building. The wall of the house in this case plays the role of the strength element of the frame, thanks to it provides reliable protection from the northern winds.
- A trapezoidal, with a gable roof, is highly resistant. It is warm and bright, unlike its counterpart with vertical walls.
- The polygon provides uneven heating of the sides of the structure. To avoid problems with overheating, it is very important to provide it with windows or vents. It is necessary for timely airing.
- The dome is adapted to gusty winds, but not intended for growing high crops.
- The tunnel is designed for growing vegetables that grow on the ground, and not in height. It is most available for independent production.
- By the type of arch allows you to grow low plants.
- The mini-greenhouse is suitable for growing a small number of plants, and is also useful if there is a small space for planting.
Materials for the construction of the frame and the coating
 Square profile
Now on the market represented an abundance of variations of materials for mounting the frame. For example, the steel frame is powder coated. This is a fairly durable material, however, it is subject to corrosion, which is why it is short-lived. It is characterized by high thermal conductivity, but in exceptional cases, this effect is not welcome.
The galvanized profile has a low strength index, but does not rust. For its manufacture is used thin, easily deformed steel.
It is very durable and not subject to corrosion, of course, due to galvanization. In addition, the frame can be made of antiseptic-treated bars.
If we talk about coverage, then each material that is designed for this has both advantages and disadvantages. For example, greenhouse film is easy to replace. It is also inexpensive, undemanding to the conditions of use. Its shape can be arched with straight walls or traditional, in the form of an arch. The film can be left on the greenhouse to winter, so it will serve you no more than 4 years.
The greenhouse film has low thermal insulation and is unstable to mechanical damage.
 Polycarbonate
Recently, polycarbonate greenhouse has become in demand. Polycarbonate has excellent thermal conductivity and light transmission ability, durability. Its main advantage is ease, as well as the possibility of operation for about ten years.
If you prefer glass or a double-glazed window as a coating, the greenhouse should be strengthened by farms, and also by internal racks. Glass has the best light diffusivity, durability of operation and the ability to retain heat. However, a significant disadvantage of such a coating is its weight and fragility.
Making the foundation
 Foundation
The foundation should promote uniform load distribution of the whole structure . The base of the structure must be built exactly horizontally, with the possibility of outflow of rainwater. To protect against corrosion and decay, install an additional sealing layer between the frame and the foundation. It is important that the base of the greenhouse was very strong, because otherwise the walls may be deformed, and the foundation itself will collapse.
Before laying the foundation, it is necessary to calculate the depth of soil freezing. Dig a special trench under the foundation, which should then be filled with sand and rammed. The height of this filling should not exceed 20 cm below the ground surface. Formwork around the trench should be made approximately 20 cm above the ground. Place reinforcement of metal in the formwork along the perimeter, and then pour concrete with it. Such simple manipulations will help make a durable concrete reinforced belt under the greenhouse.
We build the frame and cover it
 The frame of the greenhouse
The strong construction of the frame will protect your harvest from wind and rainy days. The standard type of greenhouse usually has a size of 6 * 3 m. After arranging and solidifying the base, you can proceed to the assembly of a wooden frame. Strengthen the support walls on the foundation. Then fasten the horizontal beams on the top of each support. On the north side, install a doorway having a size of 2 * 0.7 m.
If you chose a film as a cover, then after completing the installation of the frame, stretch it. Use for this purpose whole pieces of film coating. Secure the film with wooden slats that are attached to the supports.
If you chose a profile, then usually you just need to twist it according to a predefined scheme in the instructions. On the other hand, you can use the profile to bring your own frame to life.
We organize the ventilation
 The ventilation system
The method of vortex ventilation is a series of air vents which are located on the roof along the entire greenhouse. This method most effectively aerates the greenhouse without damaging the heat-loving plants.
With the draft method of ventilation, air enters through the doors that are located at the end of the structure, but this can harm delicate plants that are sensitive to drafts.
If the structure is made in such a way that it protects the soil, then a greenhouse effect is produced when exposed to sunlight. Due to the rapid rise, the air in the greenhouse will stagnate, which will cause reproduction of pests and diseases. However, the microclimate can be adjusted by using a ventilation system that provides fresh air.
The functioning of the ventilation system should be combined with the operation of heating and shading devices. Airing a greenhouse, you contribute to the hardening of both vegetable and fruit crops. Such activities have a beneficial effect on seedlings grown for planting in open ground. 2 weeks before planting seedlings should be ventilated greenhouse almost around the clock.
For the preservation of heat, gusty winds and drafts should not be allowed to enter into it. If your building has a small size, it is enough to build only 1 window window on each side of the roof. In general, for every 2 m length there should be at least 2 vents. To speed up air exchange and cooling, it is important to install side windows in the frame, which are located slightly above the soil surface. They can be equipped as blinds or done in the usual way. But this type of air exchange is inappropriate if it is planned to grow plants brought from the tropics in the building. Because of the strong air currents that occur on windy days, tropical flowers may suffer.
So, you have already acquired some knowledge, it remains only to apply them in life! Of course, everything depends on the financial situation, namely the choice of materials for the frame, foundation and coating. However, the more reliable your construction is, the more years it will serve you!
Heating of the greenhouse
 Heating of the greenhouse
If you built a decent construction with a foundation and covered it with glass, glass or polycarbonate, organized high-quality ventilation of the air, then you can take care of the greenhouse heating. This will allow you to grow vegetables, beloved family members, even in the winter season.So how can you arrange heating? Today we will look at 3 ways, namely gas, wood and electric heating.
If you want to heat the building with gas, you can do steam heating, but the easiest way is to use a gas convector. However, before you should take care of the presence of gas in the building. These units are equipped with special thermostats, which eliminates the need to regulate the burners. The burning particles will be removed from the greenhouse to the street with the help of a coaxial tube core.
If the dimensions of the greenhouse are large, it is more appropriate to use a gas boiler for air heating. Here, the heat exchanger is blown with a special fan, and warm air is diluted around the perimeter with aluminum sleeves. Small-sized building air heating boiler can be heated without air distribution. Just keep in mind that the coaxial pipes of the boiler with a closed burner and convector must be passed through a wall made of non-combustible materials.
The most accessible source of heat energy today is still wood. The simplest solution is a stove, however, it is not economical. A more reasonable solution is Buleryan, which is a gas-generating furnace. Around the firebox there are pipes that provide mixing of air flows in the room. It differs in high profitability and more rare laying of firewood. Even with strong frosts it is enough to carry out the laying of firewood only 2 times a day. Only the design of this furnace allows to mix air effectively.
 Electric heating
Electric heating with minimal operating costs allows you to create a warm climate with little frost. For example, you can use an inverter household air conditioner. Currently, the models produced transfer five kilowatts of heat from the street into the greenhouse for every kilowatt of electricity consumed. However, the lower the temperature, the less efficient the operation of the unit.
If you live in the climate zone, where in winter the temperature falls below -25˚С, then it is better to heat the greenhouse in another way. In this case, more universal are the infrared panels for heating the air, because they are more economical than fan heaters and heat guns. The fact is that infrared panels imitate the natural heating of the sun. They do not heat the air, but transfer heat to plants and soil. As a result, the air at the roof level remains colder than the soil and the temperature below.
Video: installation of a greenhouse from cellular polycarbonate
Photos
 Wooden greenhouse sewn with glass


 Fastening profile for the greenhouse


 Greenhouse from metal profile
 From polycarbonate
 From old windows


 Blanks for arched greenhouses
Drawings
 Greenhouse drawing


 Greenhouse construction
 Greenhouse project
 Transfer Naya greenhouse

 Height determination scheme
 Greenhouse made of plastic pipes
 Scheme glasshouses from a double-glazed window
 Components of the greenhouse
Search
Related Articles
How to use the laser level: tips wizard
Convenient laser levels, allowing you to accurately perform marking, and are willingly acquired by professionals and amateur masters. After all, smooth bright lines drawn by a laser are perfectly vi...
What lawn to choose to give?
It is difficult enough to care for a large plot, especially as a summer house or a country house. Here the owners come to relax or spend the weekend. In this case, not too want to spend the whole da...
Podium do it yourself - making the podium + photo
Even in ancient Roman architecture, podiums were used in arranging homes and public places. Today, with the help of the podium, many designers improve the proportions of space, and also divide the r...
Monolithic staircase do it yourself - reinforced concrete staircase (+ photos)
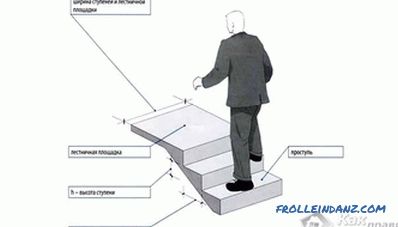
If your dream is a monolithic staircase, start your work by developing a detailed drawing that will allow you to determine the number of steps, their width and height. The following steps are cons...
Wood trim inside the house: features, schemes (photo)
Wood in its appearance and aesthetic parameters is the material that designers more often choose to create truly unique and unusual interior designs, as well as in the design in traditional styles....