In this article, which is a step-by-step instruction, we will talk about how to make a pergola with your own hands. If you want to create in the courtyard of your own home an excellent recreation area, while transforming the look of the plot and slightly increasing the value of your property, this project is the perfect option for you. Do you want the result of your work to not disappoint you? Just follow our instructions.

It should be immediately made clear that in some cases, for the construction of any construction, a special building permit is required, so we recommend that you familiarize yourself with the existing building codes and regulations. If permission is obtained or it is not required, work on developing a plan based on your needs, tastes and budget. When developing the design, do not forget that all the buildings on the site must be made in the same style.
Buy sawnwood for outdoor use, which means it is highly weather resistant (mahogany, cedar or pressure treated wood). Of course, they should not have deformations, cracks, chips or other visible defects. Do not save on high-quality materials, and then your creation will delight the eyes of those around you for many years. Be careful and work with great care if you want to avoid costly mistakes and get the result of high professional quality.
Being only a framework for climbing plants, the pergola can be of almost any shape and size. In this article, we will look at two projects at once - the classic pergola pergola and pergola-bench
Construction of the classical pergola
For the construction of the pergola you will need the following:
| Materials: | Tools: |
|---|---|
| Cement, sand, gravel; | A drill for digging holes poles; |
| Tubular formwork; | Circular saw, jigsaw; |
| Adjustable anchors (4 pieces); | Drill, drill bits for wood; |
| Stands 10 * 10 or 15x15 cm, length 240-270 cm (4 pieces); | Hammer, spirit level, joiner a pencil W, tape measure; |
| Support beam 5 * 15 cm, length 360-375 cm (4 pieces); | Ladder; |
| Cross beams 5 * 15 cm, length 360-375 cm; | Protective gloves, goggles. |
| Crossbars 5 * 10 cm long 325 cm; | |
| 175 mm screws for fastening the support beams; | |
| 150 mm self-tapping screws for fastening transverse beams; | |
| 75 mm self-tapping screws for fastening crossbars. |
Tips:
- Before beginning construction, mark the outline of the building on the ground using a rope stretched on pegs.
- Drill the guide holes in the wooden elements before screwing in the screws.
Start your work by marking the future pergola at the selected location on the contour. To do this, you will need only a few pegs on which you pull the rope.
Tip: Measure the diagonals of the square, they should be equal. In addition, it will not be superfluous to make sure that all angles are straight, using the "3-4-5" rule for this (32 + 42 = 52). If necessary, make adjustments.

Planning on the ground.
Having determined the exact location of the corners of your future building, dig holes in these places with a diameter of 35-40 cm and a depth of 90 cm (at least 15 cm below the freezing boundary of the soil), pour a 10 cm layer of gravel and carefully tamp .
Place a formwork in the excavated pits, making sure that all forms are at the same level (use a ruler and a spirit level for this). Mix a small amount of concrete and fill in the forms.

Leveling concrete supports.
Remember to install in the concrete before it grabs an adjustable anchor. Let the concrete harden for at least 48 hours, after which you can proceed with the installation of wooden pillars.
Use a 10 * 10 or 15 * 15 cm bar as racks. Using a spirit level, make sure that the racks are perfectly vertical and lock them in two directions. Securely secure the racks in the anchors with wood grouse screws with square or hexagonal heads for wood.

Fixing the rack.
If you do not want to use metal anchors, you can fix the bars directly in the concrete. Such racks will be more rigid, but they can rot in the ground due to high humidity. The use of adjustable anchors not only eliminates the contact of the bars with the ground and, therefore, reduces the risk of their rotting, but also facilitates the alignment process.

Methods of fastening racks on a concrete base.

Wooden rack installation scheme.
Now you can install the support beams. We recommend using 5 * 15 or 5 * 20 cm boards as support beams, however, their size depends on your needs and tastes. As you can see in the figure, beams should protrude 25-40 cm from both sides beyond the perimeter of the building.

Installation of the support beams.
Before fixing the support beams, you must level them horizontally with an alcohol level and fix them in this position with clamps. Then drill a few through holes through the beams and the stand, insert the bolts and tighten the nuts.
Tip: If you want your pergola not to look like any other around, decorate the ends of the beams decoratively, for example, give them a rounded shape using a jigsaw.

Beam anchoring.
Continue your project by installing transverse beams. To do this, you will need boards of 5 * 15 cm. Choose them carefully, make sure that they are all absolutely straight and in excellent condition.
The amount of light penetrating into the pergola depends on the distance between the transverse beams. We arranged them at a distance of 30 cm from each other, but you should be guided by your tastes and needs.

Installation of transverse beams.
To fix the cross beams at both ends of each of them, you must make two cuts and drill guide holes as shown in the figure. Now you only have to fix the beams with 15 cm self-tapping screws. Do not be lazy to carefully align the beams before mounting, otherwise your building will not look tidy enough.

Fastening of transverse beams.
The installation of shadow elements should not cause much difficulty if you use the correct work plan. Just pay great attention to the choice of material and measurements. Do not forget the elementary common sense if you want to get a quality result at a reasonable price.
Tip: To make the grooves neat, make cuts in the board, marking them out beforehand, and then remove the wood between the cuts using a chisel.

Notches in the transverse beam.
The cross beams are in place, and until the end of work there are only a few left - to install perpendicular crossbars 5 * 10 cm. Such crossbars have a dual purpose: on the one hand, they give your pergola a spectacular view, on the other hand they hold transverse beams at the same distance from each other and increase the rigidity of the structure.
We advise you to place the crossbars every 60-90 cm, but you can adjust the recommended distance to suit your needs. Drill the guide holes and fix the crossbars in this position with self-tapping screws.

Fixing crossbars.
As you can see in the figure, you also need to make notches in the crossbars for their secure fastening. Use a tape measure to evenly distribute the crossbar - asymmetry will be evident and will not beautify the look of your pergola.

Finished pergola.
After construction is completed, fill all the holes, cracks and crevices with wood putty and sand the surfaces with medium grit sandpaper. Apply several coats of lacquer to protect the wood from decomposition and water damage.
Tip: Put a table and a few chairs under a canopy, and have fun with friends and family members, hiding in the shade on a hot day.
Construction of pergolas-benches
To build a small pergola with your own hands, you will need the following:
| Materials: | Tools: |
|---|---|
| A - Racks: 5 * 10 cm bars with a length of 180 cm (4 pieces); | Hacksaw, jigsaw; |
| B - Seat frame: bars 5 * 10 cm in length 162. 5 cm (2 pieces) and 46 cm long (3 pieces ); | Drill and drills; |
| C - Back: 5 * 10 cm bars 162. 52. 5 cm (2 pieces), bars 2. 5 * 10 cm and a length of 27. 5 cm (13 pieces); | Chalk cord, tape measure, spirit level, carpenter's pencil; |
| D - Rafters: boards 5 * 20 cm long 180 cm (2 pieces), bars 5 * 5 cm 84 cm long (9 pieces); | Stairs; |
| E - Seat: boards 2 * 10 cm long 162. 5 cm (6 pieces); | Protective gloves, goggles. |
| F - Lattice: 5 * 5 cm bars, 135 cm long (4 pieces), 41 cm long (4 pieces), 135x34 cm lattice. |
Tips:
- At the end of the main construction work, fill the holes for the caps of the self-tapping screws and fill all the slots with wood and polish wooden surfaces.
- Apply several layers of wood stain to all wooden elements of the structure.

Pergola construction plan.
The first stage of the work is the installation of racks. At the top of the bars designed for this we recommend that you make small grooves. Later inside these cutouts you will need to place the rafters.

Dimensions and design of racks.
The next step is to attach a seat frame made of 5 * 10 cm bars to the supports. When making the frame, do not forget to make sure that all its corners are straight. To attach the frame to the posts, drill the guide holes and screw in 6 cm screws. Use a spirit level so that you have no doubt that the racks are vertical and the seat frame is perfectly horizontal.

Seat frame.
Now you have to attach the back to the rear racks. We recommend you to make horizontal guides out of 5 * 10 cm bars, which will serve as the basis for fixing vertical slats.
Tip: Drill the blind holes in the ends of the guides and fasten them to the racks with galvanized screws. Use waterproof glue if you want to strengthen the joints.

Seat back.
Now that the bottom of the rack is securely fastened together with the seat frame and the rear backrest, they need to be joined at the top. For the manufacture of curved longitudinal beams, you will need boards of 5 * 20 cm. Use a pencil to mark the cutting line, as shown in the figure, and cut the workpiece with a jigsaw. Sand the trimmed edge with medium grit sandpaper and secure the beams in the notches on the uprights.

Supporting rafters.
Your next step is to attach pre-drilled 2x10 cm wooden planks to the seat frame using 3 cm galvanized self-tapping screws. Plates should be evenly distributed, leaving 5 mm gaps between them to improve water drainage.

Mounted pergola seat.
The presence of the gratings on the sides of your pergola will give the people who looked at it the feeling that the building was made by a professional. In fact, it is not difficult. You need to make a frame of 5 * 5 cm bars and secure it with screws on the racks. Inside this frame, install the finished wooden lattice, fixing it with the help of finishing nails.

Flower grille on the side walls.
If you want to improve the appearance of the pergola and increase the degree of shading, we recommend that you place small bars on the "roof" of the building, securing them to the rafters with screws.

Installation of the upper part of the pergola-bench.
The main construction work has been completed, it remains to add a few strokes. Fill all gaps and holes with self-tapping screws with wood putty and allow it to dry for several hours. Sand wooden surfaces with fine grit sandpaper.
Tip: Apply several layers of wood stain or paint to all structural elements if you want to protect the tree from rotting and improve the external pergolas.

Ready pergola-bench.
Source of translation: www. howtospecialist. com
Search
Related Articles
Installation of thermopanels - how to install front panels
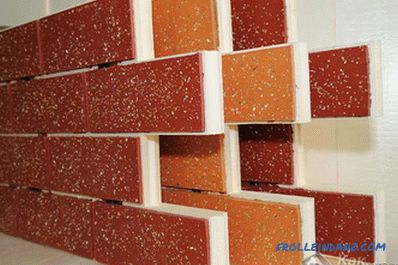
A clinker tile thermopanel is a unique combination of finishing material with insulation. This material has proven itself as a finishing material for building facades. If you are looking for a ratio...
Types and types of lawn mowers - detailed overview
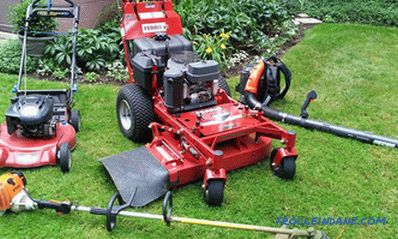
A well-kept lawn near the house is a natural decoration that will never go out of style. Neatly trimmed grass pleases the eye in any weather - lit by the bright sun, in the rain, with drops of dew,...
Glass fiber - what is it
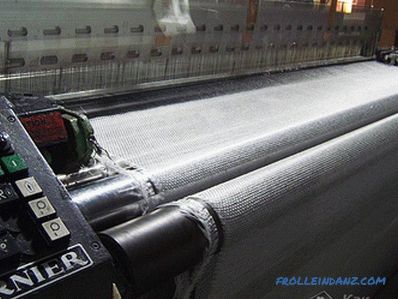
In the modern world, it has long been a tradition to use the latest technologies in the finishing work indoors. One of these innovations are glass cloth wallpaper. It is important to understand in d...
Types of profiles for drywall and their sizes. Types of components and fasteners
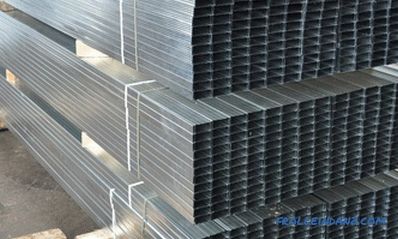
Any drywall product must have a “ridge” - a frame made of durable parts. These are profiles and guides of various shapes connected by various fasteners. By quality, they can be different. Alas - som...
How to make a steam bath in the sauna with your own hands

The room of the steam room is traditionally considered to be the key one in the Russian bath, since the functionality of bath procedures, renowned for their beneficial and healing properties, depend...