Decorative lattices are widely used in garden construction as walls and plinths for wooden arbors, they are used as pergolas and trellis, a support for climbers. Independent production of a wooden lattice is an occupation that can be done by a man who is practically unfamiliar with carpentry art and by a woman who wishes to create a necessary decorative element in the garden with her own hands. It is possible to make decorative wooden lattices from thin slats, a bar or tree branches. It all depends on the fantasy of creating it and the purpose of the finished product.

Before starting work, treat the wood with flame retardants and antiseptic compounds.
How to assemble a lattice with rhombic interlacing?
Not very much need to be prepared:
- bar 3x5 cm;
- bar 1, 5x5 cm;
- saw / handsaw;
- chisel;
- measuring tools;
- joinery glue;
- self-tapping screws or nails.
First of all, you need to make a frame for the lattice of the desired size and shape. It is necessary to assemble 2 identical constructions from a 3x5 bar. The bars cut by the standards at the ends are cut at half their thickness and at a distance from the end equal to the width of the bar. Part of the wood with a chisel is chosen from the end to the cut, forming a "mustache", through which the longitudinal and transverse parts of the frames will be connected.

Construction of a wooden lattice.
Lubricate the wood sampling sites with glue and fold the frames, tightening the joints with clamps until the glue dries. When the glue is dry, the clamps are removed and for greater reliability of the connection, the bars are fixed with screws.
Finished frames are filled with slats, fastening them to the frame with nails or self-tapping screws so that they are strictly parallel to each other and arranged with a constant pitch. To facilitate this process, you need to make a template-conductor. This may be a piece of board or block, whose width is equal to the desired step size of the slats, and the sides are equal and parallel to each other. The end of the conductor is laid out and cut at an angle of 45 ° . Putting the cut end to the edge of the lattice, the first bar is installed close to the longitudinal side of the conductor and fixed on the frame. The template is transferred, again aligning the edge of the frame and its end, tightly pressed against the stitched on the frame and put the next one, aligning it and securing it. So fill all the inner space of each of the 2 frames.
The finished halves of the future lattice are deployed relative to each other so that the slats can intersect in the form of diamonds, and connect the frames to each other. Protruding beyond the outer edges of the frame ends of the slats cut down flush. If you plan to install the frame so that the outer edge of the frame will be open, then its entire perimeter is sewn up with a flange of 1.5x3.
If it is necessary to protect the internal space enclosed by such gratings from insects or wind and rain, a grid or a thin sheet of polycarbonate can be laid between the grid halves when the frames are connected.
Ready grilles are installed on the desired openings.
Other options for decorative grids

For making a grid of branches, it is better to take hardwood.
A grid with a rectangular or square weave is made according to the same principle. The only difference is in the placement of the slats: on one half of the frame they are mounted in the vertical direction, and on the other - in the horizontal. For a uniform pitch and parallelism of the slats, a template with a straight butt cut off is used, unlike the previous version.
If a more massive and durable wooden lattice is required, then a thicker bar and rail are used for the filling elements and the frame. The manufacture of such a product can be made using the above technology or make only one frame, sawing in the marked-up areas of the notch under the strips with a depth equal to the thickness of these parts. After that, the wood from the grooves is removed, and the slats are fixed in the holes for glue and screws.
A grating made of tree branches cut during garden work will look very unusual. Making it begins with a frame of thick branches, interconnected by screws of sufficient length. After that, the internal space of the frame is filled with thinner branches, arranging them as fantasy and form will tell. Attach them to the frame can be screws. With a sufficient thickness of the branches with self-tapping screws you can fasten them together with each other to ensure the rigidity of the structure. If the branches are thin, you can tightly tie them with wire at the crossing points.
The openwork elements made of wood will give lightness to garden buildings and will serve as a reliable support for the vines. By combining climbing plants and ornamental gratings, you can decorate the garden seating area in a variety of different options.
Didn't find the answer in the article? More information on the topic:
-

Quality wooden table with your own hands
Wooden table with their own hands. What materials can be used in the manufacture? Full description of the workflow. What you need to know before starting a work activity?
Search
Related Articles
Victorian style in the interior - interior in the style of the Victorian era
When you mentally transfer yourself to good old England, the first thing that comes to mind is the luxury of beautiful old palaces and family castles. From the history ... The refined Victorian...
How to make a fence from metal profile
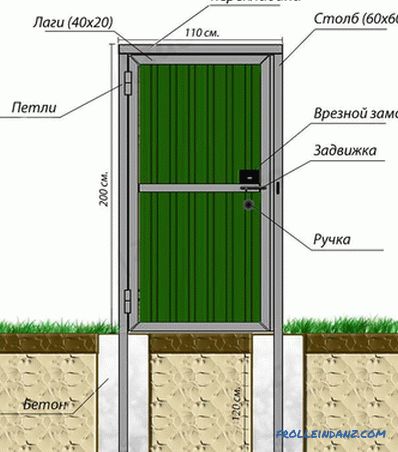
The use of metal profiles for the manufacture of modern fences and fences is associated with the following remarkable characteristics of this building material: reliability and durability, attr...
Artificial stream do-it-yourself - stream in the country
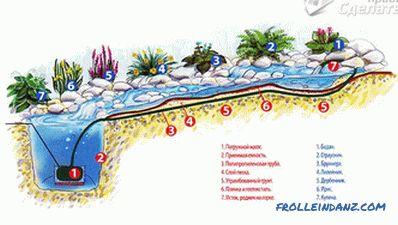
Spring is the time to equip the backyard plot, to bring in beauty and to create landscape design. The beauty of the brook in the garden is undeniable. And if you want to enjoy the gentle murmur of w...
Plaster walls without beacons with their own hands
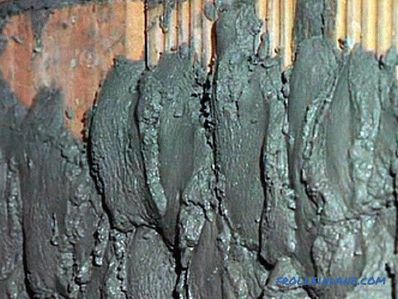
If you started a repair, then, most likely, you already know what you want to see in the final result. However, have you ever thought that by making repairs, you can save money at some construction...
Gabions in landscape design - types and differences of gabions (+ photos)
Very often, the developments of military technology come into our life tightly. Where did you find this article? In a search engine, for this using the Internet. It is interesting that initially thi...