Lining is one of the most popular types of home decoration during construction or repair. These are long and wide slats, which are tightly mounted to each other using side slots. Lining is plastic or wood, it can be sheathed any surface. How to make lining your own hands?
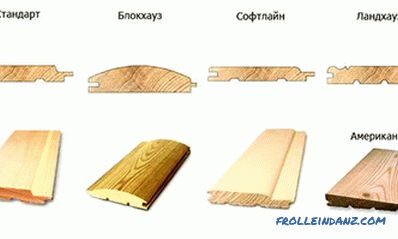
Types of lining.
Wooden lining has several advantages over plastic. It is an environmentally friendly material that favorably affects a person and has excellent sound and heat insulation. It can be bought ready-made at a hardware store, but if you wish, with the skills of working with wood, you can make the paneling yourself. This will require a special tool, time and patience. But in the end you will save money and get satisfaction from the work done.
Material and tools for work
First of all, you must buy unedged boards with a length of about 3 m, their width should be about 100 mm, and thickness - not less than 20 mm. The tree can choose any breed, as long as it does not have mechanical damage, knots and rot. Suitable for this oak, linden, cherry or pine. Before work, check that the wooden paneling is well saturated with special antiseptic compounds.
Required tool:
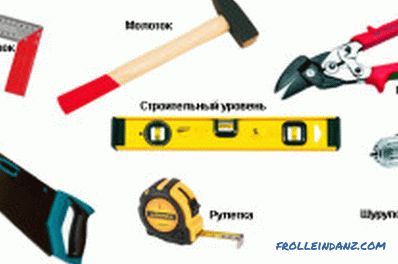
Tools for working with clapboard.
- milling machine or surface gage;
- color pencil;
- ruler;
- set of cutters;
- mounting stapler;
- mineral wool;
- wood screws;
- rock drill;
- nails;
- plummet and level;
- waterproofing film;
- hammer;
- polyurethane foam (slightly expanding);
- wooden planks with a section of 4x5 cm.
Manufacturing of lining
When everything is ready, you can get to work. The main practical part should be divided into two stages. These are cutting of the wall paneling and cutting out spikes for joints in its parts, as well as frame assembly, that is, mounting the wall paneling to the surface.
Preparation of the base of the boards
To begin with, it is necessary to prepare the boards. Decide on the future size based on how much material is needed and what size. Given that there are no uniform standards here, you can independently determine the size.
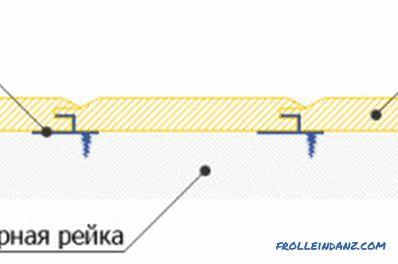
Layout of mounting of the wall panel to support rails using clamps.
Blanks can be made both on the machine and with an ordinary hacksaw - as it will be more convenient for you. It is very important that they are all the same and have no deviations. If there are deviations, then a slight difference is acceptable - no more than 5 mm.
Then we proceed to work with the surface gauge. As a rule, this tool is designed to produce a calibrated board at the exit. Therefore, drive each blank well through the surface gauge so that it becomes the same caliber in thickness. After all the boards are ready, you need to let the material lie for a bit so that it does not warp or deform in the future, then you can proceed to further work.
Work on connections
Now work will be carried out behind a manual milling machine. It is very important to form all the connections correctly - grooves and spikes. They will be responsible for the reliability of attachment of the material to the surface and its connection to each other.
First use a face or mortise cutter. The size of the slot should be approximately 0.8 cm. We form spikes. The length of each spike should be from 1.5 to 2 cm. It is undesirable to go beyond these limits, otherwise the connection will not have high reliability.
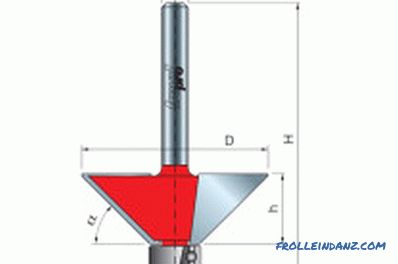
Figure 1. Drawing of a chamfer cutter.
Next, from the side of the ridge, it is necessary to make a selection. To do this, also used a groove cutter. The sample itself is needed so that, as a result, the paneling has a finished and classic look. This will not only add decoration, but also greater board strength. With the help of the same grooving cutter, it is necessary to form grooves, but from the opposite side. They will serve as part of the entire connecting mechanism.
So the work on the connections is over. Now carefully inspect the wall paneling. It so happens that often on the factory material there are minor irregularities. They are commonly called chamfers. They can be easily removed if you have such a planer cutter (Fig. 1). It is easy to work with it, defects are cleaned up sufficiently qualitatively and quickly.
Mounting the wall paneling to the wall surface
Wooden wall paneling has been prepared for use. Now it is necessary to carry out its installation on the wall. To do this, the frame is made, then the insulation is made, and after that the boards are attached to the surface. This phased work provides a good result.
Fastening the frame
First we work with the frame.Using a tape measure and a pencil, mark up, check several times the correctness of the lines, and then fix the mounting brackets to the wall. It is necessary to fix them at approximately the same distance. To make the connection reliable enough, it is better to fix the brackets to anchor screws.
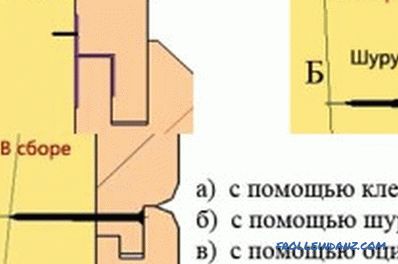
Methods of fixing lining.
After that, all the brackets need to be bent so that grooves are formed into which the wooden bars will be inserted. Usually, curling is best done inside. After inserting the bars, they should be additionally secured with wood screws, after which finally all extra ends of the brackets should be bent. In this way you need to fix all the horizontal parts of the frame.
After completion, we are working on the remaining vertical bars. First, the plumbness of the future lines is measured with a plumb line and appropriate marks are made. Then the marks are connected with a pencil using a tape measure, after which it is fastened using a similar method. Please note that the distance between the horizontal and vertical bars should be about 50 cm.
Particular attention should be paid to unnecessary brackets and mounting the frame in the place of non-standard window openings and arches. Superfluous parts of the brackets, if they are rather large, are not recommended to be fixed on top of the bar. It is better to cut them. And for finishing rounded windows and arches, it is better to first make a frame separately, and only then mount it on the wall. This process is a bit more complicated, so it is recommended to even seek help from specialists if you do not have special skills.
Thermal insulation of the frame and fixing of the lining sheets
After that, you can proceed to the next step - insulation of the framework. It is best to use a standard material such as mineral wool. It is recommended to use the roll, because you can cut suitable sheets.
Cotton is fastened by usual laying between the frame posts with fixing with glue or staples along the edges. Pay special attention to sealing gaps between its sheets. It is better to do this with conventional foam, which slightly expands.
When warming you should not forget about the waterproofing of the wall. This applies to absolutely all rooms, regardless of the level of humidity. It is better to use an ordinary waterproofing film, which you need to stretch onto an already warmed frame and fix it on wooden bars with mounting brackets.
Now the main thing remains, but at the same time the simplest and quickest thing is the installation of the lining sheets on the frame. If you do everything slowly, then work will pass very quickly, and the quality will be high. You will need a little for fastening: ordinary nails and a hammer.
So, take one sheet of lining, attach it to the edge of the wall and drive a nail into it at an angle from the top of the wall. So gradually to the very bottom you need to drive in nails, keeping the same distances between them - approximately 15-20 cm. You need to drive in nails so that they cannot be seen behind the groove. The head is recommended to be lowered so that it does not interfere with the connection.
While fixing the slats, constantly check everything with a building level.
If everything is done smoothly, then there will be no problems with subsequent fixings. Near the installed sheets of lining should be firmly pressed to each other - a thorn into the groove.
All this does not require the skills of a builder, so you can experiment and not be afraid for the result. The main thing - slow and attentive. Then you get a beautiful and reliable finish that does not require further processing.
Didn't find the answer in the article? More information on the topic:
