Repair in an apartment or private house can be done independently without the help of the construction team. This will save considerable funds, while qualitatively and in good faith. And with your own hands you can do almost any kind of work: the device partitions, wallpapering and much more. Leveling the floor can be done on their own.
")
Scheme of concrete floor screed.
Preparatory stage of work
In any way, in the end, not to level the floor, and preparatory work is necessary in any case. These measures include:
- removal of the old flooring;
- cleaning of existing debris and dust;
- sealing of cracks and crevices, comparing mounds;
- marking the height of the upcoming floor with the help of level;
- priming the surface, which will ensure maximum adhesion of materials, protect against possible formation of mold and fungal formations.
")
Floor screed attachments.
By the way, the primer should have enhanced water-repellent characteristics in order to eliminate the rapid absorption of moisture from the leveling mortars into the sub-floor. If water quickly leaves the leveling mix, then in the future small cracks may appear on the floor, which can later lead to serious deformations of the floor.
It is impossible to skip the preparatory stage, as this may entail undesirable deformations of the future floor, and its surface will be imperfect. In addition to leveling the floor, consider the tools. These can be:
- level;
- rule;
- empty tanks;
- shovel;
- hammer;
- hacksaw;
- tape measure and others, depending on the option chosen.
Self-leveling the floor with your own hands: ways
The choice of the method for leveling the floor depends on the material of the subfloor and on what kind of flooring is planned. In addition, it is necessary to take into account the funds allocated for this type of work and the available skills.
")
Layout of beacons.
There are several ways to level the floor:
- dry screed;
- cement screed;
- self-leveling floor;
- wooden floors using log.
Before the final choice of leveling method, it is necessary to carefully study floor level differences, the sound insulation characteristics of the room, the properties of materials and their combination with each other. Each of the methods has its own deadlines for this work - this indicator should also be taken into account.
The alignment procedure itself is conditionally divided into 2 stages:
- pre-tie;
- finishing alignment.
At the 1st stage it is necessary to level the floor (rough). This is especially true if a concrete slab is laid as a subfloor. These defects and defects (cracks, cracks, chips) can be eliminated with the help of special mixtures that are sold in hardware stores.
Most often these are dry mixes that need to be mixed with water in the proportion indicated on the package. After preparation of the solution, it is necessary to apply it to the places of defects, carefully seal them and level them. It is necessary to level the new surface carefully, not allowing the hillocks to appear after the solution hardens. After work, the solution should harden. Next, the entire surface of the floor must be treated with an antiseptic, and then with a primer.
")
Scheme of the concrete floor over the ground.
After the preliminary stage, you should proceed to the finishing stage - leveling the floor with your own hands. There are rules according to which it is possible to use a certain leveling method in different initial states of a rough coating. Here are the rules:
- If differences in the level of the subfloor are between 5 cm and no sound insulation is required, then a cement screed is used. At the same time the work will vary from 3 to 5 days, and the finishing flooring can be anything.
- If the ground level drops from 4 cm, the sound insulation of the future room must be good, then the dry screed will play the role of a leveling floor. Works can be completed in 3 days, and the floor can be any.
- The self-leveling floor is used when the level drops from 0.5 cm, sound insulation is not needed. Works can be completed within 2 days at most. As a finishing flooring, you can use any material.
- With differences of 5 cm, medium sound insulation and within 3-5 days you can level the wooden floor on the logs. Finishing flooring can be any, with the exception of ceramic tiles.
Using these rules and assessing the possibilities and future plans for finishing the floor covering, you can begin to level the floor with your own hands.
Cement screed: how to level the floor?
")
Schematic of a heated underfloor heating on a wooden base using cement screed.
This method is most applicable for self-leveling floors. Cement screed with a polymer base is inexpensive and does not represent much complexity in execution. The cement screed consists of cement, sand, PVA glue. Before applying the leveling solution it is necessary to place the beacons strictly on the level. The laser level gives maximum accuracy.
Beacons can be aluminum profiles or plain wooden slats, which can be purchased at the store. The first beacon is installed against the wall and fixed with a solution. In the future, all over the floor from it comes the markup and installation of the remaining machekov. Reinforcement can be used to strengthen this screed. Such reinforcement is required if the cement screed is placed on a layer of expanded clay, sand. Cells of such a reinforced mesh 10x10 cm.
After marking, the solution is laid, which is aligned with the construction rule.
")
Diagram of the dry screed device.
The alignment takes place in smooth movements from side to side, due to which the solution fills all the space between the beacons and is slightly rammed. When aligning, it should be remembered that when the congector freezes, the coupler shrinks, therefore it is necessary to leave 2-3 mm above the level of the beacon.
After setting the screed, you can rub the roughness. After complete installation, the screed must be watered periodically with water, especially the first 5 days. This will give additional strength to the coupler and eliminate the possible appearance of small cracks.
This method, for all its ease of implementation, is the most time consuming and time consuming.
Floor leveling - dry screed and its features
")
Self-leveling device scheme.
This method is also called a bulk floor, because a dry bulk mix is used for leveling. Dry screed, after the preparatory phase of work, includes the following:
- Laying waterproofing layer of parchment paper or film. This material must be laid overlapped, with the edges glue together with tape.
- The waterproofing material must locate on the walls to the marked level of the future floor.
- Installation of sound insulation. It can be insulating tape made of glass wool or mineral wool. It is necessary to retreat from the wall about 10 mm.
- Scatter leveling material. The layer should be 2-4 cm. It is leveled over the beacons with the help of the rule.
- After backfilling is compacted through time, OSB, plywood, fiberboard can be laid. These sheets begin to lay on the threshold, according to the principles of brickwork. After that, you can do the finishing floor covering.
Bulk floor: important points
This is the optimal and fast enough option to level the floor. Its thickness is small. This method of leveling floors in rooms with low ceilings is most applicable.
Before its installation, preparatory work is required to clean up debris and seal the defects of the subfloor. Further level all over the floor you need to set the beacons. For the self-leveling floor such beacons will serve as screws secured with the help of alabaster. Bulk floor is initially a dry mix, which must be diluted in the proportion indicated on the package.
In order to achieve the desired consistency of the mixture, the dry mixture is gradually added to the water in small portions. The mixture should be homogeneous, thick sour cream density. The prepared pouring is poured onto the floor and evenly distributed over the base with the help of a plastic spiked roller.
Next, prepare the next batch of self-leveling floor and compare the edges of the layers with the same roller. It should be said that when performing a self-leveling floor, at least 2 people are necessary: 1 for dilution of the solution, the 2nd one - for pouring. After all, you need to fill all the room for 1 time. Otherwise there may be nodules and bumps.
If the leveling floor, in addition to leveling, will also serve as a finishing flooring, then mixtures of different colors can be used for casting.
Didn't find the answer in the article? More information on the topic:
-
")
Construction of wooden structures
Wooden buildings: arranging the foundation of a house, erecting walls, installing a roof. Features and technology of construction of light structures, tools and materials.
-
")
Building a log house with your own hands
Step-by-step instructions on how to build log houses with their own hands. Useful tips and tricks, tools needed for the job. The choice of material for the log.
Search
Related Articles
How to make a lean-to roof garage
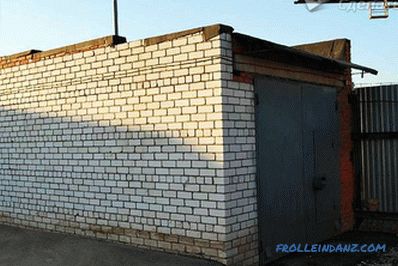
The simplest and most economical type of roof for a garage is a lean-to. For its production does not require too much building materials. Moreover, it can be built on its own, because its constructi...
Condensation boiler - the pros and cons, the principle of operation

The constantly growing cost of energy has pushed scientists and engineers to create a new type of heat generator - a condensing boiler. When installed in a low-temperature heating system, a condensa...
How to connect the bath to the sewer

When the bath is installed in its place, it is necessary to perform the last stage of work, after which you can put it into operation. An important step is to connect the bath to the sewer and water...
How to make a chair with your own hands
If you want to spend time comfortably, then you can’t do without comfortable chairs. Manufacturers offer various options for such furniture for every taste, but in order to save money, many decide t...
How to install a shower tray
A bathroom does not always have the large dimensions we need, because not everyone lives in new houses built in recent years. In view of this, the topic of saving space in a bathroom of small dimens...