Laying lining can transform the interior of any room. This material is intended not only for interior work - it is often laid on the external walls of a house. Laying lining - the process by which you can solve the aesthetic issue of the room for a democratic price, in addition, the installation of this decoration is very simple. If the room needs additional sound insulation, then this material will perfectly cope with the task.
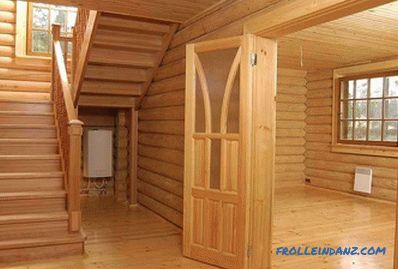
Lining in the room is laid for additional heat and sound insulation.
Tools and materials
- doboynik;
- pins;
- waterproofing;
- plumb;
- level;
- stapler;
- nails;
- wooden blocks;
- sandpaper;
- varnish;
- vapor barrier;
- lining.
Preparing the walls before installing the lining
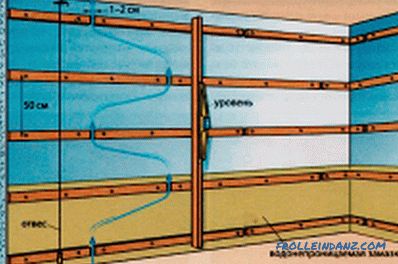
Before laying the lining, you should crate in 40-50 cm steps.
The process of laying the lining does not imply the need to level the walls with a wet method, which involves the use of plaster and putty. It will only be necessary to manufacture and install the frame structure. For this, it is necessary to use wooden bars, which are made in a rectangular section of 15x30 mm or 20x40 mm. Choose their thickness should be depending on how uneven the wall.
When laying the lining with your own hands on completely flat walls, you can use the material for the frame, the thickness of which varies from 10 to 15 mm.
Fixing of frame elements is made to the wall with the help of glue, which can be replaced with nails.
Fasteners should be placed at a distance of 50 cm, this will ensure air circulation between the lining and the base.
Lining, made of wood, is characterized by high hygroscopic qualities, this necessitates the arrangement of a waterproofing layer along the bottom of the wall, to which the facing is supposed to be fixed.
If the lining boards are to be fastened to uneven walls, then a larger section material must be used for the framework, and it must be fixed with bolts or screws that can be successfully replaced with pins. Work with uneven walls during the installation of the frame involves the use of a plumb and a level that will allow to observe the verticality and horizontal position of the elements. If you need to align the boards of the frame, you should use thin wedges made of wood, they will help bring all the bars into one plane.
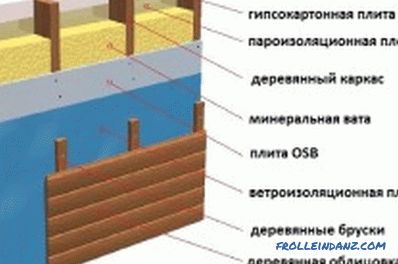
Scheme of wall insulation for wall paneling.
Scheme of wall insulation for clapboard
Sometimes insulation is placed under the clapboard, then bars should be used no less than 50 mm thick to install the frame, which is true even with flat walls, as framed elements of the space will be used for laying insulation material.
Heater after attaching the frame elements should be cut to the size of the resulting free spaces between the slats. The heat insulator should be strengthened to the rails with a stapler, after which it will be necessary to strengthen the vapor barrier with an overlap.
Each room has windows and doors, the framework has to be installed around them, in this case, the openings need to be cut in bars. Such a procedure is necessary in order to lining the bar lay on the frame, and not on the window and door frames.
Installation work on the cladding of the room with clapboard
If you finally decided that clapboard will act as the cladding of the walls of the room, it can be installed in several ways, which is why you have to decide what method of installation to choose. Different ways of laying involve the use of different fasteners.
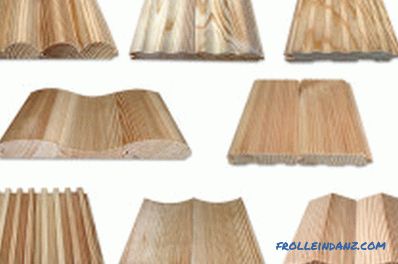
Types of decorative wall paneling.
The first method of lining with this material involves the use of a stapler or nails. If you use the method of laying with nails, it will be necessary to use a toilet bowl, it will allow you to completely drown the nail heads in the boards.
The wall paneling can be attached to the wall with special brackets, called clamps. This method of installation can only be used for interior work. Staples are fixed to the wall with nails or screws. Each next board should dock with a previously reinforced, which will close the fasteners. Hats of self-tapping screws of the finishing level should be closed with dowels.
Another way of mounting the boards involves drilling holes, the dimensions of which are equal to the size of the cap of the screw, the holes should be located on the side of the spike and made before installation. When fastening to the frame, screws will be inserted into these holes. As soon as the work is completed, it is necessary to get rid of the protruding elements by grinding the surface.
The paneling should be mounted in the places where sockets and switches were installed only after they were de-energized and dismounted.
When vertical methods are used to position the boards, the installation should be started from left to right. You can decorate the top and bottom slice slices using a carved plinth that will not act as an obstacle to the free circulation of air masses.
After installation, the paneling should be varnished in several layers.
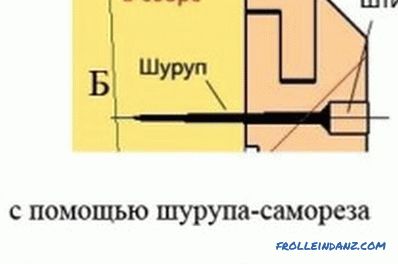
Installation of the wall paneling on screws, clamps and nails.
It is preferable to install the clapboard yourself, since the cost of installation services equals the cost of the material itself. This will significantly reduce the cost of finishing the walls of the room. However, if you still decide that you cannot do the work of laying the lining, you must be prepared for the fact that the cost of work with a small amount will be higher than the average. Finishing requires additional treatment in the form of painting with varnish, and you have to pay for it separately.
After fixing the baseboards, the surface of the wall panel can be sanded using sandpaper. The next step is to clean the working surface from dust, which is necessary for carrying out the primer and the subsequent varnishing. After the first coat of primer, the surface must be sanded again, which will help the varnish to lie more evenly on the surface.
The total cost of the room covering will be influenced not only by the cost of material installation services, but also by the price of the lining itself, which is affected by the type of wood, the price depends on the presence of natural defects and minuses that appeared during production.
It is also important to pay attention to the fact that different types of cladding are designed for use in different conditions, including the external and internal arrangement of the material. So, the lining made of coniferous breeds of wood can be used both for internal, and for external works. And for interior work used finish made of hardwood, with the exception of aspen.
Features of the painting of the wall panel
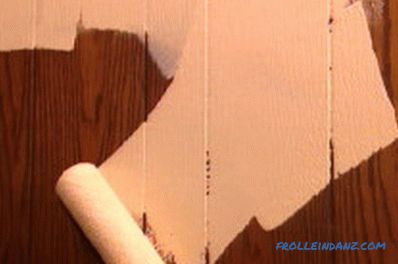
The color of the wall panel can be made with acrylic, oil, alkyd paints.
It is possible to paint the paneling with both lightening and coating compositions, it is permissible and even recommended to use antiseptics, acrylate, oil paints, alkyd compounds and akvalaki.
Oil paint is excellent for external painting, it is able to absorb well and does not let moisture, the material acquires excellent resistance to external influences. However, such compounds slowly dry, and eventually lose matting and color.
It is preferable to use acrylic paints, they are resistant to precipitation, retain color and gloss for a long time. Lining after coating with acrylic compounds breathes, remains vapor-proof, the surface becomes elastic and does not crack.
Acrylic aquaria are recommended for treatment of lining installed inside; such compounds are not only incapable of provoking allergic reactions, but are also environmentally friendly.
Alkyd varnishes are hard and will perfectly cope with significant and frequent mechanical effects, they are able to serve for 10 years, and after this period the varnish layer must be renewed.
If you decide to create an interior in the style of country or Provence, the finishing in the form of lining will be an excellent solution, but you will have to choose the appropriate furniture and finishes for the rest of the room surfaces. Whatever installation methods are chosen, it is important to observe the installation technology, then the lining will last a long time and will please the eye with its aesthetic appearance.
Didn't find the answer in the article? More information on the topic:
-
Making the table in the bath with your own hands
It is easy to build a table in a bath with your own hands. Materials for the table use different, often take those that are on hand. Used wood has a number of requirements.
-
Installation options for the sub floor
Correct installation of the subfloor. Wet, dry and combined subfloor: styling features. Recommendations for the installation of the lower flooring. Necessary tool.
