Ceramic tile flooring is quite popular. Such material often make out the floor in the bathroom, toilet or other utility rooms (for example, boiler room). Laying floor tiles with your own hands is a rather laborious process. It requires care and accuracy. And how this is done, we will tell in this article.
Preparatory work
 Basic tools
Works on the laying of ceramic tiles require training. The first thing you need to stock up the necessary tool. You will need:
- trowel, notched and wide trowel;
- building level and ruler;
- marker or pencil;
- tile cutter;
- hammer (plain and rubber), pliers, drill or hammer drill;
- plastic crosses to align seams;
- primer, grout, glue mass;
- ceramic tile .
 How to count the number of tiles
To calculate the required amount tiles, it is worth resorting to simple math. Knowing the area of the room, divide it into an area of one tile. It should take into account the width of the seams, 2‒5 mm. As a result, you get the necessary amount of material. Add to this value 10-15%. This stock is needed, the tile may crack during operation, or you will incorrectly cut any piece.
It is necessary to make a stock. The fact is that the shades of the tiles can vary even in one batch. Therefore, if you do not have enough just one square, it will be very difficult to find the desired coloring.
 Surface preparation required
Now you need to prepare the surface. Remove all items from the room (furniture, plumbing, etc.). If the floor was an old tile, you need to get rid of it. You also need to do with the old glue mass. This will help you punch with a special nozzle in the form of a blade or chisel with a hammer.
When dismantling, do not forget about your own safety. Put on your glasses, mask, and stretch your gloves on your hands.
The next step is to strip the entire surface. Clean up large and small debris, sweep away dust and sand (or vacuum it). Then proceed to leveling the base. If as a result of the dismantling, large depressions or bulges have turned out, then the alignment should be started from them. The protuberances are knocked off by a chisel, and the depressions are sealed with a cement-sand mortar. Then a sand cement screed is laid on the concrete floor and it is leveled. At each stage, check the evenness with a level. Irregularities between 0.5 and 1 cm are allowed.
 For plywood
If there are wooden floors in the room, the leveling technology is different. First of all it is necessary to soak the boards with a special oil-based paint. When the surface is dry, lay a layer of waterproofing. Then a reinforcing mesh is mounted to a height of 4‒5 cm (for this, nails not fully hammered into the floor can be used). And only after that the entire area is filled with a leveling mixture (sand-cement mortar).
In rooms with wooden floors, it is allowed to use thick plywood as a substrate (thickness not less than 12 mm). But sheets need to be laid on the surface without significant irregularities. Otherwise, plywood can bend and break under the weight of the tile and adhesive mass.
 Laying pattern for plywood
We make markup
Laying ceramic tiles on the floor begins with a markup. First of all (especially if you are installing for the first time) you need to do a dry calculation. The tile is put on the places without glue weight. So you can count everything (where you need to cut, where complex corners are formed, etc.). When laying out, do not forget about future joints between tiles.
There are two basic ways of slab layouts.
 Laying pattern for a corner
The easiest way is to start from one far corner of the room. This method is considered the fastest. This is how all novice tile builders are laid, or if they have to work in small narrow rooms, or rooms with complex geometry.
The second method is more complicated - laying from the middle of the room to the side. So the tile is laid in large and free spaces. In this case, the room is divided into four equal parts. The first line is drawn from the middle of one wall to the opposite, the second is also in the middle, perpendicular to the first. Laying starts from any angle formed in the center of the room. In this case, you will have to cut the tile around the perimeter of the room. When using this method of laying forms a more attractive pattern.
 Laying scheme from the center
You can also choose the orientation of laying tiles. It can be laid diagonally or in the usual direct way.The first one looks much more beautiful, but to create it you need to have experience in similar works. That is why the second method of laying is much more common.
 Styling Patterns
Whichever method you use, cut tiles you still have to. Here it is important to remember one recommendation. Try not to cut too narrow strips, they will look bad. At least 20 percent of the area should remain from the full tile. Also, make sure that the most visible area is laid out from whole tiles.
Laying ceramic tiles
Now let's take a closer look at how to lay floor tiles. First we prepare the glue. If you have already purchased the mass, then carefully read the instructions. If you like dry glue, then it needs to be diluted with water (also according to recommendations from the manufacturer).
Since the process of tile laying is rather long, it is necessary to dilute the adhesive mass in small portions. Otherwise, it simply dries and increases your financial costs.
Works are performed squarely. That is, areas of square meters are marked and an adhesive mass is prepared for this area. After finishing one section, proceed to the next.
 The entire area is primed
First, you need to cover the entire area with a primer. This will prevent the formation of mold and will make the surface more suitable for high-quality bonding. Depending on the level of humidity in the room, a primer is made from one to three passes. Only after it is completely dry can you start laying the floor tile.
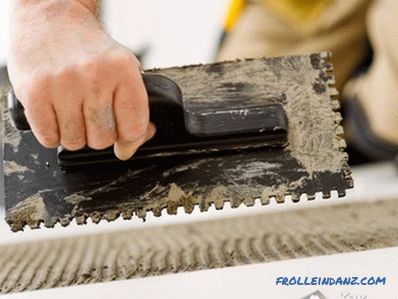
The surface is slightly moistened and a layer of adhesive mass is applied to it. Using a notched trowel, the glue is leveled. At the same time, care must be taken not to form voids and air bags.
 Glue is applied
A layer of glue is also applied to the back side of the tile. This is done using the same notched trowel. A thin layer to cover the entire surface. Then the tile turns over and neatly falls into place. At the same time it is necessary to press evenly over the entire surface.
The tile is leveled by gently moving from side to side. Horizontal evenness is checked using a building level or using a simple stretched thread. If the tile is laid below the desired level, then a little glue mass is added, if higher, the excess glue is removed.
 The tile is laid and pressed
Rubber is used to align the tile on a plane hammer. With it, applied accurate strokes. So you can move the tile to the right place.
It is necessary to leave an even gap between the tiles. Its accuracy is achieved by using special plastic crosses. They fit the resulting seam. If the tile is aligned on crosses, then the gap turns out equal and accurate. Such a seam (2–5 mm wide) is needed so that the coating does not swell.
 Near the walls will need trimming
Near the walls you will have to cut tile. This is done with a tile cutter. Carefully draw a line on the line, and then the tile just breaks. But this should be done carefully.
Final stage
During work, periodically wipe the already made masonry area with a cloth. This is necessary to erase the remnants of the adhesive mass before it hardens. And after laying the entire flooring it is impossible to walk on it for at least two days.
 Grinding floor tiles
After the glue hardens, you can begin to grout the joints . To do this, use a special moisture resistant putty. This work can be done with a rubber spatula. But first it is necessary to clean the joints of debris and dust.
After all the seams are wiped, you need to clean the entire floor with debris. Then the grout is given a day to dry and you can proceed to wet cleaning.
This is where the tile work is done. With some tricks and styling techniques can be found by viewing videos and photos.
Video
Video material about the features of laying tiles on the floor:
Photos
 Combination of diagonal and parallel styling
 Styling pattern
 Vrazbezhku
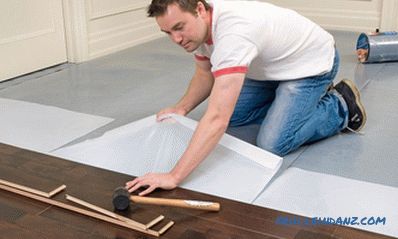
 Parquet installation
 Modular Installation
Search
Related Articles
Rococo style in the interior - the rules of design and photo ideas embodiment

The Rococo style in the interior appeared in the middle of the 18th century as a natural continuation of the development of the Baroque style. In the Rococo style, interiors of the palace premises w...
DIY landscape design (+ photos)

Landscape design is a series of activities aimed at improving the territory. Using natural ingredients, you make changes to the appearance of the site, thereby creating a unique cozy atmosphere. To...
How to arrange the rails in the kitchen

Convenient railing systems have become popular in everyday life relatively recently. They came from a cafe, where they were originally used in the kitchen, and replaced the bulky storage cabinets fo...
DIY tile laying
Tile is a very durable type of coating with a waterproof surface. The tile favorably differs from other types in the universality and magnificent operational characteristics. For example, ceramic ti...
Which substrate to choose under the laminate or floorboard
If you are going to change or repair the floor, you need to think about the substrate. In any case, this is exactly what the manufacturers of laminated coatings say. And in order to make it easier f...