Drywall today occupies a place of honor and is very popular in construction and repair work. Often for redevelopment apartments construct partitions, and drywall is simply indispensable. The list of advantages is significant: the gypsum plasterboards are quite light, the speed of erection is high, at a cost it is relatively inexpensive. Very often drywall is installed on a wooden frame.

Plasterboard lining scheme on a wooden frame.
Plasterboard dividers
Pine trees are often used as the material for the manufacture of wooden frames for the construction of a plasterboard structure. Such facilities can be used as a room partition. What features has a plasterboard partition on a wooden frame?

Layout of plasterboard partitions.
- The drywall is simple and moisture resistant, so it is important to make the right choice - for bathrooms and rooms with high humidity it is worth taking moisture resistant, for the rest you can do with simple gypsum boards.
- If a partition is needed that is strong, then gypsum-fiber sheets can be used. The entire structure will need to sheathe sheets of drywall in several layers.
- The skeleton for the erection of the partition can be wooden or metal. Metal is more durable, but wood is cheaper.
- For the construction of the framework, it is better to take coniferous wood, the best choice is pine.
- Before you begin installation, you need to process the slats with special substances to protect against fire and parasites.
- It is very important before commencing work to measure the scale of the desired construction and the thickness of the rails. It's simple: the larger the height and width of the structure, the larger the cross section of the rail.
- If the partition needs to be additionally warmed or added sound insulation, then this should be done during installation.
Frame: how to install correctly?

Incorrect installation scheme of the gypsum board ceiling.
The starting stage in the construction of a structure is the installation of a harness. The bars are fastened in the following order: ceiling-half-walls. If there are wooden floors in the room, then it is easy to fix the bars with simple nails. For slats of 6 cm, nails of 10 cm are recommended. If the walls are made of materials such as concrete or brick, plus a layer of plaster, then fixing will be a little more difficult. In this case, the attachment is carried out by anchors to the ceiling and dowels to the wall and floor.
It is recommended to start fixing from the ceiling, having previously marked the place of the future partition. As soon as the bars are fixed on the ceiling, it is possible to mark the floor and continue mounting. It is important to make the markup correctly, you can use a level or a laser level.
When marking you need to make at least 3 marks on the floor: one can be made on each wall and one in the middle, and more can be done, they will not be superfluous, all the more so that they will not be visible. After the floor beam is fixed, you need to check its position relative to the ceiling.
After you are convinced of the accuracy of the fixings, you can proceed to fixing the beam to the wall. It's all much easier: to connect the ceiling with floor vertical bars strapping. Subsequently, the main load will have to be on the vertical stands, therefore it is extremely important to fix it well. It is equally important to keep the distance between the vertical bars - no more than 40 cm.
Before you begin to strengthen the structure, you need to evaluate how strong the walls are.
In case you are dealing with walls made of fragile materials (cellular concrete, drywall, etc.), you need dowels of the largest size. It is allowed to use both dowel nails and special dowels. The following fastening is possible: drill holes in the wall, drive wooden corks into them, into which you can later screw in screws or hammer nails.

Drywall mounting technology on a wooden frame.
Another way to fasten the strapping: take straight hangers (usually these are used when installing a metal frame) and fix the bars with them. This option is perfect if the walls are quite strong.
Once the strapping is installed, you can proceed to the installation of the racks. Usually the distance between the racks is 60 cm, it is very convenient - afterwards the standard-width gypsum plasterboard (120 cm) can be fixed on 2 racks, which facilitates the installation of drywall.
Racks are installed using wooden bars, fastened to the rack and strapping with screws. You can mount the rack and metal corners.
If the partition has a doorway, then you need to add the number of racks, as well as lintels horizontally. If it is possible to do without communications in the partition, then this is excellent.If you still need wiring, the wires should be placed in a protective pipe or use a tin box.
Partition insulation: nuances

The insulation scheme of the internal partitions.
Sometimes, additional insulation in a building is indispensable, especially if the partition is not decorative. Installation of insulation materials is carried out when on one side of the wooden frame sheeting is made of plasterboard. The best insulation material is mineral wool and foam materials.
Insulation is quite easy to perform, since the dimensions of the distance between the racks and materials are the same. It remains only to lay the material and fix it. If a rigid material is chosen as insulation, then it should be mounted on the inside of the already lined partition. If cavities are formed during installation, they can be filled with mineral wool. The combination of materials will give a high sound insulation effect.
Often in the process of facing the second side with plates, there is a problem on the racks in the form of cracks. This happens because of the large number of screws. It is easy to prevent such an error if the joints of the slabs on the walls are made from opposite sides (for example, the 1st side is sheathed on the left, the 2nd side is on the right).
It is important to remember that a small gap of 1-2 cm should be left between the ceiling and the top of the drywall. The need is that the gypsum in the slab can begin to crumble. The gap will not be noticeable, it can be easily closed with a simple plinth.
Extended partition

The scheme of the ceiling of plasterboard on a wooden frame.
There are also extended partitions when the installation of drywall is done on a double wooden frame. The advantage of this type of construction is that there is the possibility of laying communications and even installing radiators.
Differences in the construction of an expanded partition in that the piping will need to be done from 2 sides, leaving a distance that is necessary for communications. The wooden frame is built on the same principles as that of a simple partition. Once the plating is completed on one side, the necessary communications can be laid. Wires must be in a pipe or box.
If there is a need to install a battery, then it should be installed not in the middle of the structure, but closer to one of the sides. Do not forget about the holes for ventilation, then they need to close the plastic bars. It must be remembered that if you install the battery, you cannot insulate the partition with foam or foam. Perfectly cope with the task of mineral wool. After the installation of communications, the installation process looks similar to a simple partition.
Mounting on an uneven wall
The room may not always have ideally even walls. Installation of the frame in this case looks a little different. It is worth starting with identifying irregularities: a bar is laid on the floor along the wall and a line is drawn along its outer edge. Next comes the markup for future racks at a distance of 60 cm. The next step: you need to press the stand bar vertically to the wall and mark the end position at equal intervals for its exit on the floor.
It is important to put the support bar evenly, because vertical bars will be attached to it further. To level the rack, you can take a piece of fiberboard, wood or plywood.
Installation of drywall can be done with your own hands, having an idea of what should happen. It is important to follow a specific algorithm of action, haste is useless here, because mistakes will not be so easy later. Before the process you need to make all the necessary measurements and calculations, stock up with all the material and tools that you need. For example:
- screwdriver;
- tape measure;
- pencil;
- hacksaw;
- metal shears;
- drill;
- level.
But the most important, perhaps, moment in the construction of a plasterboard partition is the documentation for a permit. It is not recommended to start work before you get all the necessary permissions.
Didn't find the answer in the article? More information on the topic:
-

Options for installing a subfloor
Proper installation of subfloor. Wet, dry and combined subfloor: styling features. Recommendations for the installation of the lower flooring. Necessary tool.
Search
Related Articles
Strengthening rafters: basic ways and tips
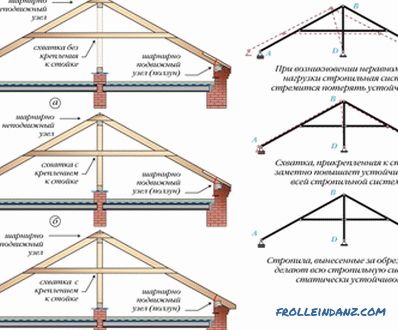
Reinforcement of trusses may be required in cases where mistakes were made at the design or construction stage of the structure. Incorrectly calculated loads or material properties can lead to part...
Diamond Cutting Technology - Diamond Cutting

Nowadays, the most effective method for cutting concrete, bricks, floor slabs, reinforced concrete, tiles and other surfaces is diamond cutting. The quality and speed of cutting is the best way to f...
Wall basement drainage - foundation with drainage system
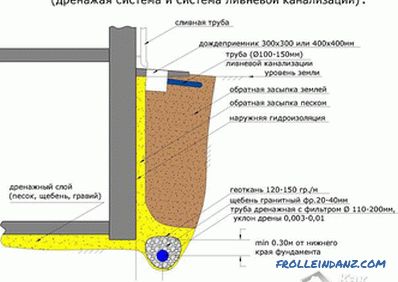
In order for a residential house in the private sector within the city or outside it not to be submerged, wall foundation drainage should be made. This construction allows you to limit the height of...
How to make a fence from the profiled sheet (profiled sheet)

In recent years, in small towns and villages, streets with cottages located comfortably on them have been decorated with fences of profiled sheets. At first glance, it seems to be a simple matter -...
Monolithic polycarbonate properties, uses and specifications
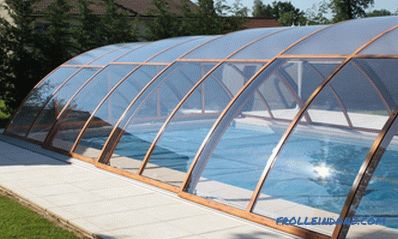
In modern construction, transparent materials are widely used, often completely forming the appearance of buildings. Along with the usual glass, monolithic polycarbonate properties have become wide...