Before you clap the bath with clapboard, you need to pick up wood. The appearance of the walls, the ceiling and the healing effect that is observed after visiting the bath will depend on the type of wood.
")
Scheme of the interior cladding bath clapboard.
Selection rules
Experts recommend carefully choosing the class and profile of the wall paneling. It is made from coniferous and hardwood trees. The choice of a breed depends on the characteristics of the room. It is recommended to sheathe the bath using hardwood, as they are more resistant to increasing air temperature. Plating cost depends on the price of the selected material. The most economical option will be pine, and expensive - cedar. Covering the sauna clapboard do-it-yourself saves the budget. The following materials will be required for such work:
")
Types of lining.
- slats;
- screws;
- aluminum foil;
- insulation;
- lining;
- aluminum tape;
- foam;
- stainless steel nails;
- staples for the construction gun.
The method of installation does not depend on the type of wall paneling. All slats are mounted on the frame. There are several options for their placement and fasteners:
- Vertically.
- Horizontal.
- Diagonally.
Vertical placement requires horizontal fastening of the framework bars. Horizontal placement requires attaching to the walls of the framework bars vertically in a row, perpendicular to the slats. Diagonal layout requires a similar placement of the frame, but the bars should remain perpendicular to the slats.
The bath casing can be made correctly only when choosing a diagonal and vertical placement of the material.
The humidity level in the sauna is higher than normal. Thanks to the choice of such a layout, it is possible to ensure the runoff of water. She will not stagnate between the material. In rooms with lower levels of humidity, horizontal casing is used.
Experts identify the following methods of fastening the slats:
")
The scheme of fastening the lining on the klyaymer.
- oblique hammering in nails;
- using a blade;
- through with a plug;
- direct hammering in nails.
In the first case, hammering nails into the grooves of the boards and drowning them with a soaking post increases the likelihood of damage to the planks. It is recommended to use this method if you have the necessary skills and experience (due to its complexity). On one board will require 6 nails.
Klyimer fastening is one of the most convenient and simple methods for fixing a wall panel. Installation will be carried out quickly and securely, and the strips can be dismantled if necessary without damage. Clips are required to attach the sheathing to the bars, using screws or nails.
A through-fastener option is used for shelves or for seats in the bath. The screw is screwed directly into the bar. Because of this, holes are formed on the surface of the material. Its external characteristics deteriorate. Such a method is not used for covering the walls of the bath.
You can drive nails directly using the appropriate wood profile. To do this, use Euroboarding or soft online. The spikes, which are tight to the crate, are driven in by nails, at an angle of 90 degrees, and are heated with a doboy. The probability of damage is lower than with oblique driving.
Basic installation steps
Finishing of the sauna or bath, when following the instructions, is carried out quickly. At the first stage, they are engaged in preparation. Next - set the frame. At the third stage, the insulation material is laid and the slats are installed. In the fourth - the surface of the lining is covered with a protective compound.
")
A plan for installing the wall paneling on the ceiling.
Preparation begins with leveling the ceiling and walls if there are drops of more than 2 mm per 1 m on their surface. Leveling is done with putty or plaster. Experts recommend covering the surface of even walls and ceilings with means to protect the bath from fungi and mold. Then communications are laid which can be hidden behind wooden panels: electricity and water supply.
Next, you need to purchase materials: lining, bars, fasteners, metal hangers and products that provide steam and heat insulation. It is advised to bring the clapboard into the bathhouse for 2 days so that the wood adapts to the indoor climate.
A wooden bar is used for the batten. The cross section must be selected, focusing on the thickness of the insulation. It is desirable to cut the bars with a length of 500 and 1000 mm, but if necessary, the aspect ratio can be changed. Due to this, they will be fixed on the walls "vzrazbezhku", providing greater structural strength. Then markings are made on the walls for metal hangers. They should be arranged in rows with a step of 40-50 cm. There is a gap of 30-40 cm between the suspensions.
Additional work
")
Fastening plan of the wall paneling.
It is necessary to purchase metal parts made of galvanized iron. The use of ordinary metal elements leads to the gradual appearance of rusty stains on wood. Bars are recommended to be treated with a composition that protects the surface from the occurrence of mold and mildew.
Next, holes are made into which the dowels are inserted. Suspensions will be attached to them, to which the bars are attached. The way of crates depends on the type of fixing lining. Bars in the same row, it is desirable to mount with a small interval. Due to this, between the rows will be able to circulate air.
Experts advise to start the 1st row of the batten of the bath with a long bar, and the 2nd row - with the short one. The frame should be located in the same plane. All rows are vertically checked using a level. Large swings require laying pads under the bars. Then the bath is insulated. Foam glass is used for this. The material has sound and heat insulation, is resistant to moisture, does not emit toxic substances when heated and does not require a vapor barrier to be applied on top of it. The cloths are overlapped and glued with aluminum tape.
Pre-cut slats. At the 1st board spike is cut off, and it is set in place. Finishing begins with a corner. The first bar is set in the corner with a cut and fixed with a kleimer. They must be installed on all boards. Subsequent boards are inserted into the grooves of the previous strips, lined with a hammer and fixed with klyimer.
Protective compounds can be made on the basis of oils or wax. Finishing material requires careful maintenance, without the use of solvents or abrasives. Heavily damaged boards are replaced by new ones. Over time, the skin must be re-coated with a protective compound.
Didn't find the answer in the article? More information on the topic:
-
")
What to glue the flooring with your own hands
What to glue parquet? You can use different glue, its features depend on what kind of parquet is planned to glue. The first step is plywood, which should be well polished.
-
")
How to fix Euro-rail correctly?
Step-by-step instructions on how to fix the lining with your own hands. Materials and tools needed for work. Installation of this coating using klyaymerov.
Search
Related Articles
Country gazebos do it yourself (photo and video)
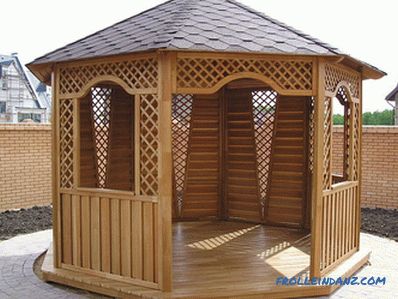
Perhaps the only place for a modern person where you can be in nature every week is a summer cottage. On it you can break a small garden, plant flowers. It is in silence, far from the noise of the...
Top Electric Drills - Top 8 Ranking
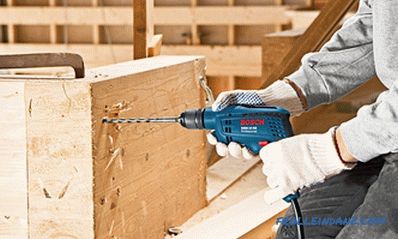
A drill is a versatile drilling tool that finds application in the construction, repair of premises, automotive, engineering, furniture and other industries. On the modern market, you can find model...
What is different from the drill punch

Looking at the showcase with a neatly laid out tool, just the eyes run, impact drills, drills, screwdrivers. All of them are a bit similar in appearance, and it seems to many that this is one and th...
How to determine the wire cross section - methods for determining the cross section
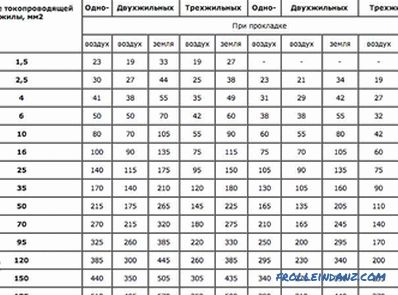
One of the important and main parts of electrical wiring is conductive cables. In order for everything to work as it should, without short circuits and molten wires, it is important to choose the wi...
How to make a wooden floor in the garage with their own hands
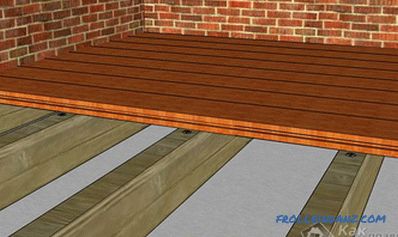
A garage can be either a separate independent structure, or it can be attached to or built into a building. Regardless of the size and shape of the building, everything inside should be properly equ...