Due to its unique performance characteristics and excellent exterior data, laminate has become incredibly popular in the flooring market. In this article, we will show how to properly lay laminate flooring, get acquainted with the rules of installation, and the tools that you need to have available.
It is placed both in apartments and private houses, and in public premises. Among the indisputable advantages of this flooring should be noted simple installation. Even an inexperienced master can handle the process without much difficulty.

Floor surface preparation
The main requirement when laying laminate is a perfectly flat floor surface. Irregularities will cause the distribution of loads on the laminated coating to be uneven. This is fraught with the failure of the locks and the divergence of the panels. The result will be clearly visible interpanel seams, when the situation is almost impossible to save.
# 1. If you have an old wooden floor, you must ensure that its surface is horizontal. To do this, use the normal construction level. Allowable drops of 2-3 mm. on the plane dinah about 2 meters. If the bumps are above the allowable limits, the floor is evened out with a sander.
In addition, you need to check the strength of the floor. If the boards bend under the weight of the human body, they are replaced or strengthened.
# 2. If the laminate is laid on a concrete base, its horizontal position is checked in the same way as a wooden floor. When the drops exceed the allowable limits, the base is considered unsuitable for laying laminate. In this case, a new one with beacons is poured over the uneven old screed. Its thickness should not exceed 20 mm. at the highest points of the old base. Perfectly help to rectify the situation equalizer floors.

To test the surface of the floor, you can use either the long level or the rule, all differences are very well visible to the light. Photo - cancork. com
Laying the substrate and waterproofing
# 1. Before laying the laminate surface is covered with a waterproofing layer. Polyethylene is often used for this purpose, but you can use a film waterproofing material. Canvases of film are spread over the entire surface of the floor with an overlap on the walls of 20 cm. Between the canvases provide for an overlap of up to 15 cm. Canvases are connected with adhesive tape, and a substrate is laid on top of it.

Raised waterproofing film. Photo - hgtv. com
# 2. Foamed polyethylene is used as a substrate. Its styling is similar to the film. The backing sheets are spread overlapped, and then glued together. When using polystyrene, the sheets are laid in a "razbezhku" and glue the joints with adhesive tape. Canvas cork substrate spread out, placing right next to each other, and are connected with adhesive tape.

Sizing the joints of the substrate. Photo - diynetwork. com
The main rules laying laminate
# 1. According to the technology of laying laminate, the basic material requires adaptation to the conditions of the room in which it will be laid. It is enough to leave it for several days in new conditions, it will get used to humidity, temperature and will get the right shape and size.
Tools required for styling
# 2. In order for the styling process to take place promptly, all necessary tools are prepared in advance.
You need:
- pencil;
- jigsaw or saw;
- tape measure;
- hammer;
- wooden plank 15-20 cm long for fitting the panels.
Using a jigsaw can make cutting a lot easier. Manual method of cutting laminate is quite time consuming and inefficient.
Styling technology
# 3. After creating a solid base with the substrate, proceed to the immediate laying of the laminate. Start working from any angle that is most convenient. However, the installation should continue strictly from left to right. The only requirement that is taken into account is the direction of the light. Installation of panels produced along the rays of light, and the shadows at the joints of the panels become almost invisible.

The direction of the panels should be along the rays of light. Photo - cancork. com
# 4. Laminate has the ability to expand, constrict in case of changes in humidity or changes in operating conditions of the room. In order to avoid surface swelling when laying the material, a gap of about 8-10 mm is provided between the laminate and the wall. Specially designed pegs are inserted into the gap.

Special spacers can be used to set the gap. Photo - diynetwork. com
It is very important to correctly calculate the number of rows of laminate before laying.If the last row is less than 5 cm wide, the last and the first rows are cut so that their width is the same.
# 5. All the panels of the first row are laid with a spike against the wall. And to ensure a snug fit, the spikes are pre-cut with a jigsaw. On the edge of the first row along its entire length, spacer pegs are installed, the thickness of which is 8-10 mm. The ends of all the panels of the first row snap into the lock connection on the narrow side. In this case, the spike of the next panel is slid into the groove of the previous one at a slight inclination, and the panel is pressed to the floor.

Cutting a spike using a jigsaw. Photo - diynetwork. com
- How and what to saw laminate - the choice of tools and the nuances of sawing laminated coatings
# 6. When laying the second row of panels, an offset of 25-30 cm should be provided. To do this, cut off a part of the panel, lay it on the wall with a narrow cut, take the whole panel and attach it to the one that was laid.

Laying of the second row, with offset. Photo - diynetwork. com
# 7. The laying of subsequent rows is carried out by analogy with the first row. As soon as the second row is typed, it is pushed to the first, and the longitudinal locks are interconnected. Final fixation is carried out using a bar and a hammer.
# 8. For a rigid fastening in the row of the last panel, use a clamp. In order to avoid distortions and protrusions at the joints, all panels of the row are fitted tightly to each other.

The last bar in the row, which is away from the wall, is fixed with the help of milk and a clamp. Photo - creativehomedesigner. com
Laminate with locks and click locks and their styling features
# 9. Several variants of interlocking connections have been developed for laminate panels. Consider such locks as "click" and "lok". In fact, they are both varieties of "tongue". The difference lies in the principles of fixing laminate panels.
Panels with a "click" lock are initially joined at an angle, after which they are pressed to the floor and finished off with a hammer through a bar. Panels with a “lock” lock are laid horizontally, and then finally finished with a bar and a hammer.

Laminate locks on the left - "click" on the right - "lock". Photo - quick-step. co. uk
Video: How to put laminate with a click lock
Rules for laying laminate near projections, pipes and doors
# 1. If there is heating in the room, the laminate can be put around the pipe. For this, a panel is applied to the pipe, and their points of contact are marked. Then measure the distance from the center of the pipe to the wall and point it to the panel. At the intersection of the lines, drill a hole that is 2–3 mm larger than the pipe diameter. A small part of the panel is cut off, and a large one is laid and fixed.
The cut piece from the end is coated with an adhesive, brought up behind the pipe and applied to the majority of the panel. To mask the gap formed, you can use a special cap.
# 2. Where the laminate is in contact with the doorway box, it is flush with the doorframe. To do this, it is recommended to cut a small section of the rack of the door frame from below. And the height of the cut should not be more or less than the thickness of the laminate. Then trim the panel so that it completely or partially overlaps the threshold and falls under the box.
It is finally fixed with a clamp. For the ideal appearance of the threshold and the absence of drops, it is advisable to use a specially provided fixing element for the thresholds.
Laying flooring such as laminate is quick and easy. If you follow the above recommendations and rules, you can guarantee its durability and reliability. A rich selection of colors and patterns on the market will delight anyone who needs a unique flooring for a low cost.
Video: How to lay laminate: errors and rules
Search
Related Articles
How to connect a washing machine with your own hands
Without the use of modern electrical appliances, it is extremely difficult to secure a comfortable and cozy stay. For this reason, air conditioners, dishwashers, convectors and other appliances that...
How to connect a washing machine to the water supply and sewage yourself

Even the most notorious skeptics finally realized that with an automatic washing machine, life in life becomes much more comfortable. Not necessarily long and tedious to prepare for the "big wash" -...
Types of linoleum - photos, characteristics, pros and cons + Video
Linoleum is still the most popular floor covering. Types of linoleum on the market have many different colors and textures. This allows you to choose a coating for any interior. The drawing can imit...
common technology for calculating the distance between the rafters
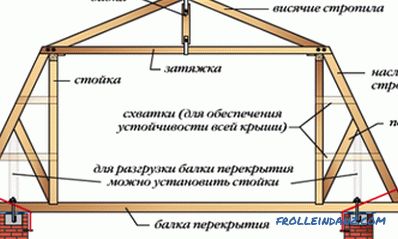
One of the important stages of any construction is the construction of the roof of the building, the basis of which is the installation of the truss system. From how correctly chosen step rafters,...
The transfer of the gas pipe in the apartment
Carrying a gas pipe in an apartment is a responsible job that requires certain skills and knowledge, independent performance is not recommended. The invitation to perform professional professionals...