Choosing a new furniture in the hall, everyone wants it to meet all the stated needs, it was beautiful, not bulky, spacious, affordable and made from high-quality materials. However, given the characteristics of the hallways, not every ready-made set of furniture will suit you in size, color or type.
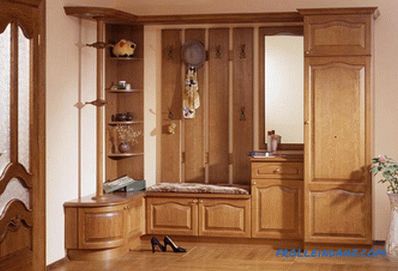
By making the furniture in the hallway with your own hands, you can adjust it exactly to the size of the room, and also choose the appropriate material color.
In this situation, making the furniture in the hallway with your own hands would be an ideal option. Already here you will be able to choose the material of the tree, if necessary, paint it in the color you need and, most importantly, independently determine the furniture set you need and with exactly those sizes that fit only your hallway.
At first glance, it seems difficult and even unrealistic to make furniture yourself, but in reality everything is not so difficult. Of course, to start making furniture, you need to have certain skills in this area, be able to work with basic tools and know the basic technologies that allow you to correctly connect individual furniture structures.
So, let's get down to it and try to make the furniture in the hallway on our own, then to assemble it into a single complex.
Tools and materials
For this work we will need certain tools: a drill;

Without a screwdriver, furniture assembly work can last more than one day.
- screwdriver;
- self-tapping screws;
- sandpaper;
- screwdriver;
- saw;
- various drills.
In addition to the tools, the following materials will be needed:
- furniture panels (mainly made of pine, beech) with sizes of 1600 * 400 * 18 mm and 2000 * 400 * 18 mm;
- boards with dimensions of 1600 * 120 * 16 mm;
- slats with dimensions of 3000 * 40 * 12 mm;
- plywood 6 mm thick;
- furniture hinges ;
- furniture handles;
- wooden dowels.
We will make one single-sided closet, the other two-door, a wardrobe-case and a hanger for clothes.
Making a single-door nightstand
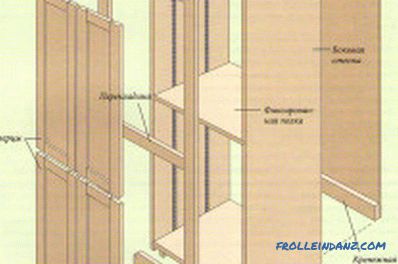
The device is a regular cabinet-case.
Let's start with a one-door nightstand. We determine the height of our future stand and cut out from the shield with a height of 1600 mm two sides of the same size corresponding to the selected height. If there is a plinth in the hallway, then on one side these two side panels are cut down so that the bedside table fits close to the wall. In the upper part we also cut at an angle so that the top cover is narrower than the main bedside table. We fasten the two panels with screws, inserting the lower and upper bases. In this case, the bottom of the base is not done straight to the floor, but slightly higher, removing the resulting gap with the faceplate using wooden dowels. From above the base is fixed in the place where the saw cut begins. The back panel, if necessary, made of plywood. Next, we saw out the door of the nightstand of such a size that the drawer can fit over it, and with the help of a special drill we make holes for the door hinges. With the help of furniture hinges it is necessary to attach the door to the bedside cabinet.
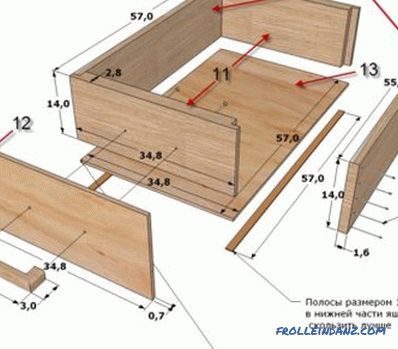
From plywood we cut out runners for drawer drawers. For reliability, it is better to cut them all the way through the bottom. We attach them on both sides of our frame. From plywood we make the lower bar for the box, taking into account the fact that it should fit into the holes of the runners, the back and side panels of the box. We make the front panel of a furniture panel the size of a little wider than the box itself.
Parts of the box are fastened with self-tapping screws. Attach the front panel after fastening the handle to it and varnish it.
We saw out the top cover of the bedside table and fasten it with the help of dowels and glue. The bedside table is ready.
Production of a two-door bollard and closet box
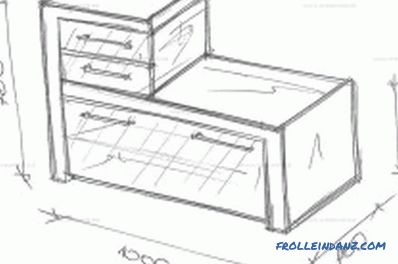
Drawing of a stand for shoes.
Now we make a two-door nightstand. According to the size you need, we cut the side panels, upper and lower bases, retreating some distance from the bottom and closing with the faceplate, making sawnings under the baseboard. The height of this bedside table should be lower than in the previous bedside table. It turned out a rectangular frame. Inner filling is chosen by everyone for themselves at will, having partitions and shelves. From the sides, everything is fastened with screws, the upper and lower covers are attached with wooden dowels. Next, we cut the doors of appropriate sizes and attach them to our frame with the help of furniture hinges. The back panel is made of plywood.
Next, we proceed to the manufacture of cabinet cases. We cut out side panels of the desired depth from large shields, as well as the lower base, the central shelf and the upper base. It is recommended to divide the cabinet into two compartments in height so that the doors are light. Do not forget to make gash for baseboards and raise a little lower base above the floor.The whole structure is fastened with screws. Two doors of the same height are cut out of large shields. With the help of furniture hinges and a special drill door must be attached to the frame cabinet-case. The door is recommended to hang on 3 hinges for greater reliability. The back wall is made of plywood. Inner content, again, everyone chooses independently. Shelves are fixed with special shelf fasteners. Here is your cupboard ready.
Now we collect all the elements of furniture in one place, arranging them in the following order: first one-door nightstand, then a two-door nightstand, and then a cupboard. Now in the resulting space above the two-door nightstand make a hanger for clothes.
Making clothes hangers
For this, boards are sawn with the same height, which must not exceed the height of the closet-case and must start above the two-door nightstand, and are attached to the horizontal rail with a certain distance from each other . The width of this design should coincide with the width of the two-door nightstand. It turned out something like a rectangular lattice. Above, stepping back from the edge of a short distance, a hat shelf is fastened to the full width of the hanger. With the help of emery paper, you need to process every detail of the hanger and varnish it. This hanger is fastened to the wall with screws over the two-door nightstand. Self-hooking attached hooks for clothes.
Now we have a place in our structure above the single-door nightstand. In this place you can hang a mirror. It will look beautiful and harmonious if the size of the mirror does not crawl up behind the closet and to the side behind the one-door nightstand.
All the resulting furniture should be varnished. We fasten the handles to all the front doors with the help of the same screws, if necessary we put locks and other accessories. If you did everything correctly and faithfully approached your work, then you ended up with a furniture set in the hallway, which is suitable for both outerwear, which is convenient to hang on the open part of the hanger and clean in the closet as needed, for shoes that are comfortable. in the boxes to clean the bedside table. A convenient shelf for hats will allow you to keep them safe and eliminate the possibility of their loss. A comfortable mirror, with a beautiful edging under the style of your corridor will give you the opportunity to put yourself in order right within the corridor.
With the minimum cost of materials and with a small set of tools that are available in almost every apartment, if you want, you can make yourself a wonderful and necessary set of furniture in your hallway.
If you wish, instead of varnish, the furniture in the corridor can be painted with the paint you need. The front surface of the door can be decorated with additional materials, such as bamboo panels, mesh panels, glass shelves, doors. If necessary, the handles can be exchanged for others, thereby slightly changing the external image of your corridor wall.
The independent production of the hallway turned out to be not so difficult, very convenient and very affordable way to improve the interior that was annoying to you.
Didn't find the answer in the article? More information on the topic:
-
How to make wood veneer?
Information on how veneers are made. Three ways of industrial manufacture of veneer. Making veneer your own hands. Finishing veneer of various surfaces.
-
How to make a house out of plywood with your own hands
Step by step instructions on how to make a house out of plywood with your own hands. Useful tips and advice on the device as a puppet, and suburban buildings. Required tools, process nuances.
-
Elegant and simple dressing table with your own hands
Simple do-it-yourself dressing table. The scheme of assembly of furniture. Materials and tools required for installation. Step-by-step instructions for the manufacture of the product: installation of guides and final finishing.
