This article is a detailed instruction on how to make a drywall arch without recourse to professional builders and finishers. You can create such an arch in any room of your home - in the kitchen, living room or hallway. Such an architectural element will add individuality to your home, make its style unique.
The drywall arch with your own hands is a very real project. If you use the right materials, tools and methods, it can be built in just a couple of days off. However, if you have no experience at all, this project may be delayed for a week, but we guarantee that your efforts will pay off in the end. Before you begin, carefully read our instructions, make a detailed plan of your actions and prepare everything you need.
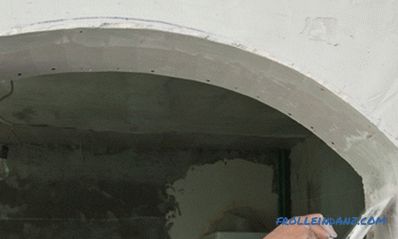
To create a drywall arch, you will need the following:
Materials:
- drywall;
- screws for drywall;
- metal profiles or wooden bars and plywood;
- putty;
- fiberglass mesh or paper tape.
Tools:
- roulette, carpenter's square, pencil;
- screwdriver;
- metal shears ;
- knife;
- trowel;
- trowel;
- bucket;
- protective gloves, goggles and a respirator.
To begin, select a place to create an arch. We will tell how to make a drywall arch in the doorway, you can build it almost anywhere in your home - everything here is limited only by your imagination. Measure the dimensions of your chosen area.
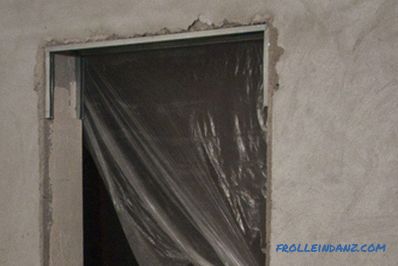
The doorway in which we build the arch.
Knowing the dimensions of the doorway or any other place where you will realize your idea, draw the desired arch on a sheet of drywall. Drawing the outline of the arch is a very important and crucial stage. If you do not pay him enough attention, it may turn out that all your subsequent hard work will be in vain. Screw the screw into the drywall and tie a rope to it - you get a kind of compass, with which you can easily draw a curve of the desired radius. Using a longer rope will increase the radius of the curve and, therefore, make it less steep. At this stage, you can make several attempts until you get a form that meets your tastes and needs.
After you have painted the arch, you need to cut it out using a jigsaw or a special hacksaw for drywall. Make sure that you firmly secure the sheet, otherwise you may get injured or damage the material. The jigsaw blade should cut the drywall precisely along the drawn line - the quality of the final result depends on the thoroughness of this operation.
- See also: How and how to cut drywall and make holes in it
Tip: If you are going to install the arch in place with moisture, you must purchase moisture-resistant drywall (green sheets), as it is intended for use in these conditions. Otherwise, your plasterboard arch will lose its appearance over time. You need to think about all these details at the very beginning, when you are just wondering how to make an arch out of drywall.
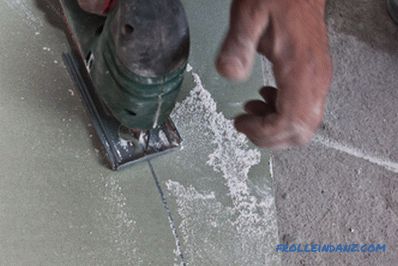
Cutting the arch out of drywall.
Now you can start creating the arch frame. Make it not as difficult as it may seem at first glance. For this, both metal profiles and wooden bars can be used. Each approach has its advantages: the metal profile is a perfectly straight and very light material, but the wooden bars are more durable. We advise you to use metal profiles for brick walls and wooden bars for wooden walls.
Installation of a metal frame for an arch made of plasterboard
Cut out metal guides of the desired length and fix them to the wall. You need to cut two profiles across the width of the opening and fix them in the upper part. On both sides of the opening, two profiles are also installed, but their size will depend on the radius of the arch you cut out from the gypsum board, see the photo below. If you fix a metal profile frame on a concrete wall, you must drill holes with a drill, install dowels, and then tighten the screws.
If you plan to fix metal profiles to wooden walls, use self-tapping screws with a minimum length of 40-50 mm. The distance between the screws should be about 10-12 cm.
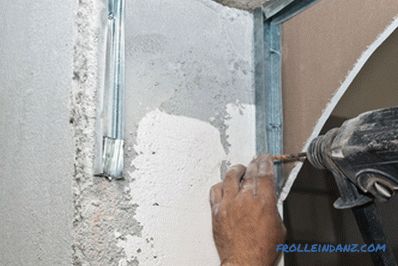
The fastening of the metal frame to the wall.
After attaching the metal profiles to the wall, you can continue the process by installing the first sheet of drywall.To perform this operation professionally, use an electric screwdriver with torque control. For drywall thickness of 12. 5 mm, we recommend that you use self-tapping screws 3. 5x35, and for drywall thickness of 9. 5 mm, screws and smaller ones are suitable.
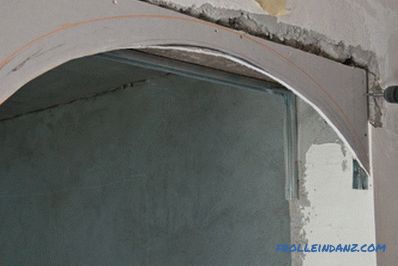
Fixing the cut drywall to the metal frame.
Similarly, dry-insulate the other side of the frame with drywall. Using a screwdriver, screw in the screws so that their caps are flush with the surface of the drywall, otherwise you will have to seal the grooves with a putty.
Tip: To secure the drywall on the metal frame, screw in the screws every 15 cm.
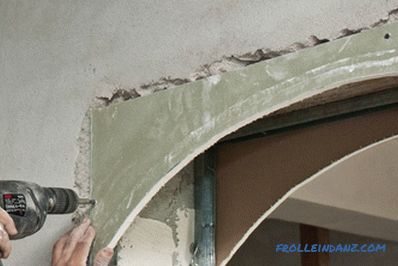
Fasten the plasterboard arch to the metal profile .
The next stage of work is to fix a curved metal profile along the edge of a plasterboard arch to increase the rigidity of the structure.
Measure the length of the arc and cut the corresponding section of the profile with scissors for metal. Remember to use protective gloves to avoid cutting your hands on sharp metal edges.
Tip: To bend a metal profile, simply make cuts on its side faces every 10-12 cm. These cuts will make the profile curved. If you need to bend the profile stronger, just make more cuts.
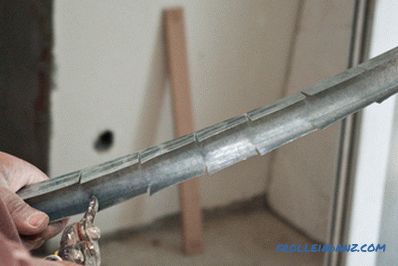
Incision of the walls of the metal profile to give it a curved shape.
Give the profile the shape of an arc and use its screws to fasten its ends in the lower parts of the metal frame.
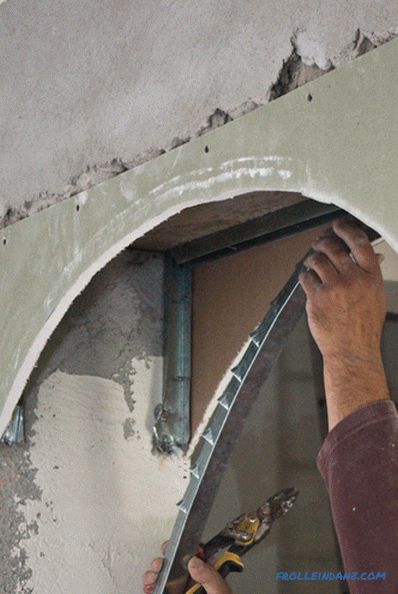
Installation of a curved metal profile.
After you make sure that both ends of the curved profile are securely attached to the metal frame, you can continue the process by screwing the plasterboard arch walls to the curved metal guide with self-tapping screws.
This step is very important for creating your arch, so be careful and make sure that the drywall is well fixed on the metal frame. To get a flat surface, self-tapping screws need to be screwed every 10-15 cm.
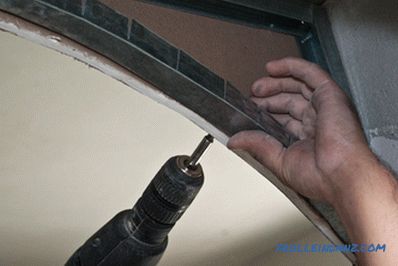
Fixing the plasterboard arch to the curved metal profile.
Remember that the frame is not complete until you install perpendicular sections of the profile, which must connect the side walls of the arch with each other. These connecting straps must be placed at several points.
Installing a wooden frame for an arch made of plasterboard
Making a wooden frame for your plasterboard arch is also easy. True for this you still need plywood and wooden bars. Measure the width of the doorway, subtract the thickness of the drywall and plywood, and you will get the thickness of the wooden bars you need. Draw an arc on the plywood arch and cut it with a jigsaw.
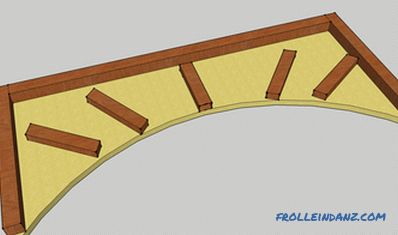
Framework for a plasterboard arch made of plywood and bars fastened to it.
Using 5-centimeter self-tapping screws, fix wooden blocks on the plywood to perform the function of the arch frame. Then fix the arch in the doorway using long screws, screwed every 15 cm.
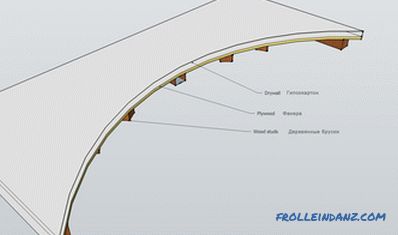
Drywall attached to the wooden frame.
The last step is to mount the second plywood wall and the plywood boarding with drywall. The latter should be fixed with screws for drywall.
Installing the arc-shaped fragment of the arch
After you have created the frame and installed the side walls of the arch, you need to fix the lower arc-shaped section.
Using a tape measure, measure the width and length of the arc. Using a knife and a square, cut a piece of drywall in accordance with the dimensions obtained.
Now use a little trick to help make plasterboard flexible. Every 10 cm apply parallel notches on one of the sides of the gypsum rectangle, having cut a paper layer with a knife. It is very important to use the construction level or the square in order to make the cuts perpendicular to the side edge of the sheet and parallel to each other. Be patient and take the time to avoid mistakes. Once again we recall the need to comply with security measures.
There is another way to bend drywall - just wet it. However, this method is suitable only for cases when you need only slightly bend the sheet.
- In more detail about the methods of bending drywall: How to bend drywall and metal profile for it
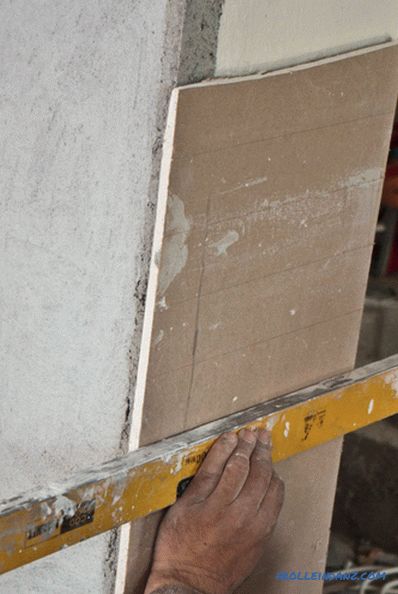
Cutting drywall for its subsequent flexion.
Turn the gypsum rectangle upside down and place it on the bottom of the arch, gradually giving it the desired shape.
Do not use too much force when bending drywall, as you risk damaging the slab. Move cautiously, small steps, and drywall will take the form of an arch in seconds.
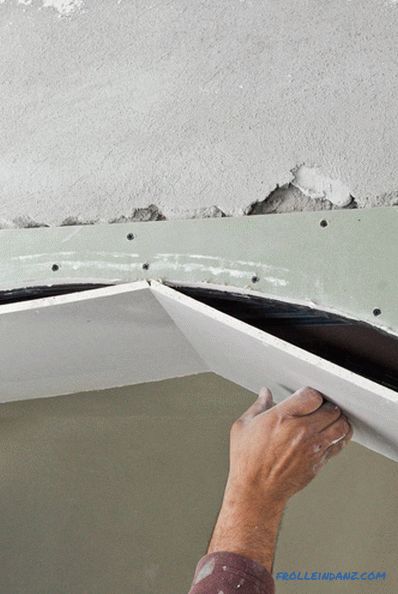
Installation of a plasterboard arc.
When installing a plasterboard rectangle, align its edges ideally with arched walls. Also make sure that the ends of the rectangle match the arc, otherwise adjust the length of the rectangle.
Fix the drywall with several screws in the upper part of the arch and continue to fix it, moving to the edges. Twist the screws on each side of the arc at a distance of 10-15 cm from each other, using a screwdriver with adjustable torque. Work with great caution, because you’ve almost finished building your plasterboard arch. Step by step, as you screw in the screws, moving from the center of the arch to its edges, the plasterboard fragment will take on the shape you have planned.
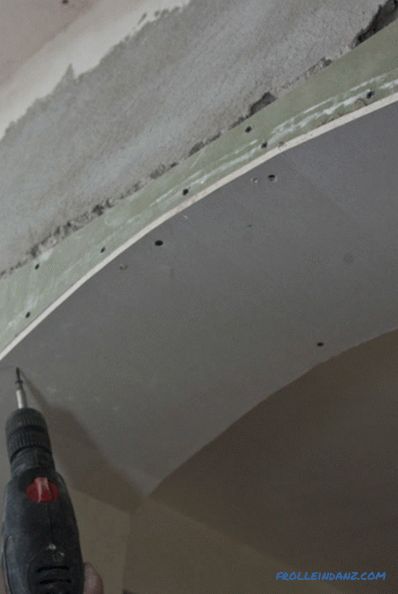
Fixing drywall with self-tapping screws.
Pay attention to the correctness of the technique of fixing a curved fragment of the arch. You must move from the center of the arch to its edges, twisting the screws in the mirror sequence.
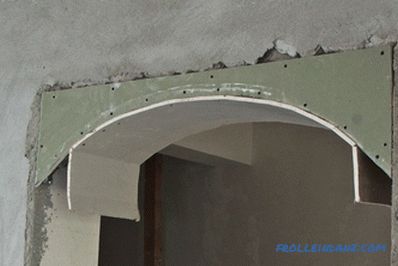
Completion of the drywall arch.
Make sure that you work in the right conditions: the workplace should be well lit and ventilated. You should wear protective gloves and goggles whenever the situation requires.
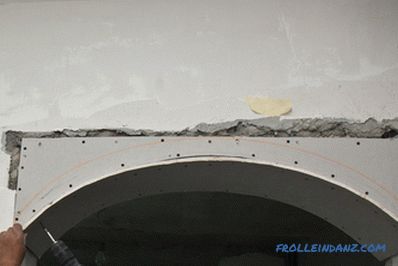
The drywall arch fastened with self-tapping screws.
After you have finished the installation of the plasterboard arch, you should pay attention to the fine details. It is possible that in some places the gypsum board was not perfectly flat. Use the knife to align all the edges. Be sure to wear protective gloves to avoid possible cuts with a sharp blade.
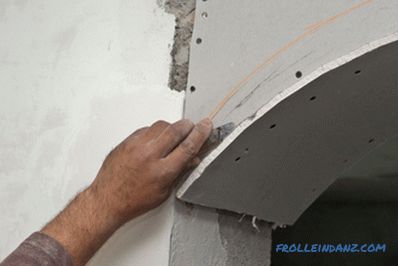
Cutting the uneven edges of the drywall with a knife.
Finishing of the drywall arch
After you have built the arch frame and sheathed it with drywall, it's time to move on to the next stage - the finishing. Only upon completion of this stage can you boast that you could make an interior arch of plasterboard with your own hands.
You will need to glue the drywall edges and all the joints with special paper tape or fiberglass mesh, apply at least three layers of putty and sand the surface several times using emery paper of different grain sizes. These operations are not very complex and do not require professional skills. We will introduce you to the basic principles of work, so that you have the opportunity to complete your project.
Once again, evaluate the quality of the plasterboard arch you made to make sure that everything was done correctly, that its side walls are flush with the wall above the doorway, that the whole structure is sufficiently rigid and reliable. If everything is in order, you can begin to putty.
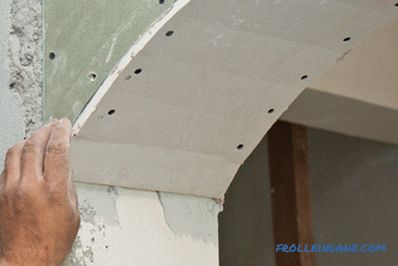
Finishes the lower edges of the plasterboard arch.
For finishing, you can use acrylic putty for interior work. But all drywall seams are best sealed with a special, more durable putty for drywall seams. This will prevent the formation of cracks in the joints. Putty must be thoroughly mixed, using a nozzle for an electric drill, until a homogeneous consistency. Do not forget to carefully read the factory label on the bag with putty.
Use gloves to keep your hands clean. In addition, when shpatlevanii better to change into old clothes, since it is likely to also become dirty.
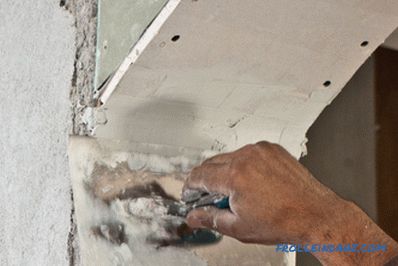
Use a rectangular spatula to apply putty on a drywall arch.
Linear movements begin to apply putty for drywall seams to the joints between the drywall and the door opening with a rectangular spatula. It is a very useful tool, and we recommend that you buy it - the money spent will definitely pay off, especially when working with curved surfaces.
Make sure that there are no scraps of paper or pieces of plaster in the area you are treating, as they can, when mixed with putty, impair the appearance of the surface.
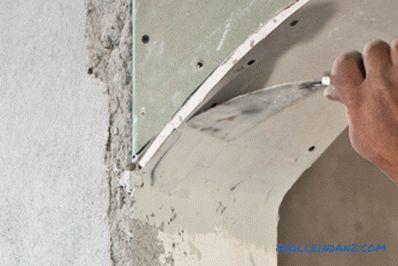
Applying putty with a spatula.
Using a spatula, apply the composition to the caps of the self-tapping screws. Remember that you must apply enough putty to create a perfectly flat surface.
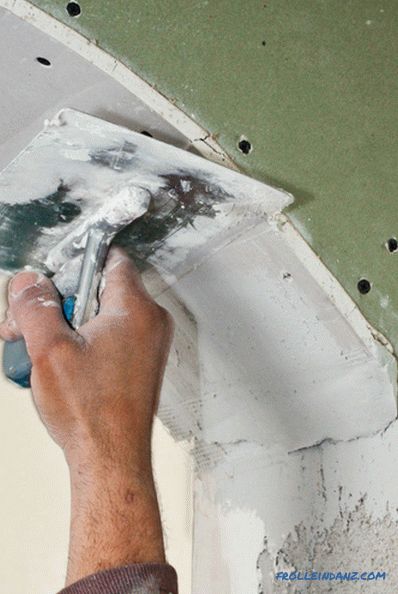
Coating of the caps of the self-tapping screws with putty.
If there are any minor defects in the drywall surface (dents, holes), just fill them with putty, and then use a spatula or grout to remove excess material and smooth out any unevenness. Remember to make sure that the leveled surface is flush with the rest of the wall and arch, since it will be difficult to correct these errors later.
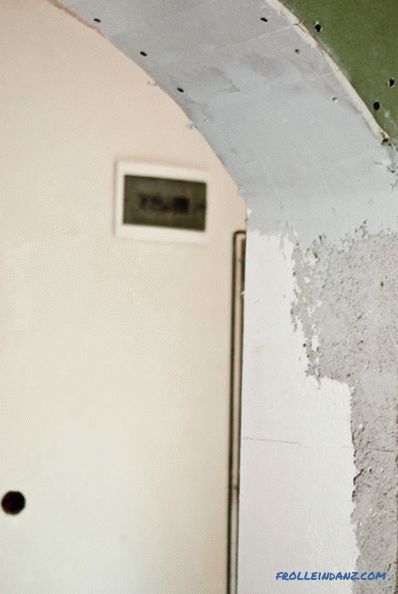
The first layer of putty on the drywall arch.
Repeat the process until the surface is flat, without any noticeable flaws. Remember that you should apply three layers of putty.The first should be as thin as possible, but at the same time it should cover all the irregularities of the drywall.
Do not apply too much putty at once. Spread the already applied amount over a large area by moving the grout several times. Return excess material back to the bucket.
Tip: Run the trowel on a curved surface several times until its line is perfectly smooth.
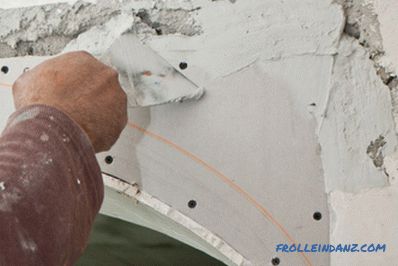
Applying putty to the drywall joint with the wall.
If you are finished plastering and are happy with the result, you can proceed to the next step - to glue over the joints and edges of the drywall to hide the bumps, give the gypsum strength and prevent cracking. There are two alternative materials designed for this purpose - special paper tape and fiberglass mesh. You can choose any of them - they are both good enough. We used fiberglass mesh in this project.
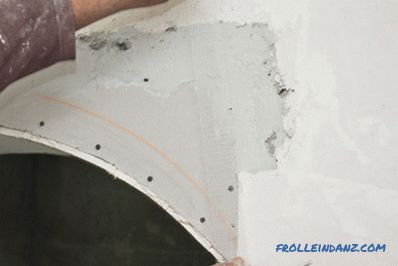
Gluing the fiberglass mesh to the joint.
Measure and cut a piece of mesh of the desired length. Then place the net or paper in the center of the joint and gently press it with your fingers or a spatula into a fresh putty. Carefully ensure that the grid is well stretched during the installation process, otherwise folds will appear.
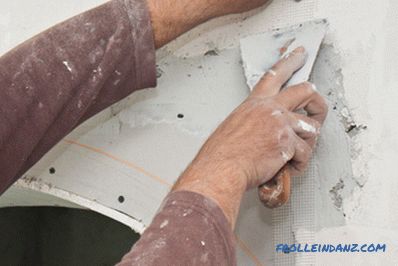
Gluing the paper mesh to the joint.
Ensure that the tape is firmly fixed to the surface and there are no unwanted folds. If you didn’t like a section, just tear the tape off the wall and repeat all over again, this time correctly.
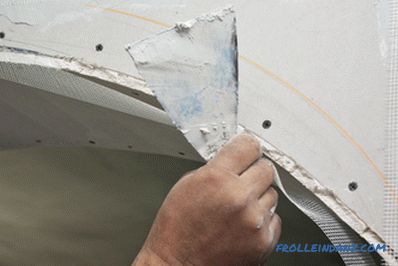
Gluing the fiberglass mesh onto the curved part of the arch
Now that we have glued the paper tape / fiberglass mesh to the edges of the arch with the wall, it's time to glue the curved fragment of the arch . The technique of work in this case is practically no different from the one you have already tested. One side of the grid is covered with adhesive, so it will be held on drywall. Do not forget to tighten the tape during installation.
When pasting the arcuate part of the arch, you probably noticed that when the second half of the tape was wrapped onto the perpendicular plasterboard wall, folds appeared. The solution to this problem is very simple - it is necessary to cut the tape with a sharp knife in the places where the folds appear, and then attach it.
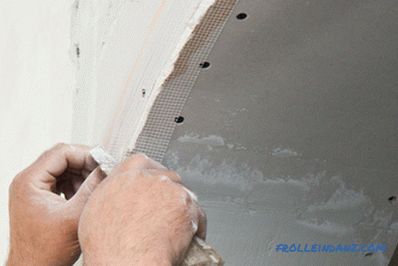
Finishes the curved edge of the arch.
When the putty dries, it will turn completely white. Use medium-grain emery paper to smooth the surface, but do not remove too large a coat, otherwise paper tape / fiberglass mesh will be exposed.
Be sure to use a respirator, because the dust resulting from such manipulations is very harmful to the lungs.
Clean the surface from dust and apply a second layer of putty over the entire surface of the arch. When it dries, sand it with fine sandpaper.
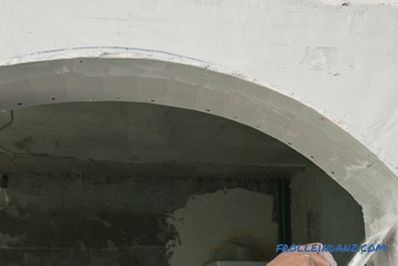
Applying a second layer of putty.
Thoroughly clean the surface with a dry cloth or large brush to remove dust. It is time to apply the third, final layer of putty. To keep the layer thin enough, use a rectangular spatula.
Wait 10-12 hours until the coating is completely dry (putty should turn white). Sand the surface again with fine grit sandpaper, smoothing out all the irregularities and resulting in a perfectly flat surface.
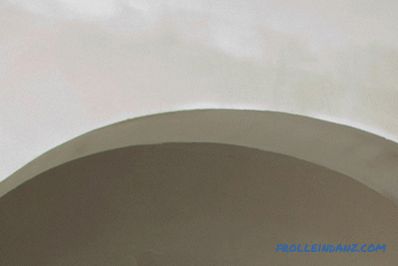
The ground surface of the drywall arch.
Now your arch is ready and you can start painting its surface.
We hope that our step-by-step instruction on how to make a drywall arch with your own hands will be useful for you, and you can not only realize your project, but also believe in your own strength and almost limitless possibilities.
Source of translation: www. howtospecialist. com
