This article focuses on how to make a two-level drywall ceiling with your own hands. As an example, consider the creation of a ceiling structure with an arched outline. Installation of such a ceiling may seem difficult for many, but we hasten to assure you that, having the right materials and tools and using our instructions, almost anyone can handle this job.

Key points that you should pay attention to at the very beginning
# 1. First, you need to determine exactly where you are going to mount the plasterboard ceiling. If we are talking about a room with high humidity, you should purchase moisture resistant plasterboard. If the conditions in the room do not go beyond the limits of the norm, you can not spend extra money and buy a regular drywall.
# 2. Secondly, you have to draw an arc-shaped contour corresponding to the shape of your future ceiling. At first glance, this task may seem easy enough, but reality will force you to change your mind. Carefully study this question, decide on the form to which you will strive and, finally, transfer its projection to the ceiling.
# 3. Third, you need to select the type of frame. You can give preference to wooden bars: this material is cheap, durable and has a large range of sizes available. However, there is a great alternative option - a metal profile: it is very light, stable and easy to install, and in addition, unlike wood, it can be given almost any shape.
To create a two-level plasterboard ceiling, you will need:
Materials:
- guides and ceiling profiles;
- drywall;
- self-tapping screws for gypsum boards.
Tools:
- square or T-square, tape measure, pencil, knife;
- screwdriver;
- level;
- metal shears;
- stepladder;
- protective gloves and goggles.
Tips:
Be careful when working with plasterboard - its sheets are quite heavy.
If you can afford it, buy or rent a special plasterboard jack.
Do not screw the screws too deep into the drywall, as this may cause damage to the material.
Making a skeleton from a metal profile
As we have said, the first step is to draw on the ceiling the outline of the structure that you intended to make. If you failed to draw the perfect curve on the first try, you can try again and again until you are satisfied with the result. Make sure that the labels you apply are clearly visible, because you will be guided by them when you begin to install the frame of a metal profile.

Ceiling frame contour.
Make cuts on the walls of the guide profile every 10-15 cm, using metal shears for this purpose. These cuts will allow you to bend the profile to give it the desired shape.
Tip: Wear protective gloves to avoid cutting your hands on the sharp edges of the metal profile.

Notches on the walls of the metal profile.
Using self-tapping screws, secure the prepared guide profile along the marked line on the ceiling. In our case, the ceiling was concrete, so we had to drill several holes in it, insert dowels and only then fix the profile. If the floors in your house are wooden, you must first determine the location of the ceiling beams, and then fix the guide profile on them with screws.

Drilling of holes for mounting profile.
So that the side wall of the profile does not interfere with drilling holes or screwing in screws, make every 15 cm rectangular cuts 2 cm wide in it. Of course, this should be done before you begin to install the profile.

Fastening the metal profile to the ceiling.
Now you must cut and attach a narrow strip of drywall to the metal profile - the side wall of your future two-level ceiling. The width of this strip will determine the vertical dimensions of the whole structure. We cut strips 15 cm wide, but if you wish, you can lower the plasterboard ceiling vault even lower. The choice depends on the overall height of your room and how comfortable you feel in a room with low ceilings.
Before performing these works, be sure to familiarize yourself with the following materials:
- How to bend drywall and the metal profile for it.
- How and how to cut drywall and make holes in it.

Fastening the sidewall of drywall to the profile.
Continue to fix the drywall with screws, using a screwdriver for this purpose. For 9.5 mm drywall, and that is what we recommend to use for mounting the ceiling, it is quite suitable screws 25 mm long.
Tip: For high-quality fixing of drywall, self-tapping screws should be screwed in every 15 cm. .
When installing the next strip, make sure that they are well aligned and, equally important, fit well together, leaving no gap.
Self-tapping screws should fit into the drywall well so that their caps are exactly at the level of its surface. Otherwise, you will have to spend more effort when finishing.
Joint of two sheets of drywall.Tip: If the curve of the curve you have planned is very small, the drywall will take the desired shape without additional effort on your part. If you need to form a bend with a sufficiently small radius of curvature, you will have to learn how to bend drywall.
Continue to install the plasterboard strips until you finish the frontal part of your future two-level ceiling. Make sure that the drywall is well fixed on the profile, otherwise the material will deform over time, and your ceiling will get an unattractive look.
Drywall edges should be cut very high quality. If you do not pay due attention to such trifles, you will have to work hard at the finishing stage.
Formation of the frontal part of the ceiling of plasterboard.The frame made of metal profiles for the installation of two-level plasterboard ceilings is much more complicated than you might think at first glance. Now you should install the second guide profile on the bottom edge of the drywall strip that you have already fixed. Do not forget to make cuts on its side walls to give the profile the necessary curved shape.
Fastening the lower guide rail.Use a screwdriver to fix the profile to the drywall - this will allow you to do the job well and save time. Twist the screws every 15 cm to make your design quite tough and durable. Do not forget about safety measures: protective gloves will protect your hands from cuts on the sharp edges of the metal profile.
Fixing the side plasterboard wall to the lower guide profile.Continue to build the drywall ceiling frame, fixing the metal guide profile on the opposite wall. It should be strictly parallel to the lower profile established a little earlier.
Use a laser or alcohol level to ensure that the metal profile is perfectly straight all the way. Pay attention to these details, as they affect the quality of the final result.
Fixing the guide profile on the opposite wall, directly opposite the previously attached lower curved profile.Now it is necessary to strengthen the frame by installing support profiles connecting two metal guides. The distance between these crossbars should be about 50 cm, but at the same time you should take into account the size of your plasterboard: the junction of two sheets should be at the location of such a lintel so that both sheets can be fixed on it. Pay attention to this aspect before installing jumpers from the support profiles.
Creating a skeleton from a metal profile.To increase the strength of the frame, it is necessary to install special metal hangers on the ceiling and fix jumpers on them with self-tapping screws. If the width of the plasterboard ceiling is less than 60 cm, you will need to install only one metal hanger for each transverse profile. If the width of the structure exceeds 60 cm, you need to consider installing at least two metal hangers on each jumper.
Fastening of the transverse ceiling profile with a suspension.Both ends of each metal web should be carefully fastened with screws in the guide profiles. Ensure that all metal lintels are perpendicular to the wall and parallel to each other.
Tip: Use a level to make sure that all jumpers are positioned exactly horizontally and on the same level. If this is not the case, you may have made a mistake when installing the guide profile on the wall.
Fastening of the transverse ceiling profile in the guide profile.Plasterboard sheathing plasterboard
So, you have finished installing the metal profile frame for a two-level ceiling. Make sure that the metal jumpers are parallel to each other, securely fastened at both ends in the guide profiles and using suspensions to the ceiling.
Framework made from metal profiles.After you have verified that the ceiling frame has been installed correctly, you can proceed to the next step - plasterboard plating.
Before installing a drywall sheet, you must trim it according to your arc curve. Otherwise, when you have already fixed the slab to the frame, it will be very, very difficult to trim.
Do not worry if after cutting the drywall does not quite perfectly match the curve of your frame - later you can fix minor issues with fiberglass mesh and putty. Just make sure these defects are really minor.
Fastening drywall sheets to the metal frame.Now you must fasten a sheet of drywall on all guide and ceiling profiles, screwing in screws every 15 cm. If you cannot lift a drywall sheet yourself, ask a friend to help you.
Fixing the drywall to the metal profile frame.Before you install the last sheet of drywall, you must solve all possible existing issues related to lighting fixtures. In our case, we needed to install spotlights, so we brought electrical wires into the ceiling of the ceiling and marked the places where the lights would be mounted.
In addition, you have the last opportunity to check whether you have forgotten any tools inside the plasterboard construction.
Placing electrical wires inside a gypsum plasterboard ceiling.After you have finished installing the last drywall sheet on a metal frame, your ceiling should look like what you see in the photo.
Fixing the last sheet of drywall.Make sure all the edges of the drywall boards are aligned. If you find minor irregularities, you have the opportunity to fix them with a knife.
Check to see if drywall sheets are well attached to the metal frame everywhere.
Two-level gypsum plasterboard with arc-shaped contour.Now you know how to make a two-level plasterboard ceiling, and you can certainly apply this knowledge in practice, making your home unlike any other.
Source of translation: www. howtospecialist. com
Video: Installation of a complex two-level plasterboard ceiling
Video: Installation of a plasterboard box around the perimeter of the room
Video: Installation of a drywall box around the perimeter of the room


Search
Related Articles
Japanese style in interior design
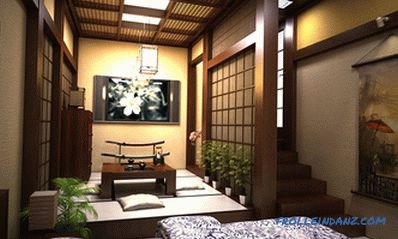
The restrained and exotic Japanese style in the interior is consonant with modernity. It is often used to organize the space of small studio apartments, cozy summer cafes, living rooms or bedrooms....
Connection of timber: basic principles and provisions
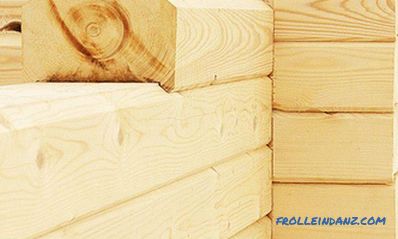
Nowadays, more and more often wooden lumber is used in the construction of the walls of houses, cottages, baths. This is due to the fact that the quality of the proposed material of large sections...
How to find water for a well yourself
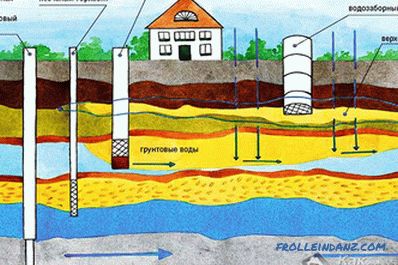
Some people who always have water in their faucet at home think that it is everywhere, and it is enough to make a well in any section and use crystal clear water. In reality, the situation is quite...
How to make a bathroom floor with their own hands
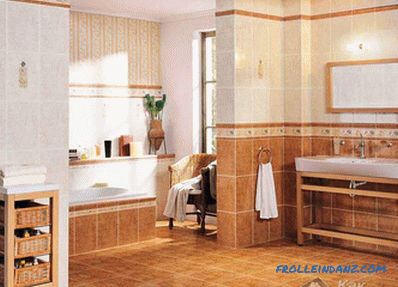
Bathroom floor plays one of the most important roles. This is due to the fact that this room is always high humidity. To prevent dampness and moisture from becoming your main enemy, it is important...
How to install plums on the roof
Rain is not always good. For example, during atmospheric precipitation, water flowing from the roof of buildings can do much harm to them. Falling trickles and even drops eventually make holes in th...