The soft headboards with rhombic pattern look amazing, but they are too expensive, so I wasn’t sure that someday I could afford such a luxury. Years later, when I had a lot of experience in various furniture projects behind my shoulders, I myself made the headboard I had dreamed about for a long time, and with great pleasure I will teach this to you too! From my detailed instructions you will learn how to make a soft headboard with your own hands, and the easiest and cheapest way possible!


Materials:
- The frame of the old headboard and wooden panels (possibly from old disassembled furniture);
- The foam mattress pad (1 m wide) , even for a king-size bed;
- Fabric;
- A set of buttons to be wrapped (I needed 37 such buttons);
- Ordinary buttons;
- Upholstery twine / hemp rope / waxed thread for coming Application buttons;
- Glue (I used MPE glue Gorilla glue).
Preparing the headboard frame
Do you have a lost headboard? Fine! Of course, you can buy lumber and make a new frame, but why not use what you already have.
The headboard of my bed, inherited from my grandmother and grandfather, was uncomfortable and looked unpresentable. And when one night I was flooded by neighbors living on the floor above, as a result of which all the furniture was badly damaged, I finally decided to part with it. I removed the ugly plastic panels from the front of the headboard to get to the core.
After that, I began to look for any waste of suitable size wood. For example, I had two MDF doors from an old broken wardrobe, which I carved in length and nailed to the frame. You should not strive for any special beauty at this stage, just nail or screw the boards to the frame.

The bed head frame was a little lower than I wanted, and I increased it with the help of 5x5 cm bars. Special strength is not required here, it is not necessary even to fasten these bars to the existing frame. Just nail or stick them to the front panels. Frame-expanding bars serve only to hold the clips fastening the fabric.

On the back side, the structure looks like trash, which is in a landfill. Haha What can I say? I like to use everything that comes handy in my work. Here, for example, door hinges, taken from the same cabinet as the doors, I used to fasten the panels. Perfection is not required when it comes to the frame.

Holes for fabric covering
It is time to apply the marking on which you will drill the holes for the subsequent fixing of the fabric. I hate to make any measurements, so I did a quick search on Pinterest for "DIY tufted headboards" and found that some craftsmen use the perforated Pegboard plate, often used for organized storage of tools and other items, as a base for the headboard. A good idea! However, a perforated plate of this size will cost a lot, and it does not have sufficient strength. Considering this, I decided to use the Pegboard only as a template to mark the place for drilling holes on the headboard of my bed.
What you need to do:
1. Measure the headboard and mark its center.
2. Center the fragment of the perforated plate that you have in the center of the headboard.
3. Start at the marked center, but three holes below.
4. Use the marker to move the hole locations to the wooden base. You can trace already transferred holes on the perforated plate, so as not to forget what has already been done.

5. Mark a point (remember to circle a hole), then skip seven holes, and in the eighth place a point again. Continue to follow this pattern.
6. The second row should be shifted by three positions relative to the first, that is, the new point will be opposite the fourth hole. As a result, you will get a diamond shape (see photo below).
7. When you reach the edges of your perforated panel, simply move it, aligning the already marked points with the corresponding holes. Continue until the entire upper half of the headboard is covered with dots arranged in a geometric order. There is no need to mark the whole headboard - only up to the level of the mattress.

After you have finished marking the surface of the headboard, make sure that you have not missed any desired point. If you traced the holes in the panel, it will be much easier to do this! There is nothing worse than removing the perforated plate, and then discover that not all points are set.
TIP: Do not put points to the very edges of the headboard, leave a few centimeters intact.
Now it’s time to drill holes at all the marked points! The holes should not be very large, it is enough that the needle should pass freely in them. Shake off sawdust.
If the access to any holes on the back side of the structure is blocked by frame elements, drill through the bars so that nothing prevents you from sheathing the backrest.

Fixing foam rubber and fabric
Take two pieces of packaging foam of suitable size (it will be much cheaper than buying furniture upholstery foam) and place it on the front surface headboard bed mesh side down. Align the top and sides of the foam with the edges of the wooden back, cutting off any excess. Secure the bottom and sides (top not needed) with a furniture stapler.

Drape the design with a piece of fabric. When measuring the material, make a stock of 25-30 cm from all sides.

Raise the headboard covered with a cloth to a vertical position and rest against the wall. At the same time, keep in mind that when it comes time to trim the backrest, you will need to have easy access to the front and rear sides of it. Well, if you have an assistant who will hold back.
Button covering
It is time to cover the buttons with a cloth. This is the hardest part of the project. I hate this job! Maybe it’s because I bought the cheapest kit, I don’t know, but my fingers hurt a lot when I made only 7 buttons. You must follow the instructions on the package with the blanks, but as soon as you read it, return here. I will give you some good advice that will greatly facilitate the process. Oh, and do not forget to use good glue if you do not want the button covers to fall off over time.

Tips for fitting buttons:
- Not all sets are the same. I bought two sets of the same brand, but it turned out that the rubber mold was well suited to the buttons from one set and much worse from the other. One set is not enough for you anyway, just try all the rubber forms until you find the one you like best.
- Cut the fabric with a small margin, that is, a little more than the template that comes in the kit. It is better to cut off the excess material after you push the button cover inside the rubber mold, rather than trying painfully to center a small shred.
- Insert the fabric and the button cover into the rubber mold on one side, then slowly insert them all the way. Otherwise, you will not succeed.
- If you do not want to ever repeat it all again, before you insert the button foot, grease the edges with a small amount of glue. Remember that if you add too much glue, its excess will be outside (if this happens, dab the glue with a napkin). Let the glue dry overnight before using ready-made buttons.
- It is very difficult to hammer the "pusher" into place! He slips out, you have to correct him all the time with your finger ... ugh! My super smart advice to you (this knowledge came to me only with experience): use a wooden block in order not to pinch your fingers, trying to hammer the "pusher" into place! My poor blue finger ...
Headboard plating
You will need a long needle with a big eye, ordinary buttons and upholstery twine. The knots on this smooth twine are easily decoupled, but then it passes freely through foam rubber and fabric. Just make sure that you have tied a knot with quality (and more than once) so that it will not relax over time.

Insert a long piece of twine into the needle, and then put a button on it. Do you want the button to not slip off? Then pass the string through all 4 holes (as if you were sewing this button) and tie several knots.


Pass the needle through the drilled hole, moving from the back of the back to the front. Start at the top center hole. Be sure to keep the needle straight.

When inserting the needle, gently press the foam rubber from the front surface until the tip of the needle protrudes. Pull it out a bit. Now you can move to the front of the head of the head and pull out the needle.

Secure the decorative button on the front side of the headboard.

How to fasten a button on the front side of the headboard:
1. Pass the needle through the button covered eyelet.
2. Make one turn of the thread around the button and re-thread it through the eyelet.
3. Drown the button in foam rubber, at the same time pulling the thread.The loop will have to hold the button in this position, unless, of course, you make an effort to tighten it.
4. Cut the string, leaving small tails.
5. Tie the ends of the twine at the bottom of the button (as if you were tying shoelaces).
6. Tie another knot on the other side of the button. Repeat the operation several times.
7. Cut off the excess length of the twine, lay the short tails under the button.
8. Pinch the fabric, forming folds on it.
To see how this happens - see the animation (the animation size is about 8 mb, so you need to wait a bit before it appears).
Before moving on to the second row, read the following section, which has some information you should know about the first line. The only thing that I messed up was the first row, so, unfortunately, the head of my bed is not perfect, but you have a chance!
An important point regarding the first row
At some point in my work I began to realize that I did not make one important small step at the beginning. The fact that I did not have the opportunity to learn from the mistakes of others can serve as a disappointing excuse for this. Make sure that you do not forget to take this step, and then every diamond on your back will be perfect.
Immediately after you secure the first button, stop and make a fold going up. Now fasten the next button and fold again ...

After you have “sewn” the first 3 or 4 buttons, pull the fabric back and fix the folds with furniture clips. Make sure all the folds are in one direction. Similarly, fasten the rest of the buttons (and form the folds) of the first row.

When you have made the first row, you can move on by flashing the rest of the headboard. Now you need to do microslips with your fingers after adding each new button to get perfect diamonds.
Fastening the fabric
After you have completely sewed your head, it is time to fasten the fabric at the edges. Lay the headboard on the floor, face down. You have already secured the fabric in the upper part of the headboard, but it does not hurt to add a few additional staples. To get neat corners, make the bends, pulling the top side down and then closing it with a stretched side cover, then secure the fold with brackets. Continue attaching the sides, not forgetting to stretch the fabric. The front side should look perfect, and the rear view is not that important.

Before fixing the bottom edge of the fabric, put the headboard upright again and cut off the excess fabric around the legs. There is no need to fasten the fabric from the front of the leg, it is tightly pulled back.

Refinement of the back side of the headboard
Now, if you wish, you can slightly embellish the back side of the head of the bed. I used an old, but still strong sheet and several upholstery studs for this purpose. I drove the carnations quite far apart, so if necessary I can easily remove the backdrop.
TIP: If one of your decorative buttons relax over time (or you didn’t pull it out well enough), pull the string with the button located on the back of the backrest and secure it with a bracket just below. Now everything is tight, there is no need to redo work.

The process of making a soft headboard with your own hands came to an end. You can enjoy looking at this magnificent work of art!

I hope you like the headboard that you made (I like mine very much). Now make your bed even prettier with the right bedding!


Translation Source: www. homemadebycarmona. com
Search
Related Articles
How to install the toilet on the tile do it yourself

More recently, the toilets were fastened to the taffeta - a piece of wood, mounted in the floor. Now this method is irrevocably obsolete, because more new advanced methods have appeared, which allow...
How to strengthen the ditch in the country
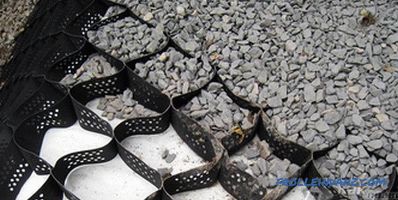
To drain the excess water from the dacha or backyard it is necessary to create a drainage system. With its help, you can protect the area from waterlogging and buildings from destruction. One of the...
How to choose an electric floor heating under the laminate, under the tile
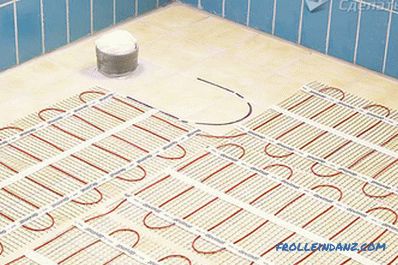
Underfloor heating is no longer a luxury. Modern technologies offer the layman various options for warm floors, for every taste and every budget. Installation of a warm floor is simple and it is qui...
Laying facing bricks with your own hands

Thanks to the exterior finish, it is easy to change the architectural appearance of the house. Making the facade will allow the laying of facing bricks with their own hands. The work requires accura...
algorithm of actions for its manufacture
The modern interior of the apartment includes many necessary pieces of furniture, without which it is difficult to imagine everyday life. The same should be said about coffee tables that can be pla...