What could be better than relaxing at the cottage on a fine summer day, especially if you know how to make a hammock that will give you a lot of pleasant emotions. To do this, you will need the following materials:
- high-strength ropes;
- strong fabric of the colors you like;
- sewing machine and having minimal skills.
When sewing a hammock, a lot of people who plan to rest in it are very important, and the colors should be selected according to the upholstery of other furniture in the garden.
The choice of quality and quantity of material
 Materials for hammock
Among the huge selection durable fabrics should be given preference to canvases having a width of 3.6 m, although material with a width of 1.4 m can also be an alternative. When choosing a canvas for a hammock, keep in mind that sewing on a conventional machine will be difficult.
 Possible scheme
To determine the length of the hammock, you need to add to the height of the tallest family member 60 cm, which will fall on the allowance on both sides under the drawstring for the ropes. Prepare machine needles No. 90-120, measuring tape, triangle, sharp scissors and a knife.
Alignment of edges
 Hammock elements
If this is not done, then the process of working uneven edges will cause a lot of difficulties, because it is necessary to align them with scissors. On both narrow sides at a distance of 18 cm from each other, apply the markings, according to which the fabric should be cut into 30 cm. These places are intended for making the drawstring under the rope. This should be done as follows:
- cut the edges from the narrow sides of the material with a triangle;
- make the necessary markings;
- when making cuts, make sure that they are positioned along the course of a thread of fabric.
Filing of the material
You do not need a huge sewing experience in order to build a hammock, and all operations are easily performed on a household sewing machine. Hem all the edges of the material with a bend of 10 mm. Since the maximum load will act on the ends of the slits, in these places it is necessary to make additional zigzag stitches more durable threads.
Drawstring
 Making the attachment
After finishing the edges, proceed to the drawstrings located from the narrower ends of the material and necessary for pulling the rope. The sections with notches are folded into two layers, the first of which is 30 mm, and the second - until the end of the slot. These places are stitched with double stitches: at a distance of 10 mm and 90 mm from the top edge. Do not forget to secure the seams.
Formation of loops and insertion of the rope
 Combining the loops The rope is passed through the manufactured drawstring. In total, you will need 40 m of rope. Pull the rope through the link and leave a margin of 180 cm, and pull 1 meter from each slot.
Since the rope is rather coarse, when pulling on it, be careful not to break the integrity of the seams. Using the knot "bayonet with two shlagami" tie the two ends of the rope on one side, stretching 4 loops in the middle slightly forward.
Combining the resulting loops into one
 Winding the loops Wrap all the received loops with the help of a cotton rope, gathering them together in your hand. For quality winding you need about 10 meters of thin rope. Before winding the loops, they must be carefully straightened and tied behind the top of the bend. The transverse winding is done only after a longitudinal loop has been laid on it and a thin rope has been carefully fixed. The longitudinal locking loop should be approximately 40 cm long. It is also made of a thin rope used for winding. The end of the rope protruding from under the first layer of the winding should be 10 cm.
The function of the longitudinal loop is to fix the two ends of the winding using the knot. The last turns of the winding should not be crossed. They should be as tight and tight as possible against one another. Before winding the longitudinal part of the fixing loop, a rope is pulled through it. After completely winding the entire carrier loop, the two ends must be joined and wound together. After making two turns, tie the ends into a sturdy knot.
Fasteners
 How to attach a hammock
The hammock can be mounted on thick branches of a tree or, after passing another loop through the loops, tie it directly to the trunk. Also, for hanging you can fasten two reliable hooks on opposite sides, the main thing is to make sure that the fasteners are secure.
To be in the hammock was even more pleasant, you can sew a few small soft pillows from the same fabric as the bed that is being hung, or, on the contrary, take contrasting material. The filler for pillows is chosen arbitrarily - it can be either a fluff or a synthetic winterizer or holofiber.
Since the main functional purpose of a hammock is rest in the summer, it should be located in a shady windless area. Only in this case you can relax well, enjoying the creation of your own hands.
Photos
 Attachment Option
 Spacious hammock
 Hammock with one loop
 With two loops
 With fringe
 Hammock with long wings
 Hammock on stand
 White hammock with a batten
Video
We offer you a few video instructions.
Search
Related Articles
History of the Russian bath - Russian bath
Baths in Russia were built from time immemorial. It is known that when the chronicler Nestor began his work, these structures were already very popular. Many Europeans tried to adopt the tradition o...
Okosyachka do it yourself - installation okosyachki

When building a country house, special attention should be paid to such crucial elements of wooden structures as window and door covers. And this is connected with the well-known seasonal phenomenon...
Strapping heating boiler with their own hands
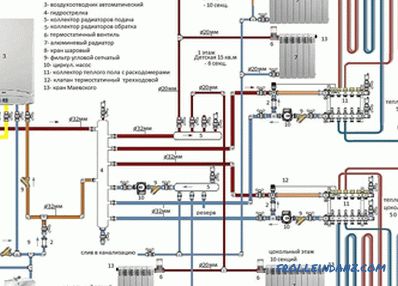
Heating the boiler strapping is an obligatory procedure that will be required if you decide to install the entire system yourself. This article will help to deal with many nuances and take into acco...
Ways of laying the floorboard on the base and on the logs (photo and video)
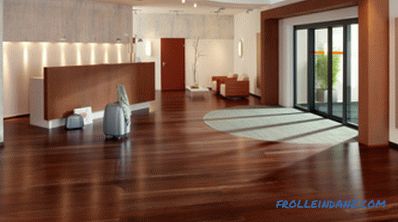
Parquet began to be laid on the floor in Russia under Peter I, during the construction of St. Petersburg. Since then, much has become different: the production of parquet, and materials for it, and...
Types of refrigerators for the home - a detailed review

Modern manufacturers offer a wide variety of models of household refrigerators, which differ not only in their design features, but also in their working principle. It is often quite difficult for a...