In thinking about the repair, we always want to get an excellent result, and at the same time do without unnecessary costs and meet the minimum time. Another important point is that the repair work does not cause much trouble, does not leave behind dirt and does not greatly interfere with the neighbors.
An excellent solution in this case would be the installation of plastic panels. Our instructions will help you understand how to attach plastic panels. They are easily mounted on the walls or ceiling and for this you do not need to pre-level the surface.
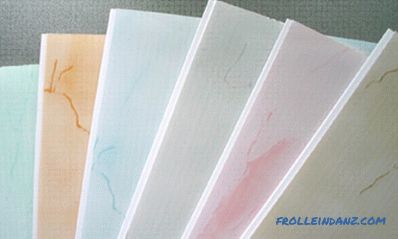
Plastic panels are easy to clean and are ideal for rooms with high humidity (bathroom, sauna, boiler room). A variety of colors and textures will help create a unique and cozy interior. For the installation of such panels is enough to have on hand a few tools.
Necessary tools and preliminary preparation
Tools required for fixing plastic panels will be found in almost every home:
- electric drill;
- hacksaw;
- scissors and hacksaw;
- screwdriver or screwdriver;
- tape measure, construction level, pencil or marker;
- hammer, stapler;
- stepladder.
First, measure the work surface with a tape measure, this will allow you to correctly calculate the required amount of materials.
The surface must be free from wallpaper. If the panels will stick, then the walls or tiles must be cleaned of paint and dust.
Before installation it is recommended to withstand plastic panels for at least half an hour at room temperature. Do not rush to remove the protective film before the completion of the installation work, it will help to maintain the presentation of the panels.
Features of installation and procedure
The fixing of the panels is carried out either directly on the wall or on a crate prepared in advance. To be mounted on the wall, it must be perfectly flat. Crate is wooden bars or slats that are screwed to the surface at a certain distance from each other. For walls, the width between the slats should not exceed 30 - 40 cm, for the ceiling - no more than 30 cm. Slats for the sheathing are mounted on the wall perpendicularly relative to the direction of the panels.
If the wall to which the laths are fastened is wooden or any other into which self-tapping screws are easily screwed in, then for fastening the bars it is best to use them. If the wall is concrete or brick, then it is best to fix the bars with dowel-nails or with the help of ordinary dowels and screws.
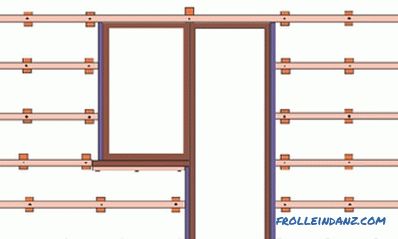
Example of fastening the lathing under plastic panels.
Before you start work, you must understand how to properly fasten plastic panels to the wall.
- If you decide to fasten the panels to the crate with nails, then keep in mind that re-use of the material will be impossible, because, most likely, during the dismantling the integrity of the panel will be violated.
- The best method of mounting is with the help of clamps.
- But the use of staples, which are driven in with a special stapler, is also a good option.
- Another good option for attaching panels is screws.
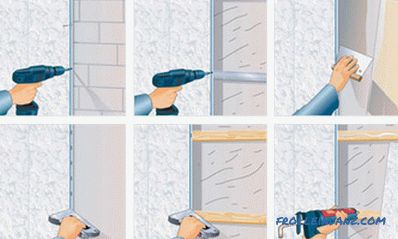
The most common methods of fixing plastic panels.
After you have decided on the method of fixing the panels, you need to do the following:
First install the fittings: the final element, external or internal angle. If the panel covers the wall to the ceiling, then fix the ceiling plinth on the upper timber.
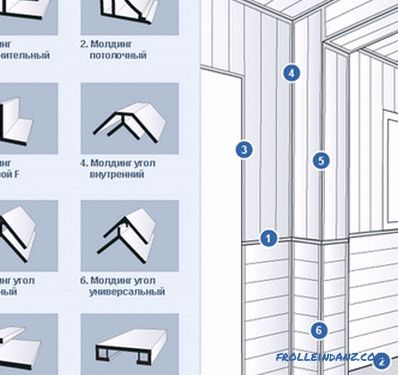
Available types of accessories for plastic panels.
Insert the panel into the fastener with a narrow mounting shelf. The panel is fixed on the side of the wide mounting shelf with nails or brackets.

After making sure that the first panel is installed level, insert the next, narrow end into the groove of the previous panel. Try to fit the panels tightly to each other.
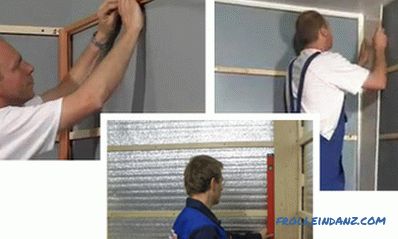
Installation of the necessary fittings and the first plastic panel.
The last plastic panel that completes the row must be inserted with force between the finishing element and the previous panel. If the panel needs to be reduced in width, then cut the excess with a knife, moving along the panel.
Video: Mounting of battens, fittings and PVC panels
Features of mounting plastic panels on walls
If the room is dry and the walls are even, then the panels can attach directly to the wall without using a batten.
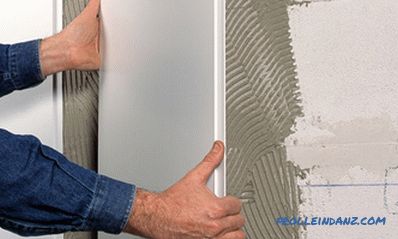
Fastening the panels to glue directly onto the walls without using a batten.
In a room with high humidity, a plastic or metal mounting profile should be used as a batten. In this case, the panels are attached to the rails with special clips, which greatly facilitates the installation and disassembly of the structure.
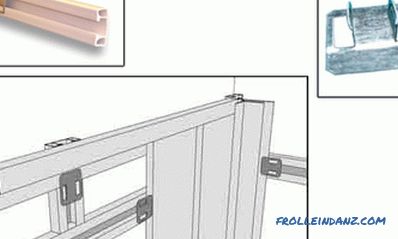
Fastening panels using a plastic profile with special clips.
The expansion of the material with a change in temperature should be taken into account, so when adjusting the panels to a height, leave a small gap. If a wide bar is used for the batten, a heater or soundproofing material can be placed in the resulting space between the wall and the panels.
Features of installation of plastic panels on the ceiling
Now let's look at how to fasten plastic panels to the ceiling. Before installation, it is necessary to determine the distance between the panels and the ceiling. This gap will depend on the type of lighting. If you plan to install built-in lights, the distance should be at least 10-15 cm, so you can completely hide the wiring. Mark the places of the luminaires in advance with a pencil, cut out the holes and install the bases of the lighting devices.
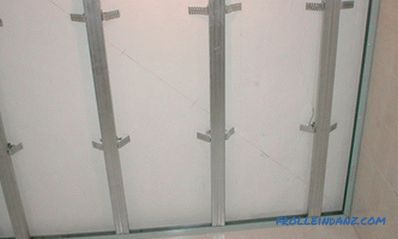
Metal crate for mounting plastic panels on the ceiling in the bathroom.
Next, you perform the same actions as when installing the panels on the walls. In a room with a flat ceiling, you can do without crates. Ceiling plinth before starting work, install on three walls. Use the building level for even placement of panels.
When installing plastic panels in a room with high humidity, fill the ceiling gaps with silicone sealant to achieve full waterproof performance.
Useful tips for installing plastic panels:
1. Cut and drill the panels, turning them face up. Use a hacksaw, hand saw or construction knife for cutting. Always wear special glasses to protect your eyes.
2. Apply the glue directly to the wall. Use smooth lines to draw a grid, leaving no empty areas. Use only "liquid nails" special construction glue.
3. When hammering nails into the panel during installation, be careful not to hit the hammer on the surface, otherwise there will be dents.
4. Clean plastic panels with soap and water. Do not use abrasive cleaners, coarse scourers or solvent-based cleaners.
Now you know how to fix plastic panels to the wall and how to care for them. Installing plastic panels does not require much time and power to any beginner. By choosing this easy to install material, you can create a unique interior with your own hands. Among the variety of panels that imitate stone, wood, paper of various colors, you will definitely find an option to your liking.
Be sure to check out the video below, it shows very clearly the installation process of plastic panels.
Video: PVC wall panels and ceiling decoration

