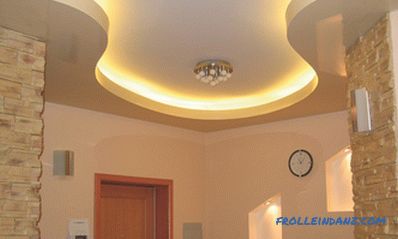
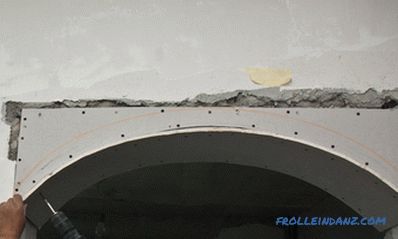
Drywall is usually used to create perfectly flat surfaces. However, curved plasterboard interior objects - arches of doorways, embossed multi-level ceilings, and niches with curved lines are becoming increasingly popular among designers and homeowners. You can create such masterpieces yourself. All you need is materials, tools and our detailed instructions. Our advice will be useful not only to the dressers, who by virtue of their professional duties deal with plasterboard almost every day, but also to ordinary owners of apartments and houses.
If you decide to diversify the interior of your home with one of these unique objects, you first need to learn how to bend drywall and how to make a curved frame for fixing it. And our article will help you with this.
How to bend drywall
In order to give a drywall sheet a curved shape, you will need the following:
Materials:
- gypsum plasterboard;
- plasterboard self-tapping screws.
Tools:
- T-square or square, tape measure, pencil, knife with replaceable blades;
- roller, garden sprayer or sponge.
First of all, you need to cut a piece of drywall of the size you need. This operation is quite simple: put a square along the edge of a sheet of drywall and with a knife make a deep cut. Then bend the sheet along the cutting line to break the layer of plaster. And the last thing you have to do is cut the paper layer from the opposite side. Do not forget to make sure that the cut fragment suits you in size.
- For details, see the material: How and how to cut drywall and make holes in it.
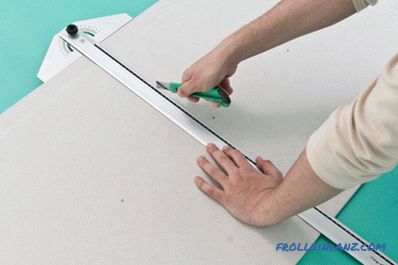
Cutting drywall.
There are two ways to make a drywall sheet curved - wetting its surface and applying parallel cuts. The first method is used in the case when you only need to slightly bend the plasterboard. The second method will be useful when the sheet needs to be given greater curvature. In the latter case, there is an alternative: you can use two layers of drywall with a thickness of 6. 5 mm (the so-called arched drywall), because it bends more easily, or a layer of 6. 5 mm plywood plus a layer of 6. 5 mm of drywall.
Relying on your own experience, we recommend that you begin to work with a large sheet of drywall before you start working with a large sheet of drywall. Having done this several times, you will understand how easy it is to bend drywall at home - you can do this kind of work.
Method One: cuts on one side of a sheet
This method is mainly used to create door arches where you need to bend drywall over a large radius. In this case, in order to bend a sheet of drywall, you have to make notches on it every 3-5 cm. Put the sheet on the floor or lean it against the wall and, using a ruler (in our case - the building level), make quite a few parallel cuts. Cutting the paper layer from one side of the drywall sheet makes it easy to bend it, while the remaining intact layer of paper on the other side will keep the sheet from breaking.
Tip: Remember that you should make notches on the outer surface of the future curve, otherwise you will not be able to bend the drywall correctly.
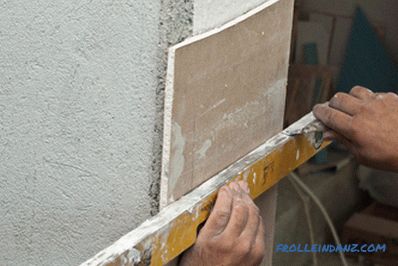
Notching with a knife.
Next, you must break the plaster in the places of the cuts to make the sheet very flexible. If you did everything correctly, the drywall will bend very easily, and you can easily give it the desired shape.
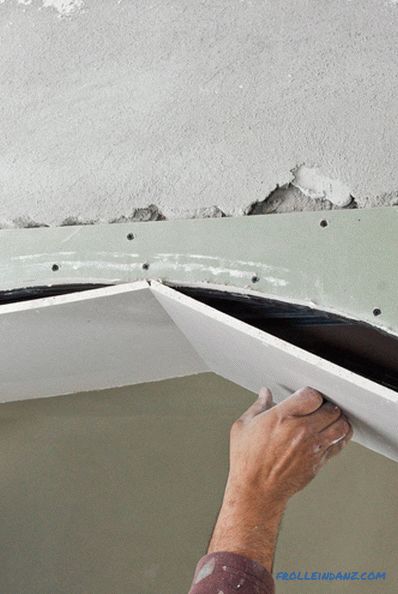
Bending of drywall along an arc.
Now it remains to align the fragment of the future arch with the plane of the wall and fix it with self-tapping screws. Perform all operations with great care so that the result of the work meets your expectations.
We recommend that you fasten a curved piece of drywall every 3-5 cm. Use a screwdriver with adjustable torque, this will allow you to tighten the screws quickly and correctly. In addition, be sure to verify the strength of the metal frame to which you are attaching drywall, otherwise the arch will not be sufficiently rigid.
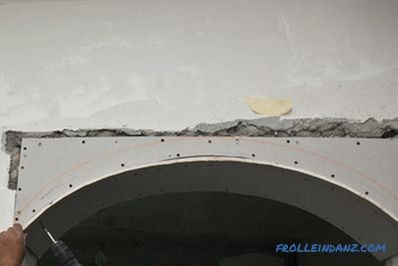
Fastening a curved sheet of drywall.
It may seem to you that the arch you created does not look attractive enough. We will hasten to assure you that you will not notice any flaws after pasting the edges with reinforcing mesh and applying several layers of putty.
Method Two: wetting with water
It is possible to give a drywall a curved shape by moistening the back surface of the sheet. If you need to bend the sheet strongly enough, you should wet not only the back, but also its front side.Sheets of plasterboard must be laid on a flat concrete floor and moistened with a roller or garden sprayer. If you need to moisten the drywall strongly enough, you can use a sponge for this purpose. Remember that excess water can easily damage the material, so drywall should be moistened gradually.
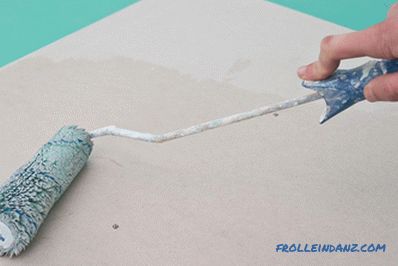
Photo 5. Moistening a drywall sheet.
Before you begin to bend, water should be absorbed into the drywall for about an hour. Work with great care, as the damp panel is very easy to damage. After you give the drywall sheet the desired shape, you must ventilate the room to get rid of excess moisture.
Tip: Do not moisten the sheet too much, otherwise the paper will tear easily.
Having fixed one of the edges of the sheet, gradually bend it, screwing in each subsequent self-tapping screw. Act with great care and patience to get a smooth curve. The screws must be located at a distance of no more than 10-15 cm from each other, otherwise your curve will turn out wavy.
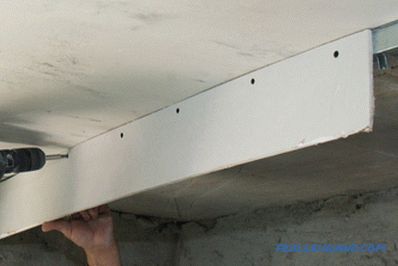
Fixing curved drywall with self-tapping screws.
Twist the screws carefully in order not to damage the drywall, otherwise you will have to spend more effort on finishing the surface leveling with putty.
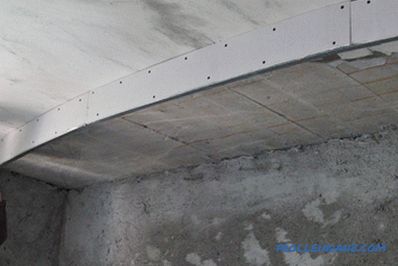
Curved plasterboard construction.
As you can see, it is not as difficult to give a drywall a curved shape as it might seem at first glance. You just have to use the right tools and methods to carry out the work in a professional manner.
Tip: To form bends with a small radius of curvature, you should make cuts on the back surface of the drywall sheet every 3-5 cm. If you need to bend the sheet only slightly, you should wet it with roller or sponge. We recommend at the very beginning of work to think about the sequence of your actions, this will help you to avoid possible mistakes.
How to bend a metal profile for plasterboard Bending profiles is easy if you use the right tools and methods. Having learned to bend steel profiles, you can create door arches and other curvilinear interior objects, so we recommend that you pay attention to our advice.
There are two main types of metal profiles for drywall: carrier and guide profiles. In addition, there is a special arched profile. The choice of the size of the metal profile depends on the specific task.
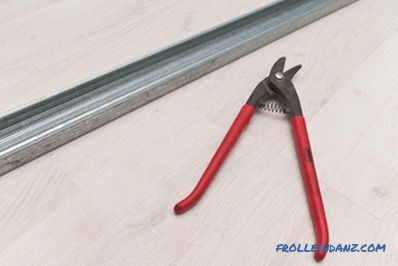
Metal profile.
In most cases, the guide profiles are installed in the lower and upper parts of the frame, and the carrier profiles are placed vertically and fixed inside the guide channels. The rack-mount profiles must remain perfectly straight, as they bear the weight of the gypsum boards. You must remember that guide profiles, not rack-mount ones, are subject to bending. If you want to create an arch or any other curved plasterboard surface, you must bend the guide profiles, and after fixing them, place the rack profiles in their channels. Use 1/2 ”No. 8 flat head self-tapping screws to hold metal profiles together.
If you are going to bend a metal profile, you will need the following:
Materials:
- metal profiles;
- 1/2 "self-tapping screws No. 8 with a flat head.
Tools:
- metal shears;
- screwdriver or screwdriver;
- protective gloves.
Time:
- 10-20 minutes for each steel profile.
How to bend a metal profile
To begin with, select the bearing and guiding metal profiles that are suitable for your purposes. Using sharp metal shears, cut the profile to the desired length.
Tip: Wear protective gloves to avoid cuts on sharp metal edges.
The best way to bend a metal profile is to make cuts on its sides every 5-8 cm. For these purposes, you will need metal shears for a direct cut. Remember that the cuts should be parallel to each other, otherwise you will not be able to bend the profile correctly.
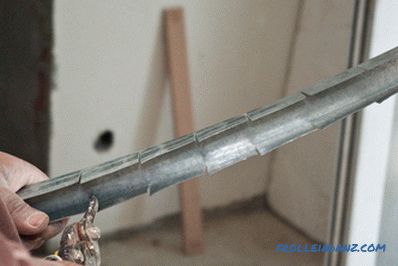
To bend a metal profile, make cuts on its sides.
After you have made the cuts, you must bend the profile to give it the desired shape. Make sure your hands are protected by gloves, otherwise you can easily cut yourself on sharp metal edges.
If you are making a door arch, attach the curved guide profile to the plasterboard wall already in place.Use for this self-tapping screws for drywall (for drywall thickness of 12. 5 mm self-tapping screws 3. 5x41 are the best choice, and for drywall thickness of 9. 5 mm smaller fasteners are quite suitable).
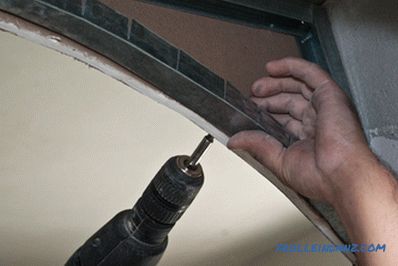
Using a curved metal profile to create a door arch.
If you need to attach a metal profile to a ceiling or wall, then you will have to cut small holes in the walls of the metal profile with thin scissors for easy mounting. Take your time, otherwise you may damage the profile. After that, secure it to the ceiling / wall with self-tapping screws. In the presented photos you can see this procedure from different viewing angles.
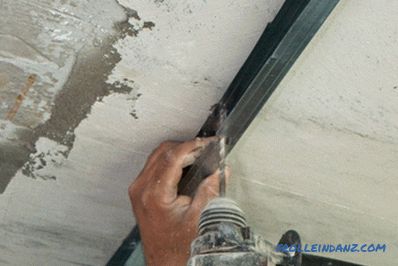
Fastening of a curved metal profile.
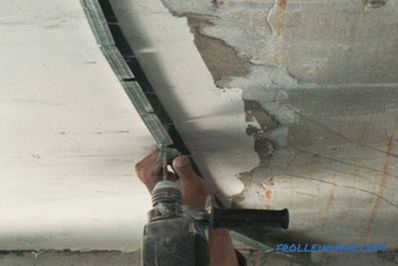
Fastening a curved metal profile to the ceiling.
If you want to attach a metal profile to a specific ceiling / wall, you must first make several test holes in the bearing surface with a drill.
To attach the profile for drywall to the ceiling, you should use self-tapping screws every 25 cm. Use a level to make sure that you are installing the profile correctly.
After fixing the curved profile, you need to assemble the entire metal profile design.
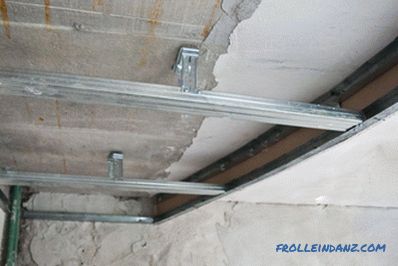
A framework from a metal profile with a curvilinear element.
Now, for sure, you understood how to bend the drywall and the metal profile for it. With such work, you can easily cope on your own, without the involvement of professionals. It is enough to have on hand all the necessary materials and tools and follow our instructions exactly.
Source of translation: www. howtospecialist. com
