Are you dreaming about your own home where your family will live? Then you should learn about the new approach to construction. It is about building a house of aerated concrete. Such a home will serve you for many years and will not lose its original performance characteristics. In the article we will explain how to build a house of aerated concrete with your own hands from the foundation to the roof, as well as video and photo instructions.
As for aerated concrete, this is a relatively new material used for the construction of walls of low-rise buildings. A house of aerated concrete for more than one decade retains heat and sound insulation characteristics, frost resistance, strength and density. With all this, the cost of aerated concrete is relatively low, which is why in recent years aerated concrete blocks have been particularly popular.
A house built of aerated concrete blocks is less likely to ignite. If you build your home from this material, you will get a good guarantee of protection of property against ignition.
Aerated concrete blocks are made on the basis of quartz sand, as well as cement with impurities of water and lime. Under the influence of pressure and temperature on this mixture, its active saturation with bubbles occurs. So, aerated concrete in the process of solidification turns porous in structure. This technology makes it possible to increase the volume of the material, as well as to ensure its lightness, durability and other positive properties, as discussed above.
Site preparation for construction. Purchase and storage of materials
After you receive all the design and estimate documentation, you can safely begin the planning of the construction site. At this point, you should take care to install the fence. After you can carry out installation of lighting, as well as prepare scaffolding. In addition, it is very important to invite surveyors to conduct special measurements that will help them determine the position of the axes of your future home and the zero horizon. After that, bring outdoor communications.
It is very important that during transportation the aerated concrete blocks are packed in an airtight film, because moisture can destroy the material already at this stage. In addition, the blocks should be carefully strengthened during transport. This event will help prevent possible mechanical damage.
Aerated concrete should be stored in a dry place, always under a canopy. It must be protected from precipitation. The blocks must be laid on a flat platform.
Arrangement of a reliable foundation and basement floor
 Foundation for aerated concrete
The foundation of each house is a strong and reliable foundation. It must withstand the load on the subgrade. Before you start building walls, it is important to lay a solid foundation. You can pour a concrete slab or build a monolithic strip foundation.
In fact, a monolithic foundation is concrete with a higher level of strength, additionally reinforced with rigid pins having a diameter of approximately 1.5 cm. The reinforcement is placed in 2 layers. If your land plot is located at a place with a high level of groundwater or on heaving soils, then the best solution would be to build a non-buried slab foundation. The construction of a pile foundation with a monolithic grillage is also allowed.
Before the start of hard work on the arrangement of the foundation should be cleaned and evened out a place under it. If you build a one- or two-story house, then you should build a monolithic foundation about 2 m deep and 40 cm wide. The pit should be dug around the entire perimeter of the future house. It is important to calculate the volume of concrete. Now you can start pouring the foundation. After he grabs and hardens, you can start the construction process for arranging the base.
The choice of material for fastening aerated concrete blocks. Glue or mortar?
 Glue or mortar
You can use glue or mortar to fix the blocks. Each of these materials has both certain advantages and disadvantages. With the use of glue, perfect joints are obtained, the smoothest masonry of the walls comes out. However, the glue during the operation produces toxins, and it costs more than the solution.
The solution consists of sand, cement, and water. Of course, working with him is a little more difficult, because you constantly have to measure the evenness of the walls. However, it is much easier to fix the unevenness of the laying on the mortar than when working with glue. There are no strict proportions when mixing the mortar, usually the masters make the 3: 1 ratio of sand and cement. Water is added to this dry mixture and mixed. If the solution is very liquid, then sand is added to it, otherwise water is added. If the mortar on the trowel does not flow between the teeth and does not solidify, then you have made its consistency correctly.
Features of laying walls
A special feature of aerated concrete blocks is their lightness, so that the connecting solution is not squeezed out, which means it does not flow out of the seams. This allows you to quickly lay walls. For the construction of bearing walls it is necessary to use blocks having a size of 375-400 mm. As for interior partitions, their dimensions may not exceed 250 mm. A specially designed tool is used to work with aerated concrete.
 Aerated concrete walls
Particular attention should be paid to the laying of the first row of aerated concrete. Before starting the process, be sure to perform waterproofing. The first row should be laid on the cement-sand mortar. Laying start from the highest corner of the house. The ends of the blocks have a groove and a comb, so they need not be joined with glue. On the first row of the wall, stretch the cord and check the level of the masonry level. If necessary, level the first row of blocks with a rubber mallet.
If during the laying of the first row of the wall you had a gap having a length less than a block, then you will need to do, so to speak, an additional block. For the implementation of the file, use an electric saw or an ordinary hacksaw, as well as a square. The frontal surface of the finishing concrete block is pre-coated with glue or mortar.
A connecting adhesive designed for laying aerated concrete blocks is chosen for thin joints. Clay should resemble sour cream. It is applied with a special trowel, after which it is smoothed over the surface of the block with a spatula.
After the laying of the first row is completed, rub down any irregularities using a grater. And then remove dust and dirt from the blocks. The process should be repeated after laying each subsequent row. It is very important that the rows are stacked with an offset of approximately 8-10 cm in relation to the previous one. Remove any glue or mortar residues with a trowel. The laying of the second row of blocks can only begin one or two hours after the first one has been laid. To protect the walls from moisture, cover the areas with polyethylene film.
 U-block for jumpers
Reinforced aerated jumpers are applicable only for window and door openings. They are mounted with a special wooden support. The part of the U-shaped block that is thicker should be located on the outside of the house, and it is on this side that the insulation layer should be laid, for example, mineral wool. In their cavity, it is necessary to install a reinforcement cage consisting of five or six rows. And after it you need to fill with fine-grained concrete. Concrete must be compacted and then leveled.
 Lintels of aerated concrete house table
In the process of building internal walls, it is necessary to make hydro and noise insulation. In addition, it should be noted that every second row should be connected to the bearing wall with anchors or brackets using galvanized punched strip.
Each constructed building in the process of operation is subjected to very different loads, among which we will distinguish soil deposition, wind and temperature drops. In order to avoid deformation, the laying of aerated concrete reinforced.
Experts strongly recommend carrying out the reinforcement of the first and every fourth row, the area above the windows, as well as belts for interfloor overlaps.
How to do it? Cut through the grooves, clean the resulting cavities from dust, lay down the armature, and then apply the solution completely.
Expansion joints are also used to avoid cracking. They are usually located in those places where there is a change in the thickness or height of the walls. Expansion joints are made between walls having different temperatures, when connecting aerated concrete with other materials, in long unreinforced walls, etc. Such seams are compacted with polyethylene foam and mineral wool, inside and outside they are treated with a special sealant
Overlapping and inclined fittings surfaces
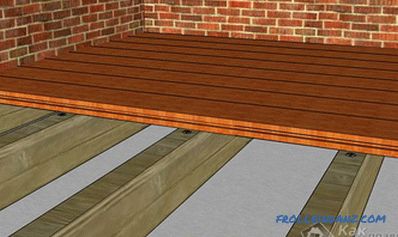
 Installation of floors
Interfloor floor slabs should be supported on a ring reinforced belt. The joints that form between the floor slabs should be filled with mortar. And outside the ends should be closed with clumsy blocks.
You can use either hollow-core concrete slabs or their gas-concrete counterparts to overlap. Aerated concrete plates have a high bearing capacity, low thermal conductivity, high refractoriness. The use of hollow-core concrete slabs is acceptable only if the distance between the load-bearing walls does not exceed or even less than 6 m. This type of slab should rest on a distribution belt made of reinforced concrete.
 Aerated concrete floor plan
With proper construction of a gas concrete house you can avoid the formation of so-called cold bridges where most often there are large heat losses. As for the windows, the foundation and the roof, then they are insulated in the standard order.
Inclined surfaces, as well as openings with complex shapes, can be cut manually with an ordinary saw. This is due to the fact that aerated concrete is easy to drill and cut. Even the mounting holes can be cut with a drill with a special cutter. Electricity grooves are made by a wall chaser.
Finishing work
 Facing aerated concrete with brick
A house built of aerated concrete blocks should be plastered both inside and outside. However, you can use only a special type of plaster, designed for aerated concrete. This approach will help you protect the walls from destruction. Be sure to level the surface with a grater before starting the process, and fill the chips with a solution.
The facade finish can be started only after the roofing and curtain-bar overhangs were installed above the entrances, and a blind area was built around the building. You should first level the surface of the facade with a float and fill the chipped and chipped mortar. If you decide to hold a brick lining, it is recommended to make it with a gap. Vibropressed brick is perfect for this purpose. The abundance of different colors and textured surfaces will allow you to make your home unique.
Internal contour insulation is recommended in aerated concrete buildings. Lining can serve as an interior wall decoration. This approach will allow you to lay an insulator, as well as hide all errors in the masonry blocks.
 Finishing facades of houses from aerated concrete scheme
Facing the walls can be attached simple or strip anchor, z-anchor.
 Siding
If you have any questions about the stated material, write comments to the article. Maybe you already have experience in building houses from aerated concrete blocks, then share your experience. It may be useful to our readers.
See also:
- strip foundation for a house with your own hands;
- ways to drill a well with your own hands;
- a gas heating boiler with your own hands.
Photos
 Foundation for the house
 Masonry walls
 Concrete lintels
 Shaped lintels
 Design of the doorway
 Jumper from the steel angle
 Installation of jumpers
 Reinforced belt
 Laying floors
 General view of the house
Search
Related Articles
Arrangement of the well with your own hands - we arrange the well independently
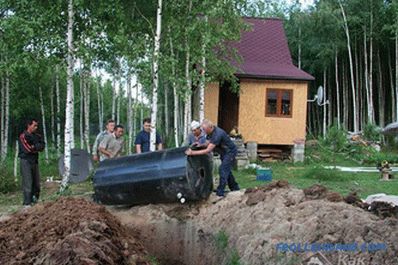
Although it is already a lot to drill a well, this is not all. Of course, it is required to restore order, but, even if there is no desire to make beauty, you still need to perform a set of works fo...
Making a kitchen set own hands (photos and videos)
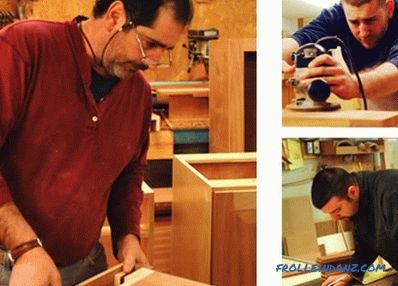
The independent production of the headset will not only save on its assembly by experts, but also get a beautiful and functional kitchen that satisfies all needs and differs little from factory-mad...
What to do first wallpaper or suspended ceiling
When repairing it is necessary to observe the sequence of finishing, in order not to dirty and not spoil the ceiling during wall decoration, for example. That is why questions arise, similar to what...
Slag stone bath with his own hands
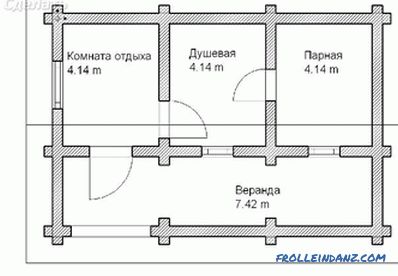
Wall blocks made of concrete mixture are a popular material for the construction of buildings. Due to the considerable size of the cinder block, less time is spent on the construction. The material...
How to make a wooden floor in the garage with their own hands
A garage can be either a separate independent structure, or it can be attached to or built into a building. Regardless of the size and shape of the building, everything inside should be properly equ...