The circular saw is a convenient and functional tool for cutting wood pieces. You can use it to cut sheets of plywood, saw boards, cut timber, baseboards, platbands, etc. But for a large amount of work, for example, when building a house, it is more convenient to use a stationary device option. How to make a circular paper with your own hands from a hand tool?
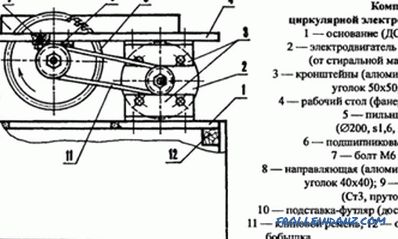
Scheme of a self-made circular saw.
Design and materials for a stationary saw
A homemade circular saw can be made with its own hands by fastening a hand tool on a stable base. In the simplest version, the device is mounted on wooden goats or on a table mounted of plywood and boards. The tool is attached to the bottom of the plywood sheet, for the toothed disk is cut in the table top.
The design parameters of the machine depend on the size of the material being processed. In accordance with it, the power of a hand tool (800-1200 W or more) is selected. To perform a clean cut, it is better to install a model with a speed of 3000-4000 revolutions.
For the manufacture of the machine will require materials from wood, fasteners and tools:
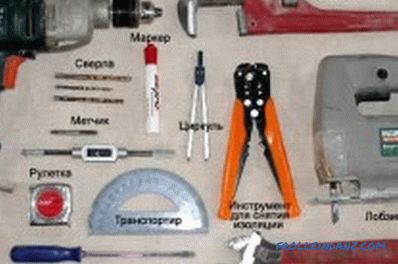
Tools for making a homemade circular saw.
- plywood from 20 mm thick;
- board for stiffeners and legs (50 * 100 mm);
- sandpaper, wood glue and varnish ;
- bolts, screws, clamps;
- tape measure, pencil, ruler;
- jigsaw, drill, screwdriver.
The height of the table is selected according to the height of the master and is usually about 1 m, the length of the table-top depends on the size of the materials to be processed.
Making the worktop
The working surface is sawn with an electric jigsaw of plywood according to the accepted dimensions. Preparation is processed by an emery paper or a grinder. The edges of the tabletop are milled.
On the underside of the sheet, markings are made for fixing the hand saw. The sector for a hole for a disk is planned. If you plan to cut the workpieces at different angles, the slot should have a trapezoidal contour with the extension down. The groove is cut by a manual circular saw; holes of ø10 mm are pre-drilled at the ends of the intended sector. Also, holes must be made in the tool frame and tabletop for mounting on the bolts.
Next, the rigidity frame is marked for the horizontal surface of the table. The edges along the perimeter should retreat 5-10 cm from the edge of the table top. The boards that have been cut to size should be applied with the end to the markings on the bottom surface of the sheet, and their contours are outlined with a pencil.
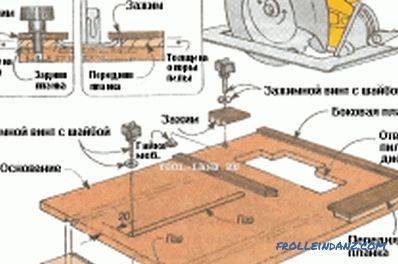
Tabletop layout for a circular saw.
A center line is drawn in the middle of the marked contour of the frame. It marked places under the screws for attaching the ribs. For fasteners, drill through holes with a chamfer on top for mounting the caps. Screws should be screwed in after 10-20 cm, from the corners of the frame - at a distance of 5 cm.
Boards are put on the joiner's glue along the intended perimeter and clamped with clamps. After the glue dries, without removing the clamping devices, the screws are screwed in with the caps screwed in. In the corners in the end of the frame is screwed on 2 screws. Then it is necessary to attach stable legs to the finished worktop.
Assembling the table for the circulating saw
The boards prepared for the legs are cut to length at a slight angle with tapering downwards. The upper ends are also mowed, so that the structure stands with a slight spread. The legs are attached to the tabletop frame with bolts through the drilled holes. For better joint strength, square bars can be included in the screed, glued into the inner corners of the frame.
It remains to install the working mechanism in the circular saw. The hand-held circular saw is mounted to the table top of the machine below. The disk is inserted into the cut-out slot, the device is fixed with screws, the heads of which should be sunk into the plywood sheet from above and flush.
As a protective layer for the material and to improve the sliding of the workpieces, the tabletop and other wooden parts of the machine are varnished in several layers. The surface of the tabletop can be marked for trimming the ends of baseboards or platbands, which are prepared for docking "on the side".
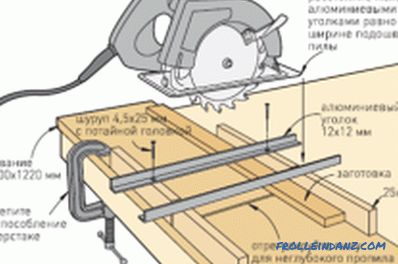
Schematic of mounting the table for a circular saw.
In another embodiment, the working plane of the machine is made of two metal plates. They are bolted to the frame, leaving a gap under the disk. The bolt holes are countersunk on top for recessing the heads. The strap to control the size of the material being cut can be fastened with clamps.
A more convenient stop for the sawn part is made of a steel corner with shelves 60 and 80 mm. Its length must be greater than the length of the table. The ends of the narrow shelf are cut off, and the wide one bends over the tabletop.Holes are drilled in the ears and thread for clamping bolts is cut. The guide bar from the corner is set on the template of the workpiece and fixed by bolts to the end of the table top.
With constant use of the machine, it is better to make the table from steel corners by welding.
The power button can be mounted on the tabletop frame or mounted on the workshop wall using an extended cable to connect the machine. The power key on the body of the saw can be bridged or simply fixed with a clamp. Access to the machine shutdown device must be secure.
Mini circular saw with your own hands
For cutting parts of small size, you can make a mini-machine without a desktop. As the electric drive for the sawing mechanism can serve as an old drill. Special shaft for insertion into the drill chuck will have to be ordered from the turner. A toothed disk and 2 bearings should be firmly mounted on it.
The frame for mounting the shaft is made of two parallel pieces of a board of hard wood with holes for pressing in bearings. The working surface can be made of hardboard or plexiglass. The drill and the frame of the device are attached to a board with a thickness of 30-40 mm. The tool, installed upward by the handle, must be securely fastened with a clamp to the base in the cylindrical part of the body near the cartridge. The board, which serves as the base of the mini-circular, is attracted to the usual table with clamps. The housing of the inverted drill and the base plate must be flush.
The guide bar for a mini circular saw can be made from a bar 50 * 50 mm. At one end of its rigidly fixed stop, cut from the board. It should fit to the end of the working surface. In the other end of the guide bar pin is fastened with thread. A second stop element (bar) is put on it through a hole drilled in it. The stops are tightened by twisting the lamb nut on the stud. The guide stop is installed at the required distance from the disk and is fixed as a clamp.
The self-made mini circular saw allows you to saw off parts of sufficiently small thickness.
At your discretion, you can improve a homemade circular saw in a simple version by installing additional elements and using other materials. It is possible to improve the functionality of the machine by equipping it with a carriage for feeding material, changing the attachment of the working mechanism, installing other optional devices for controlling the saw.
Didn't find the answer in the article? More information on the topic:
