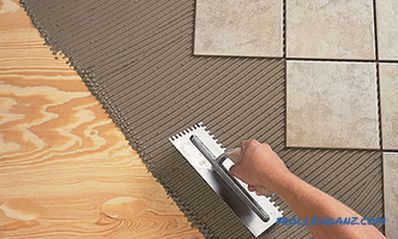
Ceramic tile is a universal finishing material that is used most often for floors and walls. The material has many advantages. It is beautiful, durable, easy to clean, has a significant life. Laying ceramic tiles on plywood (or any other base) is not so difficult. It is not necessary to have a great experience of the tiler, although the skills do not interfere. The process of laying tile is as follows:
")
Ceramic tile is the most popular material for decorating bathroom walls and kitchens due to its shock resistance and water resistance.
- The foundation is being prepared. It should be as smooth as possible, if necessary, work on the alignment.
- Kneading tile glue is better in small portions (especially if there is no experience in laying material), since the glue dries quickly in air and becomes unusable. Glue is applied on the basis, seamy side of the material.
- A special mix is used for grouting.
A concrete screed can be used as the base for a tile, but it is not always possible to wait until the concrete dries . That is why plywood is often used for floors. This base is an analogue screed, but solutions are not used. First, lags are laid on the floor, after which a loose heat insulator is poured. It is best to apply for this claydite. Further on the prepared basis plywood fastens.
Required materials and tools
In order to quickly, efficiently and simply lay the tile, you need to prepare all the materials and tools in advance. To do this, you need:
")
Laying the tile on plywood.
- Ceramic tile of the chosen type (for the floor tile or large format porcelain tile is usually used). Calculation of tiles is made on the area of the room with the addition of trimming.
- Tile adhesive (or special parquet), which is better suited for plywood base.
- Spatula dispenser for glue, rubber - for grouting.
- Building level to check the horizontal position of the base and the already laid row of tiles.
- Tile cutters, wire cutters and other tools that may be needed to cut the material. If there is a need to make holes, then a drill with special nozzles-crowns of the required diameter is used.
- Plastic cross-dividers.
- Water repellent, silicone formulations for hydroprotection.
- Clean rags, making it easy to remove excess glue and grout.
Calculation and preparation of glue
")
Possible layouts of tile laying.
Ceramic tile on plywood does not fit so hard. For gluing it is better to use a special two-component parquet glue, which not only provides excellent adhesion to the wooden surface, but also acts as a primer, high-quality waterproofing agent. The process of laying tile on the floor is simple. It includes the following steps:
- Calculation of material for work. The area of the room, option of laying (diagonal, direct, chaotic) are considered. In normal stacking, 10-15% is added to the resulting floor area for trimming. If a more complicated option is used, it is necessary to carry out the calculation in accordance with all the conditions.
- The laying does not begin with the first, but with the second row, so that the ornament is more accurate and attractive. For the first row may require trimming, but such tiles always fit in the last place. The second row should originate from the far corner of the room. Gradually, the work will move towards the exit. There are exceptions. For example, if a ceramic tile is laid out according to the "carpet" method or with the observance of another complex ornament, then at first it will go from the center. It is necessary to perform not only the markup, but also to determine the position of each element.
- The glue is laid on the base and on the back surface of the tile with a spatula in a small layer so that it will not be squeezed out during installation of the coating. The thick layer reduces the quality of the surface, making the tile vulnerable to the formation of cracks, kinks. Glue is applied to the surface of the floor and tile, after which the tile is pressed tightly to the base for a few seconds. To make the seams even, cross-dividers are placed at the joints. They are placed between the tiles, slightly receding from the corners: on each side there are 2 such crosses. Before tiling, they are removed. It is best to use 2-3 mm dividers for standard ceramic floor tiles, but if temperature fluctuations are significant, it is recommended to take 5 mm crosses.
- The laying of ceramic tiles assumes that all the whole elements for the main area will be laid out first, and the niches and other hard-to-reach areas where the pipes pass are finalized.Used for cutting tile cutter, it can be a manual household or professional. To create holes, a drill and a set of crowns with the required diameter are used. In some cases, use pliers. It is for cutting and taken stock tiles, as tile can crack. After cutting, there are very small pieces that are no longer suitable for floor decoration.
It must be remembered that the glue dries quickly in air: it is usually unsuitable for gluing after 2-4 hours. Therefore, you need to knead it in small portions, it is applied to a small area, maximum per square meter. A mixer and a convenient container, such as a plastic bucket, are used for mixing.
Features of installation of ceramic tiles on plywood
")
Scheme of staged tile laying on the wall.
Laying tiles on plywood differs in some features. Required preparation, leveling base. For this purpose, the construction on logs is used, the cross section of which is 50 * 70 mm. The plywood itself is taken only moisture resistant. PSF for 18 mm is well suited, but PSF for 12 mm can also be used. To work you need to take a two-component or water-dispersion glue. During the preparation of the base lags should be mounted in compliance with the pitch of 400 mm, but not more. To reinforce the base, glued double plywood is used, since one layer will not always be able to provide the required strength.
If you lay only one layer of plywood, kinks may appear in the seam area.
Parquet glue is used for bonding, it provides the necessary strength. Apply it better with a special spatula, which is called a dispenser. It has cuts on its work surface. Parquet glue is also ideal for gluing tiles to plywood. Advantages of the method:
")
Floor tiling schemes of plywood tiles.
- Provides the best conditions for finishing wooden floors, especially in dilapidated houses.
- The load is minimal while ensuring a high level of strength.
- Glue is ideal not only in terms of strength, but also to create the necessary conditions for waterproofing.
- The setting process is quick. It is possible to walk around the tile in about half an hour after the finishing work has been completed.
As soon as the glue dries, you can begin to grout the joints. Laying ceramic tiles can be done without grouting. The tile is glued end to end, but experts do not recommend doing this. The consumption of the trowel mixture is small, but the surface eventually turns out beautiful, protected from the penetration of moisture. For work the rubber pallet is used. The mass is carefully inserted into each seam, before that the dividers are removed. The last step may be the treatment of water repellent, if the tile is placed in the kitchen, in the bathroom. Grouting is not done a day after laying, but on the same day that the coating was installed.
Laying ceramic tiles on a plywood base is another way to decorate the surface. It is important to properly prepare the base, observing all the features of the work. For the tile itself, you can not use tile adhesive, and parquet. It provides optimum conditions.
Didn't find the answer in the article? More information on the topic:
-
")
Making the table in the bath with your own hands
It is easy to build a table in a bath with your own hands. Materials for the table use different, often take those that are on hand. Used wood has a number of requirements.
Search
Related Articles
How to choose a screwdriver for the home: characteristics and applications (video)

The choice of the screwdriver is not easy and quite responsible. There are many brands on the market today, and almost everyone has a wide range of products ranging from budget to professional devi...
Cellular polycarbonate - technical details in detail
Polymeric materials are widely used in the construction of buildings and structures for various purposes. Cellular polycarbonate is a two- or three-layer panel with longitudinal stiffeners located b...
Do-it-yourself gazebo installation: arrangement and installation

At the dacha, a gazebo is a decoration of the garden and the best place to relax. Conveniently located in it, you can enjoy nature and fresh air in any weather. The construction of an arbor with yo...
How to clean the chimney pipe with your own hands
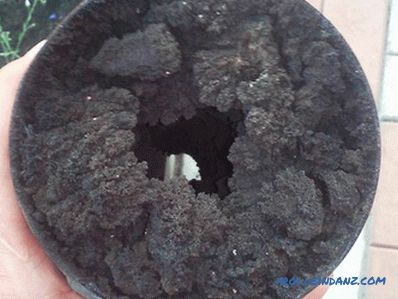
Whether we like it or not, but the owners of private houses constantly have to deal with the need to maintain stoves, fireplaces and heating boilers running on liquid or solid fuel. The need for thi...
How to put a tile on a wooden floor with your own hands: ways, steps (video)
How to lay tiles on wooden floor? This is a question that excites many, since it is rather difficult to combine incompatible materials. This is due to the property of wood to expand and narrow depe...