The fastening of the timber to the wall is present in the process of any construction of a country or private house. Installation technology is relatively simple and consists of several stages.

Schemes of fastening the beam to the wall.
The fastening of the beam occurs at a certain distance between each other. The gap between fasteners is made depending on the cross section of the timber and, accordingly, the quality of the wall surface.
Thus, if the parameters of the beam are 4 * 5 cm or 5 * 6, then it is fixed every 80 cm. At the same time, this element is installed only after you have decided what you will use to sheathe the wall surface. Saving free space when finishing is also a major factor in the choice of cross-section of the timber.
When installing, do not forget to take into account irregularities, roughness and other deformations of the wall. In this case, you should choose building fasteners strictly in height - so you hide all the flaws. If in the house where you are engaged in plating, the surface consists of wood, then before fixing the timber it is necessary to thoroughly treat it with antiseptic or drying oil to prevent mold and the tree is not subjected to the negative effects of insects.
There are 2 methods of fastening the frame: soft and hard. Each of them has its own peculiarities of work.
What do you need to fix the timber to the walls?
You will need the following tools and materials:

Tools to work with bar.
- cant;
- antiseptic;
- linseed oil;
- hammer;
- nails;
- screws;
- ax;
- shabashka;
- drill;
- wooden chop;
- chisel;
- plane.
Fastening technology: soft method
This method is applied using U-type brackets. The method has both advantages and disadvantages. The main plus of the soft fixing on the wall of the beam is the speed of work, the minus is the unreliability of fixing the frame, the structure may collapse over time.
Among other shortcomings, the fragility of the timber is noted: the frame can be easily ruined by accidentally striking it. Therefore, it is worth thinking before you decide to do this work. However, there is still a solution: if the elements are stacked to finish the walls of plastic panels, then deformations, as a rule, are not observed.
It should be taken into account that the paneling of the panels with wooden frames is made perpendicular to the panels of the element. On the lower part of the wall the laying of the bar occurs more often than in the upper area. As a rule, the timber fastener to the wall at a height of up to 1.5 m is located every 0.4 m. Above this mark, the distance is longer and can be 0.6-0.7 m.
Such work can be done on their own. Installation of the frame does not require special skills in the field of construction, it is important only to strictly follow the instructions.
Features of mounting in a rigid way
The scheme of fastening a timber using the soft method with the help of brackets.
This method has been used for a long time and has proven itself from the best side. To fix the timber to the wall you need to start only with the following elements:
- nails;
- chops;
- sabashes.
The method is distinguished by its reliability, durability and durability of the structure.
Experts advise to make fixings on the walls in exactly the hard way, since there are no further problems with the deformation of the frame.
In the process, a bolt is used - a device for making holes. You should drill a hole to install the fasteners. It does not matter, a wall of concrete or brick - this tool will help you cope with the task.
Insert a wooden chop into the hole formed (hammer it into the hole). Further, in the chop it is necessary to drive a nail through shabashka or timber.
This method is used more often than the soft method of fasteners. However, despite the guarantee and quality of work, he has one major drawback - time. The process of wall covering takes you a lot of time and effort, which is so lacking in modern man.
Do-it-yourself installation: step-by-step instruction

Rigid mounting of the beam.
First of all, you need to make markup, which will be the basis for creating a project. This is done so that you can determine the level of the surface of the walls.
Next you should measure the steps of the fastener elements. The distance in this case varies up to 60 cm (the minimum gap is 30 cm). It determines the quality of the timber and its thickness.
The next step is the harness. To do this, stack the elements strictly along the contour of the wall being leveled. In case you are going to align one wall, then it is necessary to fix the timber to the walls, which are perpendicular. At installation application of linings is not required.
First, it is recommended to make a small hole in the installed part.This should be done in order to insert the screws. At the same time, remember that the diameter of the drilled hole should be slightly larger than the diameter of the screw.
Then you take the product and apply it to the surface of the wall. Do some of this work with a hammer and a nail. Your task is to transfer the mark for the hole to the surface.
The next step in the work is to drill the marked holes. As a rule, in them you should hammer in wooden chop or usual dowels.
Next, you set a wooden bar in its place, securing it with a screw. However, you can use another way: the timber is attached to the chop with a nail, using a hammer.

The scheme of fastening the beam to each other.
Now you fix and install all the additional contour elements. For convenience, you should stretch a thread between them. What is the thread for? On it you will be able to set the height of the shabashki, and in all places of fastening the beam to the wall. In this way, you measure the distance that forms from the surface of the wall to the thread. Then subtract from this distance the height of the element.
Then you should take pieces of plywood of various thickness and build a shabashka. In the process, you will need an ax and chisel.
After the winch is ready, you can start drilling a hole in it. The diameter of the hole should be greater than the diameter of the screw.
Next, you should make holes in the beam, so that you can later attach it to the wall.
How to drill a hole depends on the height of the element, as well as on the material from which it is made. For example, if a timber has a height greater than 6 cm, and the material is larch, then you need to use a drill with a drill with a diameter of 12 mm. When installing, take into account one important circumstance: the screw head must be fully inserted into the timber, do not allow any elevations, try to position the screw in the inside of the element.
In the case of a bar of considerable thickness, you should make holes up to a depth of 3 cm.
Then proceed to fixing the element to the surface with the help of previously made shabashki.
To verify the flatness of a fixed bar, use the building level. If it turned out that the timber is attached to the surface a little higher than planned, then unscrew the screw and replace the shabashka. You can use the second method: unscrew the screw (but not completely) and enclose the laying of the necessary parameters on both sides of the element.
If the beam is located below the planned level, unscrew the screw and change the shabashka. However, if the difference in elevations is a small height (up to 2 mm), you can cut off the unnecessary part with the help of a construction planer.
Fastening a timber to a brick wall: installation features
To get started, you should purchase:
- dowels;
- self-tapping screws;
- anchors;
- rivets;
- nails;
- corners.
Experts do not recommend using a punch when working with bricks, as this material is brittle. In this case, you can easily split the wall. Therefore, use only a drill.
You will be able to choose the right drill at the hardware store. The drilling process takes you a lot of time, but it will not work out otherwise.
Installation is done according to the standard scheme: make holes and use special tools to fasten the timber. Be careful: if improperly installed, the entire structure may collapse.
The fixing of the timber to the concrete wall is carried out according to the same instructions, the fixtures and materials are the same. However, the main tool is a drill, which is able to make holes in concrete (a drill is useless here). The rest of the work you will also need to drill, calculate and fix. Thus, if all items of technology fasteners are observed, the timber will be held securely.
Didn't find the answer in the article? More information on the topic:
-

What to glue the flooring with your own hands
What to glue parquet? You can use different glue, its features depend on what kind of parquet is planned to glue. The first step is plywood, which should be well polished.
-

Nuances of flooring laying technology
Will consider the technology of laying the floorboard, the most necessary tools and materials. Thanks to this technology, the floors will always be smooth and durable.
Search
Related Articles
The device of the wooden floor of the second floor, the design calculation
Wooden houses at one time enjoyed immense popularity, then with the development of modern building materials, they were a little marginalized. But today, wooden buildings regain their former glory....
How to cut a ceiling plinth
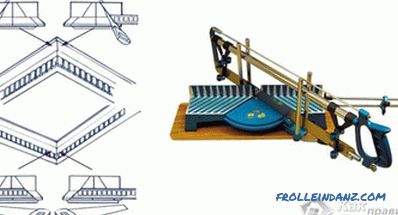
It is known that in order to obtain the perfect articulation of two corner blanks of the ceiling plinth, it is necessary to correctly draw the cutting line of each of them. In this article you can l...
How to insulate pipes in the street
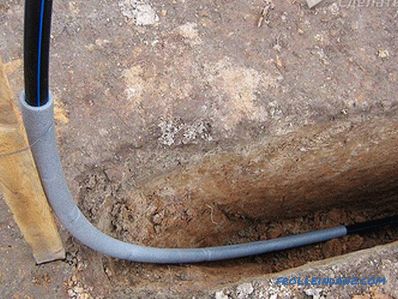
Plumbing has become an integral part of our life. Without such communication, comfort is simply unthinkable. But for many residents of private houses there is one problem - it is the freezing of wat...
Laying plywood on wood flooring and other surfaces.
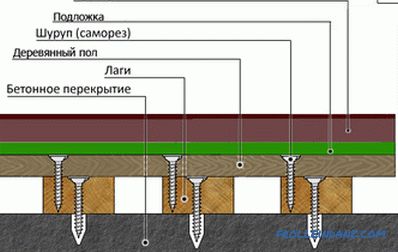
Any building material over time begins to deteriorate, collapse and crack. Such characteristics can be attributed to wood. Old and worn floors, making unpleasant creaking sounds, are not able to de...
The foundation for a gazebo do it yourself
Every builder knows that a solid foundation is a guarantee of durability and strength of any construction. Even such very light and small constructions as gazebos also need a solid foundation under...