The house cannot do without cabinets that can accommodate many things in their space. A chest of drawers acts as the most convenient variant of the piece of furniture for everything (from laundry to small trinkets that need to be hidden). It can be purchased by choosing the design option that will match the interior, but making a chest of drawers with your own hands will be much more profitable. Among other things, this piece of furniture can be given a completely unique design and color.
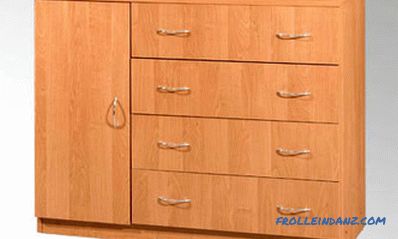
The dresser is used to store linen and is an excellent addition to the interior of the room.
Tools and materials:
- plywood;
- hardboard;
- manual router;
- electric jigsaw;
- sawing wood;
- screwdriver-drill;
- drill;
- right angle;
- tape measure;
- pencil;
- fine-grained sandpaper;
- self-tapping screws.
Preparation before starting work
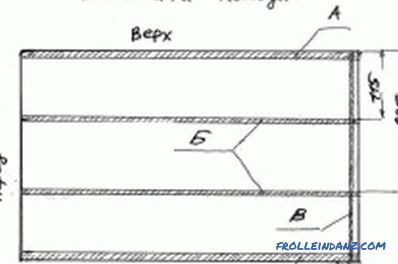
Figure 1. Side of the dresser.
Making oversized furniture, as a rule, it is very difficult to find material and accessories for them. In order to make a dresser with your own hands, the design of which was presented above, you will need 15 mm and 10 mm plywood. It is preferable to purchase an eurofaner, since it looks more presentable and is better processed in the factory. The back wall and the bottom of the boxes can be made on the basis of 3.2 mm hardboard.
For material processing, you should prepare a manual router, which can be replaced by a desktop model. In the first version, face mills will be needed, and in the second - disk ones.
In order to make a dresser, it will be necessary to prepare the following parts in an amount of 2 pcs. each of 15 mm plywood (hereinafter all dimensions are in mm):
- sidewalls - 350x400;
- top and bottom - 467x400.
From the 10-mm plywood to prepare the following parts:
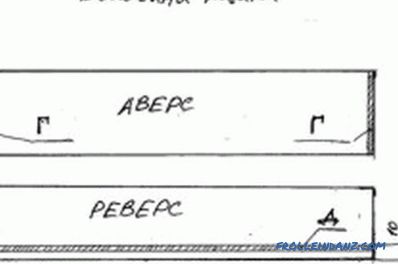
Figure 2. The side of the box.
- shelves (2 pcs.) - 467x390;
- rear and front walls of drawers (18 pcs.) - 98x148;
- sidewalls of drawers (18 pcs.) - 98x377.
From hardboard you need to cut out blanks with the following dimensions:
- the back wall is 328x461;
- the bottom of the boxes (9 pcs.) Is 136x377.
Before making a dresser, sawing can be done independently or using the services of a professional sawman. The design requires compliance with a clear geometry of elements that must have right angles and dimensions with an accuracy of 1/10 mm.
Top, bottom and shelves should not be milled. The remaining details are to be milled, guided by fig. 1 (construction sidewall), fig. 2 (side of the box) and fig. 3 (front side of the front wall of the box, front and back walls of the box), where surface A needs to be machined with a 15 mm cutter, the extreme sample should have a depth of 7.5 mm. In the future, it should be noted that the extreme sample provides an L-shaped end. For the remaining surfaces, the following cutters should be used:
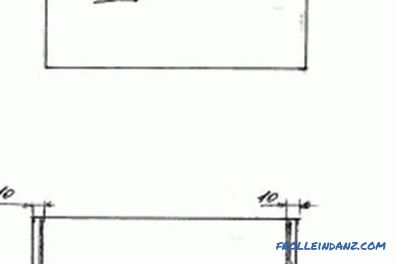
Figure 3. The front side of the front wall of the box, the front and back walls of the box.
- B - 10 mm cutter, depth - 7.5;
- C - 3.5 mm cutter, depth - 5;
- D - 5-mm milling cutter, L-shaped end, depth - 6.6;
- D - 3.5 mm milling cutter, depth - 5;
- E - 3.5 mm milling cutter , depth - 5.
The elements are to be subjected to sanding, getting rid of sticking slivers and other errors. In the pictures you can see how to equip the holes in the front side of the mounted box for a hidden handle, which is needed for the case that does not involve the installation of external fittings.
The process of assembling a structure
Assembling a dresser involves inserting elements into the grooves and strengthening them with glue. After construction should be left to dry the composition. The sides of the piece of furniture should be fixed to the top and bottom covers with self-tapping screws with dimensions of 3.5x30 mm, however, this technique cannot be used in the case of drawers.
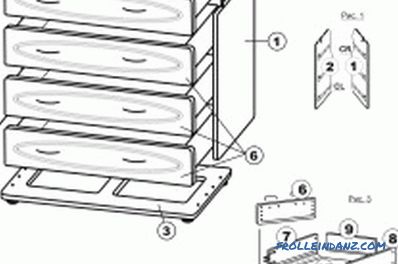
Assembly procedure for a regular dresser.
The sides of the dresser should be additionally screwed to the top and bottom covers using self-tapping screws. The assembly process must be accompanied by checking the geometry of the boxes. If necessary, you can use corner clamps, strengthening the right angle until the glue hardens.
The elements must be carefully pushed into the grooves, immediately getting rid of excess glue that has protruded to the outside using dry cloth, after hardening it will be extremely difficult to get rid of the composition. The design is calculated precisely and has no tolerances; for this reason, it is required to ensure that there are no protruding elements anywhere. After gluing the front cover of the drawer, allow the glue to dry. Then all joints can be processed by grinding again.Now the surface of the chest can be refined, covering it with varnish or paint. You can apply the method of decoupage or craquelure for decoration.
Manufacturing a changing chest
A changing chest can be made of laminated 16 mm chipboard, the ends of which are to be ennobled with a melamine edge.
The height of the dresser will be 1076, the width will be 800 and the depth will be 500. The sides of the folding board should have the following dimensions: 1076x500, they will need 2 pcs.
Before the start of the work, it is necessary to prepare:
- shelves (2 pcs.) And the bottom, each element has a size of 768x500,
- base - 768x100;
- rear side - 768x175;
- partition - 187x500;
- folding shelf - 322x765;
- drawer fronts: 3 pcs. 183x764, 2 pcs. 183x371;
- the back and front walls of the boxes: 6 pcs. 710x150, 4 pcs. 318x150;
- side elements of drawers (10 pcs.) - 450x150;
Hardboard elements:
- back wall of the structure - 795x795;
- the bottom of the boxes: 3 pcs. 740x450, 2 pcs. 347x450
For the dresser, use 450 mm full roll out guides. Before assembling the parts, drill holes for installing confirmatics. A hole will be needed 76 mm from the top and front edge of the side member. The same hole should be drilled on the sides of the folding board.
Guides need to be fixed with a distance from the front edge of the sidewall at a distance of 20 mm.
The assembly should be started with the fastening of the partition to the upper shelf by means of corners with 4x16 screws, only after you have to install the lower shelf, pulling it in confirmatics. The back wall of the structure can be installed by means of nails, while it is important to take into account the observance of the right angle of the box. The next step is to install the so-called hooves on the sidewalls.
A washer must be installed between the sides of the hinged element and the sides of the frame, which will be 1 mm thick. Washers should be strengthened to the sides in advance.
The coupling bush must be hammered from the inside and strengthened with a screw from the outside. You should not make excessive effort - you need to apply superglue under the head of the screw, this will prevent unscrewing.
All drawers are assembled according to the same scheme. The bottom of the boxes should be screwed on screws 4x16.
Next you have to drill holes for the handles in the fronts of the drawers. Then you need to attach the facade to press through the holes with 4x30 mm self-tapping screws. Now you need to remove the box, tighten the screws from the inside, then unscrew the outer ones. The handle can be installed on the elongated screws through the front wall of the drawer.
Such a chest of drawers is useful not only at the stage immediately after the birth of the baby, but also in the future, since the design of this piece of furniture is universal and will look harmonious even in a classic, not a children's bedroom.
Didn't find the answer in the article? More information on the topic:
-
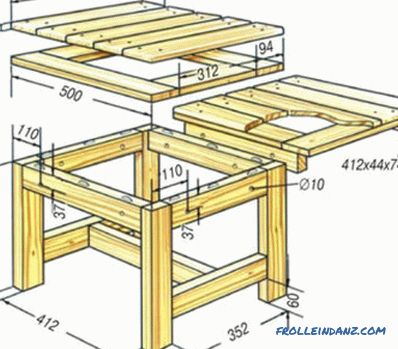
How to repair stools with your own hands
Do-it-yourself stool repair: basic repair options for individual parts. Repair legs: installation with glue; thread restoration and improvement of the old thread. How to repair a seat.
