A home craftsman who prefers to do all the housework on his own, needs a comfortable and safe workplace. The best option would be a workbench. Thanks to this simple design, the work will be significantly accelerated, since the master will work in comfortable conditions and all the necessary tools and accessories will be at his fingertips.
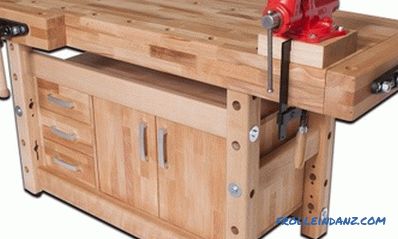
Figure 1. The joiner's workbench is a reliable, convenient table that is necessary for processing parts.
Design features
The joiner's workbench is a durable, comfortable table designed for processing various parts (Fig. 1). His worktop must be strong and large enough to fit extras on it: a vice, a milling cutter, a circular saw and other devices. In order for a small instrument to be available, drawers or shelves must be arranged nearby for storage.
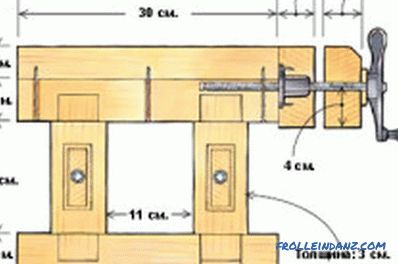
A drawing of a self-made workbench.
Before you build a workbench, you need to decide on its design and size. One of the main parameters - the height of the table. When performing works, the master should be comfortable, he should not feel any discomfort. To determine the height, you must stand up straight and bend your elbows, mentally leaning on an imaginary table. The height between the bent arms and the floor will be the desired value.
In addition, you need to determine the configuration of the workbench, the width and length of the table top. The width should not exceed 80-100 cm. This will allow you to easily reach the opposite edge, where the shelves for the tool can be arranged. The length will depend on the area of the workshop and on the number of fixtures to be fixed on the surface. The space under the workbench is better equipped with a cabinet or drawers to store consumables and other items.
It is also important to decide whether the workbench will be a stationary or mobile construction that can be disassembled and moved to another place. If a mobile version is being constructed, then it is more rational to make the construction lighter by using a material of smaller thickness. Also, the mobile version must have folding legs or a removable tabletop.
The place where the workbench will stand should be light. To provide additional lighting and equipment operation, it is necessary to provide for the arrangement of electrical outlets and switches. Electrical wires located near the machine, you want to enclose in a corrugated pipe or a special box.
Preparation for work
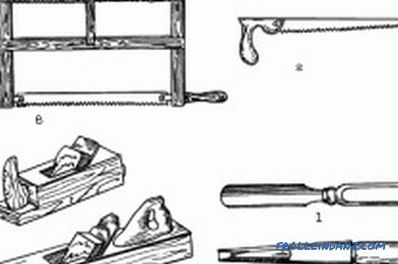
Tools for making a workbench.
Before starting work, it is necessary to draw up a diagram of the future structure, on which all dimensions should be indicated, and the places of fixings should be marked. This will help to correctly calculate the required amount of material and not make a mistake during assembly. To make the frame of the future workbench, it is best to use a wooden beam. For the legs, you should choose blanks with a size of at least 100x70 or 100x80 mm, jumpers can be made of a thinner material, for example, 100x50 mm. For tabletops are used flat boards, whose thickness is not less than 50 mm. It is necessary to choose hard wood: oak, beech, maple. Then the workbench will be strong and stable.
In order to make a joiner's workbench by yourself, the following materials and tools will be needed:
- Wooden beam.
- Boards.
- Bolts, screws.
- Glue.
- Hacksaw for wood.
- Hammer.
- Kiyanka.
- Drill and drill bits.
- Sandpaper or sanding machine.
- Chisel.
- Building level and square.
Stages of construction
The workbench is constructed in two stages. Initially, the frame is assembled, and then the tabletop is installed.
All work is carried out in strict accordance with the drawing. Each connection is checked by a level and a square.
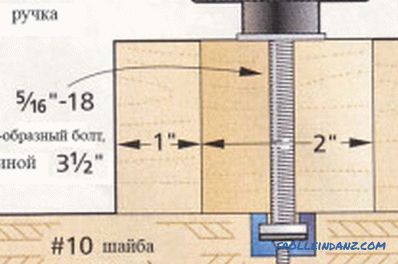
Figure 2. Schematic of clamping the workbench frame.
The base of the structure is a frame of bars (Fig. 2). To make it as rigid as possible, a horizontal web is installed at a height of 40-50 cm from the floor between the legs, and a tsar along the length. Subsequently, they can become the basis for tool boxes. The upper part of the frame is reinforced with diagonal jumpers. To fasten parts together, a thorn-groove connection with preliminary sizing is used. Where such a connection is not possible, you can use self-tapping screws.
If the workbench is constructed in the mobile version, then the support frame is assembled using metal corners. If you do not plan to move the structure, the frame can be bolted to the wall and to the floor. This will make it stronger and more stable.
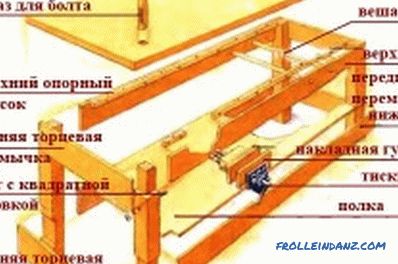
Figure 3. Building a workbench.
For the table top, one piece can be used or individual planks. In the case of boards, you need to carefully adjust them to each other.On the surface there should be no cracks and irregularities. The dimensions of the table top should exceed the base by 10-15 cm.
To connect the boards with each other and attach them to the base, you need 3 bars, the length of which is equal to the width of the table top. They are located across the boards (Fig. 3). On the basis of the grooves must be made, which will include these bars. For fixing the table top on the base metal corners are used.
The surface must be thoroughly sanded using an emery cloth or sanding machine. Then it should be covered with linseed oil.
Second life of the old table
You can make a convenient workbench with your own hands from any material, for example, from an old table. Any construction is suitable for this, the main condition is that it should not be too old. Before the old table starts a new life, it must be prepared. All mounts must be inspected and tightened. If cracks or chips are found on the supporting frame, metal lining should be installed at these points. This technique will add more strength to the details of the table. In addition, the wood should be treated with special antiseptic agents that prevent its damage.
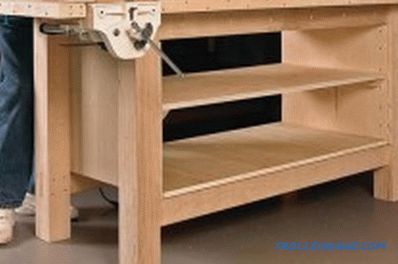
When assembling the workbench, you need to take into account that its surface must be thick enough so that it may not break when striking.
After the preparatory work, you can assemble a workbench. The surface of the tabletop must be durable to withstand the severity of any work. For its construction it is necessary to choose boards, the thickness of which is not less than 3 cm. They must be successively installed on the table surface and secured with screws. Boards should be tightly adjusted to each other so that there are no gaps on the surface.
The dimensions of the new countertop should exceed the old base by 15-20 cm. This allowance is necessary for convenient and reliable installation of additional equipment.
To store tools and other necessary materials, boxes must be made. They should be made strong, with comfortable systems and reliable fittings. The number of boxes and their sizes depend on the desire of the master and the size of the workbench. Install them so that they do not interfere with work.
Arrangement of the workplace
You can attach the necessary equipment to the workbench. To install the vice, it is necessary to prepare grooves on the table top, and on the bottom side, provide a plywood gasket. Their vertical plate should be in the same plane with the table surface. A vice must be attached to the surface and marked attachment points. When using bolts, the holes for their heads should be pre-machined with a mill. Thanks to this, the bolt heads will sink into the surface.
In addition to the vice on the workbench, stops can be installed. It is best to use rectangular, which can be adjusted in height. They will allow to process various parts, fixing them securely. Holes must be provided to install the stops on the table top. On the workbench, any turning equipment can be installed, but it is mainly used as a normal flat surface on which it is convenient to work.
Didn't find the answer in the article? More information on the topic:

