In this article we will try to tell you in detail about how to replace a typical electrical outlet in the living conditions. Immediately we will make a reservation that the need for such a replacement arises, as a rule, in situations when a full or partial update of all electrical equipment installed in the apartment is made (sometimes, if necessary, transfer of sockets to a new position).
Also note that all operations for the replacement and installation of electrical installation products (sockets, in particular) belong to the category of electrical work, the production of which must comply with the requirements of applicable electrical safety standards (PUE rules). In accordance with the provisions of these rules, before replacing the socket with your own hands, it is necessary to partially relieve the voltage from the room where the electrical product is located.
In the most general case, an apartment can be completely de-energized by switching off the input automatic device (the so-called "automaton").
Used tool
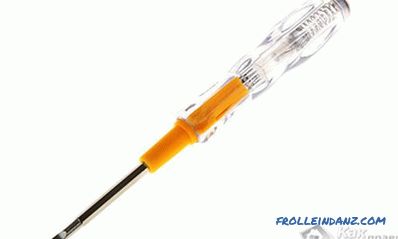 Indicator screwdriver
To successfully complete the whole complex of works, associated with the dismantling of the old and installing a new electrical outlet, you will definitely need the following tool:
- typical indicator screwdriver (you can also use a multimeter measuring instrument of the type "multimeter");
- a set of ordinary screwdrivers with cross-shaped and straight working part;
- knife for stripping the ends of wiring;
- small round-nose pliers used in making contact th part of the wire
Dismantling the old product
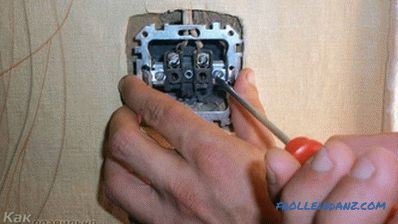 Dismantling the old outlet
Immediately after removing the power supply from the working area of the apartment, you can proceed to dismantling the updated outlet, which is usually performed in the following sequence:
- first of all, the decorative cover of the electrical product is removed, held on its base with one or two mounting screws;
- then you need to loosen the tightness of the 2 side screw fasteners, by means of which the body of the product is fixed in position internal hole (Murphy);
- immediately after that you can loosen the screws on the terminals to bringing the power wires and completely removed from the niche housing the vacant socket.
You will need to strip the bare ends of the old wires in such a way that their working part is at least 2 centimeters long. After careful stripping, the free ends are shaped as a ring, the diameter of which should correspond to the terminal mounting, and the direction of folding should coincide with the direction of rotation of the fixing screw.
Installing a new outlet
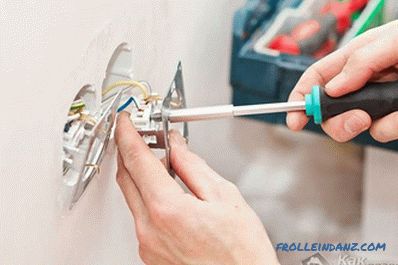
After the old outlet has been completely dismantled - you can begin to install a new product. To do this, first of all, loosen the screw fastenings of the spacer legs located on the sides of the housing of the outlet to be installed. After that, it is inserted all the way into the socket, remaining in the niche from the old outlet, and fixed in it by alternately tightening each of the spacer screws. (In case of severe wear or damage to the underside, it is best to replace it with a new one).
Right after this, the ends of the preformed wires are connected to the terminal contacts of the newly installed socket, which are fastened to them with a screw connection. Upon completion of all fastening operations, be sure to check the tightness of all fasteners, as well as conduct a test check of the installed outlet. To do this, you will need to apply power to this section of the wiring and make sure that there is voltage at the terminals of the product (you can do this with the same indicator screwdriver).
At the final stage of installation work, a decorative cover is installed on the case of the socket, after which the introductory automat is turned on. Making sure that the voltage at the terminals is present, you can safely proceed to the operation of the updated product.
Notes
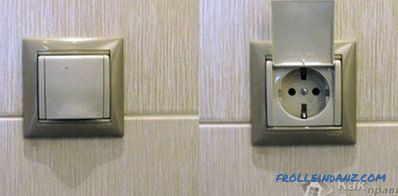 Socket with lid
In conclusion, we consider a number of special conditions which should be performed when you replace the outlet with your own hands.
- First of all, they relate to the installation of sockets in rooms of high humidity (in bathrooms, for example). In such premises should be installed products with a special waterproof performance.
- Further, all the procedures described above assume the use of new models of sockets in the "euro" version, having an auxiliary contact, necessary for the organization of protective grounding.
The final check of the operability of the newly installed product is carried out by connecting to the network an arbitrarily chosen home appliance.At the same time, a reliably mounted outlet should not be heated or sparted during operation.
Video
How to change old style sockets with new ones, see the following video:


