The stuffiness and lack of air are familiar to all, without exception, during the hot summer heat. Opening the doors and windows, you can wait for the uninvited guests in the form of mosquitoes, flies and other insects. To prevent them from entering the house, you can use a mosquito net. Installation of a mosquito door with your own hands is quite simple, because for its installation does not need special skills, and a specific tool is not needed.
It is easy to purchase such a grid, it is enough to know the size. One call to the manager and in several days the grid will be made. Urgent production of the grid can be ordered, but its cost will increase sensitively.
What are mosquito doors
 Types of mosquito doors
Anti-mosquito balcony doors are:
- hinged;
- sliding;
- pleated;
- rolled;
- magnet on magnets.
Frame door device
 Frame swing door
At the heart such a door has a rigid frame. In essence, this is a frame assembled from a profile intended for this purpose. Such a door can be installed on hinges and open outwards or move sideways along the sled. As for the material of manufacture, it is:
- Steel profile.
- Aluminum profile.
- Plastic.
Plastic doors are cheaper but less durable.
Although the design of the doors is the same, the way of opening, and accordingly the mechanisms, is different. Therefore, we will consider their installation separately.
Swing door
 Profiles of mosquito doors
Door opening method installed on loops, already in her description.
A cheaper and less durable window profile is often used to make mosquito doors. The design will turn out shaky, not intended for frequent use to it. In addition, over time, the frame can skew, and insects can penetrate into the room through the cracks formed.
A durable anti-mosquito door is obtained only from a profile having a cross section of 52 * 20 mm. With small mesh size should be at least 1 jumper. If the frame is higher than two meters, then there should be at least 2 jumpers.
Hinged doors are installed more often than others, since they have several advantages:
- Easy installation and disassembly of the door.
- If a profile intended for its manufacture is used, then such a door will serve for a very long time.
- The door can be not only rectangular, but also trapezoidal, arched and even semicircular.
There is also a disadvantage - since the doors open in different directions, additional space is required. True, most people do not even think about it.
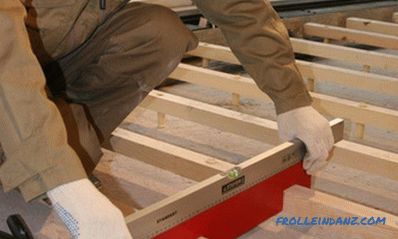
Let's proceed to installation
 Set the loop
Regardless Whether the company brought you a mosquito door or you did it yourself before you make the final payment (or sign the receipt documents), you need to check the build quality, whether it is scratched and how well the mosquito net is fixed.
If you install the door yourself, make sure that along with it are:
- 2 hinges;
- plastic handle;
- screws.
Most often, nothing prevents you from fastening the hinges to the door frame, but it is better to check it and then fix the hinges on the grid frame. If everything is normal and nothing interferes, then you need to fasten hinges to the end of the door, stepping back from the bottom and top of 20-30 cm. This is not the only parameter that must be observed. In order for the door to close well and fit snugly, the loop must be set so that the plane of the lower part of the loop coincides with the plane of the door.
Now the door should be attached to the frame and fasten the hinges. Such work is difficult to do alone, so someone from the household can help: hold the door while you fix it.
The hinges can be simple or with a door closer, due to which the doors will close automatically.
Try where it is most convenient to use the handle and fasten it there. If simple hinges were installed, it is necessary to install a retainer for the mosquito door or fasten furniture magnets. At this installation work is completed.
Sliding mosquito door
 Sliding grid
Mostly the sliding grid is installed side by side with sliding doors, but nothing prevents to install it and next to a simple door. The only inconvenience may be a guide attached to the floor, through which you can stumble.
Installation work begins with the leveling of the guide rail, after which it must be fastened securely. When installing the top rail, it is important to leave a gap, thanks to which the mesh door will then be inserted into its place.Completing the work, you need to adjust the position of the door movement limiters and fix them.
Pleated mesh
 Mosquito net pleated
For such a grid you need less space, as it does not move to the side, and is going to be an accordion. The principle of installation is the same as in the case of a sliding grid.
Mosquitoes need water. Often they get it by sucking out wet clothes hung out to dry. Removing dried things, shake them off, then together with them you are unlikely to bring these insects into the house.
Rolling mosquito door

In view of the design features of the mosquito roll grid, for its installation on the doorway you will need to assemble all the parts together and then install .
Rolling doors can be not only vertical, but also horizontal. Regardless of the design, such a device is not cheap, and not everyone can afford to make such a purchase. Given these factors, a person with no experience is better not to take up the installation, since it is possible to damage the mechanism.
Rolled anti-mosquito doors have their advantages:
- They do not need to be removed periodically. All winter they are stored inside the box.
- It does not take much space to open a roll door.
Grid on magnets
 Mosquito net on magnets
This the cheapest option, with which you can protect against the penetration of mosquitoes into the room through the doorway. It is possible for many to install such a grid, but since this product is mostly made in China, it is unlikely that it will be possible to find intelligible instructions in the package. Therefore, we dwell on this in more detail, describing the procedure in detail.
- Unpack the grid, and, laying it on the floor, determine where the bottom, top, inside and outside. If it is not clear, then there should be a seat for a large magnet from below. These magnets are attached on the inside of the grid.
- Now it's the turn of tapes with magnets. On the one hand you need to cut the corners of the gum. Now it will be the lower parts of the tape.
- In order for the tape to align itself, it is necessary, unwinding, spread out on the floor and install the lower magnets (if they have not been installed).
- After that, the magnetic tapes are separated and slid into the pockets provided for this in the grid, make sure that they are not twisted. Tapes should not be ripped off! As they were connected, the only way they should be inserted. To confuse the situation will not give the cut corners.
- Now the grid should be attached to the door leaf - it should not touch the floor, but there should not be a big gap either.
- Having set the grid, you need to stretch the ribbons a little so that they do not rest against the bottom magnets and fix in this position along with the grid.
- Included is mounting hardware. For plastic frames - velcro, and for fastening on a wooden surface - decorative nails. Choosing what suits you, finally fix the grid.
- Now it remains to install lambrequins, thanks to which the grid will look very attractive.
Home-made wooden mosquito door

At home, the frame is best made from well-dried wood. Otherwise, it may skew or lead. To fix this defect will not succeed, so the door will become unusable.
For the manufacture of wooden slats, you will need to purchase:
- mosquito nets, which will be somewhat larger than the frame to be made;
- 2.5 m wooden bars, size 20 * 40 mm;
- corner;
- a pair of fortochny loops;
- clamps;
- pliers;
- a screwdriver or screwdriver;
- door handle;
- chisel;
- tape measure;
- pencil;
- hammer;
- waterproof PVA glue.
To make it clear how to install the mosquito door on the balcony, it is necessary to measure the width and height of the opening. Since the construction made by us will not enter the doorway, the resulting dimensions of the opening will be the internal dimensions of the mosquito door frame.
How to choose a mosquito net
 Grid
Grid
mosquito nets in a wide range. Their color may be different, but the classic version is white. Under the old wooden frames, it will be more practical to choose a grid of a darker color, since in this case it will be less noticeable. When purchasing a grid, you need to take with a margin of several centimeters on each side. Excess then you can just cut off.
You also need to consider that the grid cells come in different sizes. In one case, it will only protect against insects the size of a mosquito, but very small insects can easily penetrate through it.In another case, if the cell is too small, then even the dust will not pass through it, but you need to consider that the flow of air will also decrease.
We assemble the frame
 The framework of the home-made door
For mosquito nets to the balcony, designed independently, it is important that its internal size coincides with the clearance of the doorway. After completing the marking bars, you need to cut off from the bar too much. Now, using a clear example, consider the process of making a wooden frame.
Next, we will look at an example of making an invoice balcony door. If it is planned to install a mosquito door instead of the existing one, then its dimensions will be the same as that of the removed canvas.
- Let us take as a basis the dimensions of the lumen of the balcony door 190 cm in height and 60 cm in width. Our slats will be located wider part of the door, that is, their width will be 4 cm, so we need 2 segments of a length of 198 cm and 4 pieces. 68 cm each.
- To join the slats at the corners, at the end of each you need to make a notch 4 cm long. Since the 2 cm thick rake, you need this notch to go to the middle - only 1 cm. That is, we delete the fragment 4 * 4 * 1 cm. This can be done with a saw and chisel or with a hand mill. In order not to get confused, make notches on one side of the rail.
 Cut out the groove
- We still have 2 slats of 68 cm left They will be used as jumpers designed to enhance the strength of the structure. Since the door is 198 cm in height, we divide this figure by 3. The resulting 66 cm is the distance from the edge of the door to the lintel axis. Draw a mark, retreat from it up and down by 2 cm (only 4 cm), mark and make notches under the cross member. In this case, such accuracy is not required, and the cross member can be installed arbitrarily.
- It is necessary to check how well the parts are connected and whether there are any differences. If necessary, parts must be adjusted.
 Gluing the frame
- Gradually, the whole frame is glued together and tightened with clamps. The crossbars are glued last. You need to make sure that all angles are 90º. For this you can use the square.
- The finished frame must be thoroughly sanded and painted or varnished.
- Now you need to fasten the grid and cut off the excess on the frame with a stapler (or furniture nails). To prevent the edges of the netting from rolling, it can be pre-cut to the size of the door with an allowance of 2 cm on each side and secured with the edge wrapped inside. Imposing a grid, it is necessary to be very careful that there were no warps and it lay down exactly. Otherwise, the door will look unaesthetic.
- The hinges must be fastened between the edge of the door and lintels, but not on the lintel. Since the thickness of the slats is only 2 cm, so that it does not split, it is best to drill small holes with a thin drill for self-tapping screws. If this drill is not, then you can use a thin nail without a cap, holding it in the drill.
- The next stage of work will be the fixing of the mosquito door and the installation of the handle.
- It is important to remember that the door should be securely fixed. For convenience, you can fasten one furniture magnet to it from below and above.
It is possible to assemble the door with screws, but in this case it will become loose very soon and it will sag.
We hope that the material provided has helped you to install the mosquito door. You can share your opinion or ideas by leaving a comment.
Video
This video will help you determine the choice of a high-quality anti-mosquito door:
See how the installation of the mosquito net on the magnets is done:
Search
Related Articles
pitch dependence on flooring
In order for the floor to be properly laid, even and strong, in 9 out of 10 it is laid on logs. Without a log, it is very difficult to level and reinforce the floor surface so that it does not bend...
How to connect the RCD - wiring diagram

If your apartment has a large amount of household appliances, then you should install a device such as a RCD. Otherwise, all appliances will be under great threat. In the article we will look at how...
the creation of the march construction of wood and concrete (photos and video)

The staircase is an integral element of a modern two-story or three-story country house. It can be made of various materials, the most common of which are wood and concrete. In any high-rise...
Types of sliding doors and their design features

Door sliding systems have long been a permanent trend in interior design. In addition to the elegant and elegant appearance, they have excellent functionality, practicality and ergonomics. Various o...
Summer kitchen in the country with their own hands + photos, diagrams, drawings

In the fresh air not only the appetite is stronger, but the food is absorbed much better. In warm weather, do not want to sit in the room. Conservation for the winter is also easier to do outside. I...