Installing interior doors is not as difficult as it may seem at first glance. If the master has at least a little experience with doors, then this is a big plus. The only thing that is better to entrust a specialist - it is a sidebar fittings. Incorrectly installed hardware can ruin the whole result.
Stages
") Installation of the door unit
Installation of the door unit
The installation of interior doors takes place in several stages :
- Assembling the box.
- Mounting the box.
- Installation of the canvas.
- Installation of additional elements.
- Installation of platbands.
Preliminary stage
") Door selection
Door selection
Technology of installation of interior doors simple enough. However, before starting work, there is one crucial stage that cannot be skipped. This is the door selection stage.
The end result largely depends on how responsibly the choice is made.
- The first thing to do is bypass the shops. Do not take the first available option. If we are talking about online stores, here we must carefully check the characteristics of structures.
- The door leaf should fit the box perfectly in size. All the characteristics of the door must be known in advance. Without measurements here is not enough.
- Sometimes very cheap options appear in stores. After purchase, the owner may find that the box or accessories are not included in the configuration. We have to spend time and pick up the remaining parts. It is not always possible to do this correctly. Therefore, do not look at too cheap door designs. As a last resort, it is necessary to preliminarily clarify the presence in the kit of certain parts.
Materials and tools
Materials and tools for installation must be prepared in advance. From the tools you will need:
- wood saw;
- screwdriver;
- level.
From materials it is necessary to purchase:
- mounting foam (cylinder);
- self-tapping screws;
- wedges.
Assembling and installing the box
") Installation Tools
Installation Tools
When door purchased, you can get to work. At the first stage collect the box.
Assembling the box is a simple process. The only thing you need to remember is that you need to retract the stand boxes to set the gap between the door leaf and the floor. For ordinary apartments, the gap is set to about 10 mm.
After the gap is set, the racks are connected using self-tapping screws. After assembly, the stage of installation of the box in the opening begins.
It is desirable that the opening be pretreated. To do this, check the vertical walls, as well as the height and width of the opening.
The box is installed using level and wedges. The level checks the position of the structure in the opening. The procedure is as follows:
- The box is fixed in the opening with wedges at the top and bottom.
- First, the door should be fixed with wedges from the bottom, before this checking the level of the position of the structure in two dimensions.
- The average clearance between the box and the opening on all sides should be about 10 mm.
Door leaf installation
") Assembly of the door frame
Assembly of the door frame
Door leaf hinged on hinges. The box at this time is fixed only with struts and wedges.
Do not fool the door frame before hanging the door. The fact is that we still have to make sure that the door itself will not open in this position.
After the canvas is hung, you can fill in the gap between the box and the opening.
Care must be taken to ensure that foam does not hit the surface of the door. The composition of the foam can easily damage the surface, so you should work carefully.
Additional bar
")
Now we need to install the additional element.
- The additional bar is measured to the size of the distance from the edge of the box to the edge of the wall.
- With a hacksaw, it is cut around the edge.
- The doborny element is mounted in a groove and foamed. Zaining is done at several points.
Casing
") Additional element
Additional element
After the additional element installed, you must wait for the foam to dry. When working with assembly foam, you should remember about its expansion property. The substance should always be applied in doses.
The next stage after the installation of the striker plate is the trim.
- To install the platbands, you need to determine their size.
- After that, the rims are cut with a hacksaw.
- The holes for the nails are drilled.
- The platband is fixed.
If the bezel is “with a beak”, then it is attached to liquid nails. Sawing it is not necessary.
Types of interior doors
")
Today, you can find doors made of natural wood, glass, plastic, metal and composites in stores. Also found mixed designs.
Usually the choice is made taking into account the design of the room and this is the right approach. However, it is necessary to consider all the main varieties of these structures in order to know their advantages and weak points, as well as the subtleties of care.
- Paneled hardwood. Such designs are very durable and prestigious. In addition, they are very expensive. The most common panel doors are made of oak and walnut. Constructions are made either with the use of glue or without it. The latter type is the most durable. Care of such a door is necessary, as well as for any natural surfaces. The door must be protected from moisture and high temperatures. It is recommended to wipe them with a napkin. The use of abrasives is prohibited.
- Paneled soft wood. Ideal for summer houses and cottages. In ordinary apartments such doors do not look very appropriate. They are more suitable for country style. Care for such structures is the same as for the doors of hardwood.
- Filed combined doors. These designs are made of veneer. They contain little valuable wood. Therefore, these doors are quite inexpensive. Their lifespan, however, is less than that of solid wood structures. However, they can stand for about 50 years, which is also very good. Special care for veneered doors is not required, it is their advantage.
- Panel structures. The dignity of panel doors is that they are inexpensive, do not require special care, are easily replaceable, and have a presentable appearance. In addition, they are well decorated and fit any interior. About 85-90% of all doors are shield. This design can be glazed, decorated with natural veneer or artificial materials. Flush doors - the best option for most apartments and offices.
") Installation of trim
Installation of trim
Video: instructions for installing interior doors
Photos
") Paneled Door
Paneled Door
") Flush doors
Flush doors
") Installation steps for doors
Installation steps for doors
") Fixing the box
Fixing the box
") Attaching the hinges
Attaching the hinges
") Door Threshold
Door Threshold
") Door Installation by level
Door Installation by level
") Mounting the box and its foaming
Mounting the box and its foaming
")
")
") Fixing canopies
Fixing canopies
Schemes
") Inset handle
Inset handle
") Installed interior doors
Installed interior doors
") С box attachment
С box attachment
") Installation drawing
Installation drawing
") Loop mounting scheme
Loop mounting scheme
") Assembly of the box
Assembly of the box
") Installation of additional units
Installation of additional units
") Door installation
Door installation
Search
Related Articles
how to install a mosquito net on a plastic window
This article is devoted to the simplest devices that allow to protect the living quarters from the penetration of mosquitoes and other annoying insects - mosquito nets. Rolled mosquito nets...
How to connect gas pipes

Currently, there are many modifications of products used specifically for the supply of household gas, the choice of which is determined by the peculiarities of laying gas communications. In additio...
How to make shallowly foundation

The main task during the construction of the building is the choice of the type of foundation. It directly depends on the properties of the soil and its heaving. Loose soil during freezing expands,...
Extension of the house from the bar: recommendations for implementation
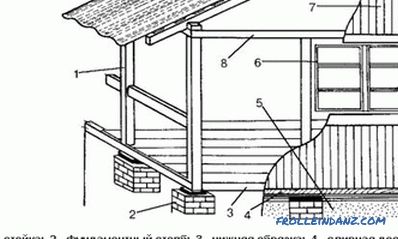
Not every family builds a house from scratch; more often they buy a ready-made one. It is also possible that the project of the house is ordered by the architects, and they build typical buildings...
How to zone a room into a bedroom and living room
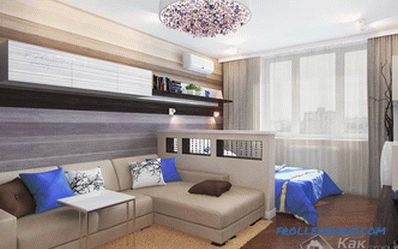
Not everyone can boast of having spacious and free housing in three rooms or more, where each family member will have his own personal place and space. Many young families begin their life journey i...