Retractable drawers are an integral part of any cabinet. Sometimes there are situations when they are not enough to arrange all things in a convenient place and order.

The drawers are very convenient to use. They can even be made by those who have never done anything on their own.
It is worth talking here that you can make drawers with your own hands. Some, of course, want to buy them, but the right size may not always be on the market. In this case, the sliding elements are the only way out of the impasse.
Tools and materials
So, to assemble the products that are being put forward, you will need the following list of tools and materials:
- a drill or a powerful screwdriver;
- electric jigsaw, which allows you to cut the material with the highest quality;
- construction angle;
- ruler;
- pencil;
- tape measure;
- a rag;
- knife;
- iron.
When everything is assembled, you can proceed directly to the installation.

Drawer Assembly Diagram.
Guides will be an integral part of the design. Without them, just can not do, because the boxes should move on something?
Full roll out guides are the best option. However, roller products can also be used. Some people prefer to install instead of them just ordinary wood. However, this is not the best way.
All guides on the market have a pitch that is 50 mm. Thus, if we are talking about a box whose length is 450 mm, then it will need a guide having a size of 400 mm. In this case, the system will work efficiently and smoothly.
It is one thing to buy, but you need to deliver. This is done very simply. The design of these elements involves a standard mount with screws or other fastening materials.
Detailing the boxes themselves
Now it's time to make the boxes themselves. For blanks, you can use chipboard sheets or purchase ready-made furniture panels. They may be smaller, but they will be enough for work, but there will be a lot of waste from the chipboard (of course, if you don’t equip your furniture).
All elements can be sawn and independently using an electric jigsaw. Sometimes you can go another way, for example, order this service in the store where you purchased the material. The front and back walls of the drawers must be secured between the sides. It is necessary to attach the bottom to the box.
Assembling drawers with your own hands

Scheme of the drawer.
All parts are ready for assembly, it's time to go. Before starting work, the elements are glued. This is done very simply - with the help of not very hot iron and rags. The edge at the same time keeps within the beautiful party up, and then on it several times are passed by the iron (fastening will be more reliable).
After that, the rag is removed. Then everything is wiped with a dry cloth, excess edges are cut with a knife. All edges must additionally be treated with sandpaper. The result should be a very nice picture.
Holes with a diameter of 8 mm are drilled in the product in the product, and 5 mm in the end face. The marking for guides on the box can be in any convenient position, but it is best if this line goes in the middle of the product.
Some features
It will be a question of the full roll-out guides mentioned above. They are the most relevant in this situation. Products consist of two parts. The wide part should be firmly attached to the side of the cabinet with self-tapping screws of the appropriate size. They should not be too large so that the fasteners do not protrude. A small part of them should be attached directly to the boxes. Initially, such items are sold as a single unit, but they must be disconnected before work begins. This is done quite easily.
Now the guides can be fixed on the cabinet and on the drawer. On the first element this is done with a small indentation, which is approximately 3 mm from the edge. As for the boxes, there is no need for any gaps. The guide is attached flush.
The facades themselves must be fixed from the inside with self-tapping screws.

The calculation scheme for the details of the drawer.
There is one small trick that will help to set these elements exactly:
- To begin with, you need to make corresponding holes for the handles on the facades.
- Next, you need to attach it to the place, and then attach it from the outside through these holes. Then the drawer comes out, the facade is fastened from the inside in the normal mode, and then the fasteners are turned out. A very complicated system, but in practice it is easy enough to deal with it.
Now you can drill through the holes for the handles to the end, and then do them directly mount. This work is pumped.
It can be stated that the drawers are fully operational. In this case, be sure to first need to check their performance. If something is wrong, then the elements will have to be customized from the very beginning. And this is very undesirable. Better at the design stage to make sure that everything is done as accurately as possible. Only in this case, the work of all structural elements will be correct.
Thus, as is clear, it is easy enough to make drawers with your own hands. The most important thing is to follow the instructions above. This will eliminate various modifications and defects that may occur at different stages of work and operation of structural elements of this type. Good luck!
Didn't find the answer in the article? More information on the topic:
-

How to make a wooden floor on the ground?
Wooden floor on the ground: the device of the coating, the required materials and tools. Technical features of the work stages. The process of mounting your own hands.
Search
Related Articles
How to use the laser level: tips wizard
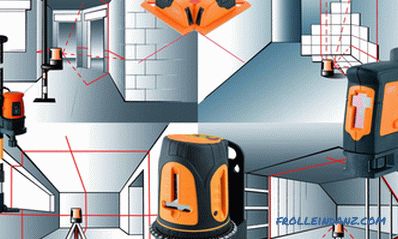
Convenient laser levels, allowing you to accurately perform marking, and are willingly acquired by professionals and amateur masters. After all, smooth bright lines drawn by a laser are perfectly vi...
Installation of the log house: basic recommendations, installation

The frame is a traditional option for the construction of summer houses and small country houses. Today, the scope of the log has expanded considerably. From it build houses, baths, saunas, hotel c...
Installation of lining their own hands (video)
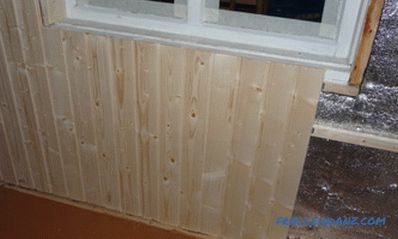
Lining is a durable and moisture-resistant material that has gained great popularity in construction. With it, you can align the walls, as well as visually expand the room. To properly perform, you...
The joint between parquet and tile: some features
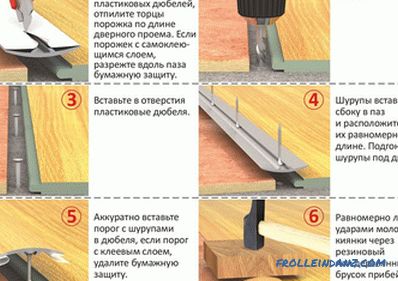
If you want to carry out practical repairs in your house, to get high quality, then you simply cannot do without modern materials, you will be required to absolutely precise adherence to the techno...
Wooden garage do it yourself - how to make + schemes, photo
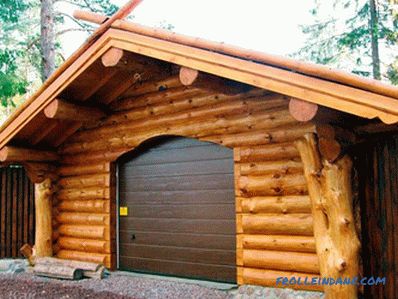
Garage made of wood in many regions of our country is the best option for construction, due to the affordable cost of materials, ease of installation and beautiful appearance of the finished structu...