High-quality laminate flooring allows you to make comfortable and environmentally friendly floors. But the desire to make such a floor often comes up against a problem - the poor quality of the bases of the floors, especially in old houses.
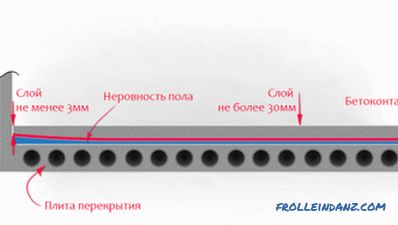
Laminate leveling screed scheme.
If you do not make the floor level, a poor-quality base can negate all the impressive advantages of panels made of embossed wood fiber. Today, different ways of leveling the floor under the laminate have been worked out. But despite the apparent simplicity in this technology has its own nuances that are worth knowing.
Is it always necessary to level the floor under the laminate?
In construction, with rare exceptions, it is customary to operate on flat surfaces. But if in other cases there is an opportunity to neglect perfection, then when it comes to the problem of leveling the floor under the laminate flooring, you should still strive for an ideal indicator.
The reason for this approach lies in the physical properties of the actual laminate. It is these properties that force the builders to level the floor as best they can. Otherwise, the uneven floor will cause deformation of the laminate panels, poor adhesion between them, cracks, and the divergence of the seams. As a result, moisture will begin to fall under the floor covering with all the negative consequences.
The only thing that a specialist can afford when installing a laminate floor is minor irregularities.
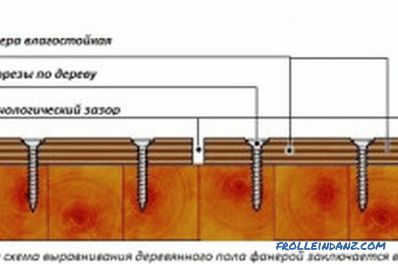
Floor plan with plywood without lag.
For good quality, the difference in floor height is 1 running meter. m base should not exceed 2.5 mm.
With such results, it is recommended to perform a slight leveling of the base. If frequent bumps / depressions are recorded, if the elevation differences in certain areas are significant, the alignment will have to be done more carefully. But if the difference in height per unit area is no more than 1.5 mm, you can restrict yourself to a simple substrate.
Having thus determined the state of the “relief” of the base, it is possible to choose a leveling method. If you plan to raise the level of the floor to a height of 5 cm, it is recommended screed cement mortar. If the floor is even higher (for example, with large differences in height), then a lighter option is desirable. For example, you can use a dry tie from GVL panels or apply a method of laying plywood sheets on logs.
Materials and tools for floor leveling
Whatever methods are used for leveling, you should stock up with such materials and tools:
- building level;
- rule;
- bars for lags;
- cement mortar;
- plywood sheets;
- tiller;
- electric drill;
- hammer;
- wood saw;
- screwdriver;
- self-tapping screws, nails.
Technology of leveling a concrete base

Tools for leveling the floor under the laminate: hammer, ruler, logs, level, pliers, tape measure brush.
Today, most of the bases for laminate floors are made of concrete. But rarely do they go without defects. Possible cracks, gouges, chips, shells, the presence on the concrete surfaces of various flows or delaminations of the solution lead to differences in height on the plane, which should be eliminated.
Experts suggest the 2 most common methods for leveling concrete under laminate. The first method involves the use of cement screed, the second is based on the use of self-leveling mixture.
Before using cement mortar, remove all residues from the previous floor from the surface of the concrete base. Influenced solution cleaned with a pick or punch, while small ones can be left. If there are oil or paint stains on the substrate, they should be removed with a solvent or burned out with a burner. At the end of the concrete is treated with liquid soil.
Then on all the walls of the room, in their lower part, with the help of the level, the upper edge of the subfloor is marked. On the marked level of the floor are exposed reiki-beacons. The method of fixing them does not matter much, but most often the slats are fixed by arbitrary slides from the solution. The width of each strip between the slats must not exceed the length of the rule.
As for the cement-sand mixture, in this case it is necessary to adhere to the following proportion - 25% of cement grade M-400 for 75% of quartz sand, previously sifted. It should be noted that when using this technology, the solution should be quite thick, which will prevent its premature spreading.
Immediately after preparing the solution, it should be poured between the exposed beacons. With the help of the rule, the level of the solution is leveled under the level of beacon rails. After pouring the solution, each strip must be rolled with a special spike roller, which removes unwanted air bubbles.
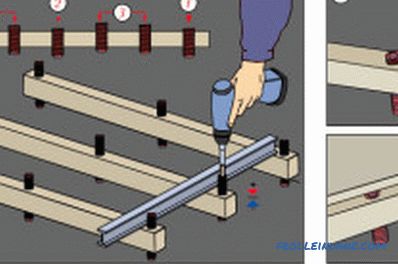
Lag mounting scheme.
After the solution has set and hardened, the beacon strips are removed.The grooves formed in their place are filled with a solution.
But even after the mortar has hardened externally, the readiness of the floor under the laminate cannot yet be considered final. It should be borne in mind that the screed, especially thick enough, requires a long time (up to 3-4 weeks) to harden so that you can walk along it safely. During this entire period, it should be kept covered with plastic wrap, regularly (2 times a day) moistening its surface.
Another option for preparing a flat floor is a self-leveling coating. This method is fast and high quality. But all this can be achieved, if only properly organize the process.
First, as is the case with the screed, it is necessary to remove the room in which the floor will be prepared for laminate flooring. Removes the influx of the solution, debris, dirt, knocks are knocked down, cracks and hollows are puttied. Finally, the surface is treated with deep penetration primer.
Next is the preparation of a self-leveling compound. Dry powder is diluted with water according to the attached instructions and thoroughly mixed until a homogeneous mass. But you can deviate from the guidelines for the preparation of the mixture, determining the proportions of dry powder and water empirically. This is allowed if the worker has his own experience of flooring, taking into account, in particular, the fact that for preparatory layers of different thickness self-leveling mixtures of different thickness are needed.
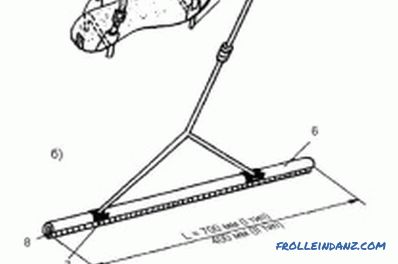
Floor leveling tools.
After the mixture is prepared for pouring, it is carefully applied to the base of the future floor. Moreover, this should be done at the highest point of the leveling surface, from where the solution will spread throughout the room. You can speed up this process with a spatula.
To ensure the best possible leveling of the mortar, good surface smoothness and removal of unwanted air bubbles from the mixture, the spreading mass is rolled with a spike roller. Then leave the resulting floor to stand for several days. After that, it can lay the panel laminate.
Such a method using a self-leveling mixture is suitable not only for concrete, but also for wooden foundations. In the 2nd case, the preparation of the base for casting with the mixture mainly consists in fixing the rocking boards, removing paint residues and protruding nails, after which the fixed base is impregnated with a waterproofing primer.
Leveling the wooden base
It is often necessary to level the wooden floor, on which the laminate will be laid out in the future. Here we have to pay attention to the degree of wear of individual floorboards. The leveling method will depend on this. The most common in the repair and construction practice are 2 ways - the scoring of the boards of the subfloor and the leveling of the floor with plywood sheets.
The scraping is used in cases where the master has to deal with a flat floor in good technical condition. It, as a rule, eliminates insignificant defects. Two types of tools are used for this - a manual cycle or a special chipper machine.
In the 2nd case, the process will be fairly quick and easy. It is only necessary to drive all the possible nails and screws into the wooden floor with a doboy beforehand, otherwise you can spoil the knives of the machine. After the work of such a mechanism, the floor usually becomes smooth and quite ready for laying laminate.
To the 2nd leveling method - using plywood or chipboard sheets - is used in cases where the floor is very uneven, but it is not planned to disassemble it. For this purpose, precarious floorboards are carefully fixed with self-tapping screws, if necessary, replace the individual boards. And only then pre-cut sheets of plywood or chipboard are laid on the floor.
Special attention should be paid to the fact that there is a gap of a few millimeters between the sheets to be laid. This is necessary to prevent deformation of the sheets when they may expand or swell under the influence of moisture.
At the end, all sheets are neatly attached to the bottom boards with self-tapping screws with hidden caps. After that you can start laying laminate.
The device of the substrate for laminate
Speaking about the leveling of the floors under the laminate, we should also mention the substrate, without which this process will in some cases be incomplete. Usually, the substrate is used when the height difference of the surface of the base is small and the worker faces a problem - it is impossible to lay the laminate on the base without preparation, but there is no need to fully align it.
For this purpose, both synthetic substrates and materials based on natural components are used.Among synthetic materials, polyethylene substrates are most often used, among the most popular natural substrates - cork or cork-bitumen.
It should be noted that in many cases the specified components belong to expensive building materials. But they guarantee excellent quality and speed of work. And this, combined with the skill of the performer, is the key to a beautiful, comfortable and durable floor.
