Each country site needs a water source. To get a water resource, it is necessary to equip a well or a well. In this article, we will describe the technology of drilling a well with our own hands, consider various methods (percussive drilling, using water), and also show video instructions.
Before starting work, it is necessary:
- to clarify where and at what depth the aquifers are located on the site;
- to find out what type of soil is ;
- using the previous data, select a specific type of well.
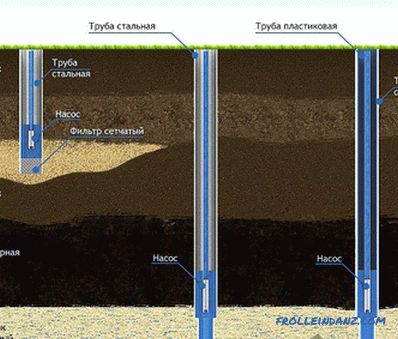 Well types
Wells are of two types:
- Abyssinian well - from 3 to 12 m depth.
- Sand - up to 20-30 m.
When setting up wells, it is recommended to choose a place where the aquifers do not lie deeper than 20 m, as this depth compels us to use more sophisticated construction equipment.
The diameter of the well is determined by the diameter of the manual drill and the pipe that will be placed in the hole made in the ground. The standard pipe diameter does not exceed 11-12 cm. Therefore, the diameter of the well should not be less than 14-15 cm.
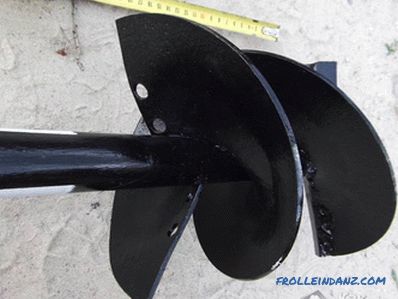 Self-made auger drill
As a tool with which you can make a hole in the ground, the following types of drills can be used:
- auger drill,
- drill in the form bits,
- auger in the form of a spoon.
If there is non-falling ground on the plot, it is wiser to use a spoon. For hard soils, it is recommended to use a drill bit. It is best to work with mixed soils with auger auger.
Construction on the site
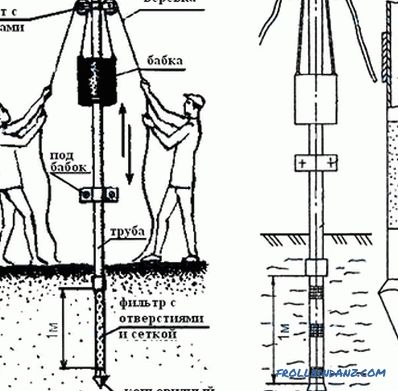
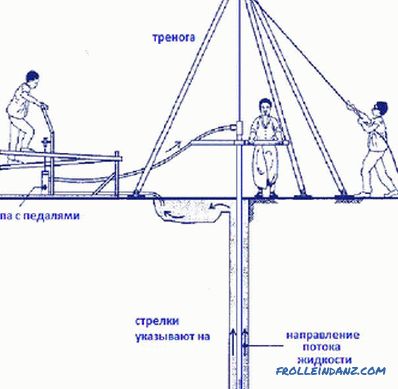
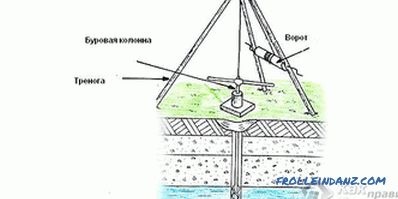 The classic scheme of manual drilling of wells
- When choosing a site for drilling, it is necessary to take into account that the well should be located in a place remote from drain holes or other sources of pollution.
- First, in the area of the future well, it is necessary to remove the top layer of soil, 1.5 * 1.5 m in size, to a depth of no more than 1 m. Such a measure will prevent land from entering the prepared well.
- For the convenience of organizing a water source, it is necessary to build a tripod. The tripod is easy to make yourself using logs with a diameter of 15-20 cm or a wooden beam with a size of 100x150 mm. Installation is carried out as follows: the logs are stacked on the ground in the form of a triangle, and the place of their connection is securely fixed. Gently lifting the tripod, you need to firmly install it so that the junction where the winch will be attached, was exactly above the place of the future drilling.
-
 > 16
> 16
- It is better to arrange the well with a manual drill. This drill is called auger, and has the ability to increase the length of the handle with an additional metal rod. A cable is fixed near the serpentine constituting the cutting edge of the drill, the other edge of which is fixed on the winch suspended from the tripod.
- Before starting work, a distance of 50-60 cm is marked on the rod - the drill should be advanced to that depth. After reaching the mark, it is necessary to remove the screw auger from the hole in the ground with a cable or later using a cable and clean it thoroughly. Adding metal bars to extend the drill, it is necessary to measure another 50-60 cm from the initial mark.
- As soon as the aquifer opens at a certain depth, it is necessary to continue drilling to the waterproof layer.
- To clean the water in the well is required to use the shell. When the amount of soil lifted with it is practically reduced to zero, it is required to install a casing with a filter in the hole. Before placing the filter in the form of a metal pipe with a grid or small holes, experts recommend laying a layer of gravel on the bottom of the well.
- Pipe stability is ensured by gravel poured into the space between the soil and the pipe walls.
- A pump lowered into a well must be installed so that it is completely submerged in water and delivers clean water to the surface.
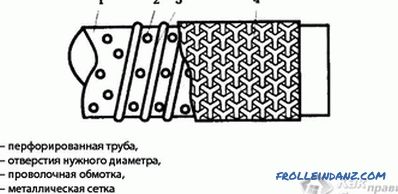 Scheme of the filter
The well can be protected from external contamination using directly mounted her roof.
Percussion drilling
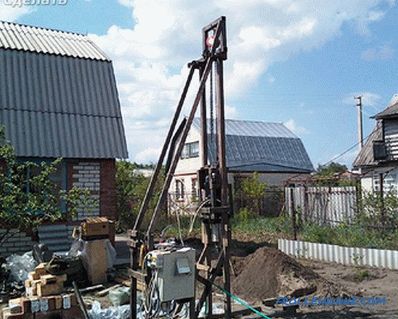
Drilling rig device
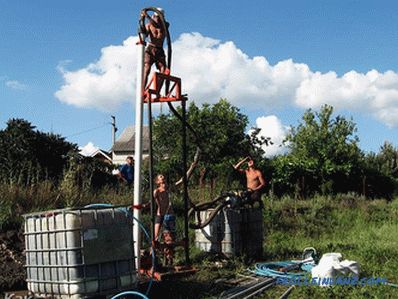
For work, you will need to collect the following material:
- Drill. The projectile is selected based on the type of soil, for example, it can be a chisel, a shell or a glass.
- Cable or rope.
- Shock rod.
- A tower with a winch and a block.
The main tool of a drilling rig is a driving glass.Here are its distinctive features:
- The glass is a section of pipe, at the bottom of which a cutting edge of durable metal is welded. This edge has a bevel inside the projectile.
- Thanks to the edge, the device can go deeper into the ground upon impact.
- An anvil is formed at the top of the glass, along which the barbell hits.
Among other things, this technology requires the use of a tower. It can be done independently, giving the shape of a tripod:
- You can weld the structure from a pipe. If this is not possible, wooden bars can be used.
- The height of the tower must be greater than the length of the drill. This is important, because the projectile, for example, a glass, must be raised above the ground level completely.
- A block is installed on top of the structure. A cable or rope will pass through it.
- For lifting the projectile, you can use a simple structure of the type of gate, which is used in the well.
Drilling with a pouring glass
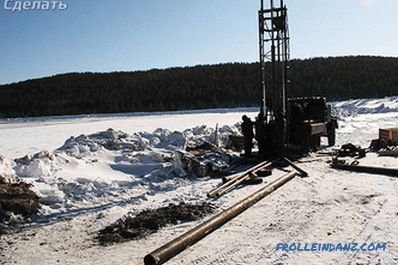
The process of drilling with a glass is described below. The work is carried out as follows:
- With the help of a winch, lift the projectile above the bottom, and then drop sharply.
- When hitting the glass on the reservoir, the projectile captures part of the soil.
- When lifting the glass up, due to friction, the soil is kept on the walls.
- For deeper penetration it is necessary to use a shock bar. For a start, raise it, and then lower it. With such actions, the bar hits the drill projectile, which captures more soil.
- After several strokes of the bar, the glass rises to clear it from the ground.
- After that, the percussion drilling process continues in the same manner.
The technology of percussive drilling using glass is possible only on loose and soft soils. For example, if the soil benefits from sand, then given the fact that the sand particles are not interconnected, the friction force will not be able to keep the sand in the glass.
We describe below the technology of percussion drilling on loose soils.
Drilling on loose soils
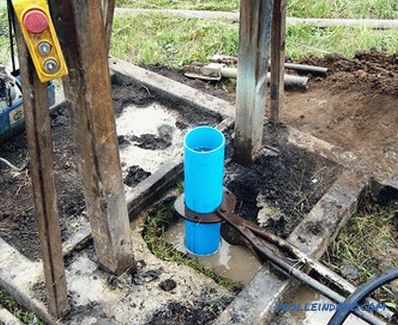 on loose soils
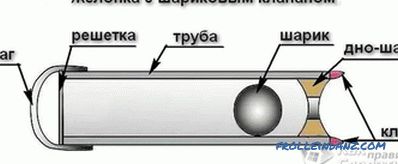
If the soil consists mostly from sand, then the shell is used as a shell. This instrument consists of the following structure:
- There is a valve at the bottom of the jelk, which opens when struck to the ground. As a consequence, the ground gets inside the projectile.
- When the scum rises, the valve closes under the pressure of the existing soil. As a result, the contents are removed outside.
- After cleaning the bit, drilling continues.
Often, during percussion drilling, homogeneous loose soil or its layers can be found. And to prevent falling asleep it is necessary to do the following:
- During the drilling process, the barrel is strengthened with a casing pipe.
- On the very first pipe you should make an expansion boot, cone-shaped.
- In the process of deepening, sections of the casing under its own weight or with accurate shocks are deepened.
The casing section must be larger than the diameter of the bushing. This will ensure free movement of the projectile inside the pipe.
Drilling on hard ground
 on hard ground
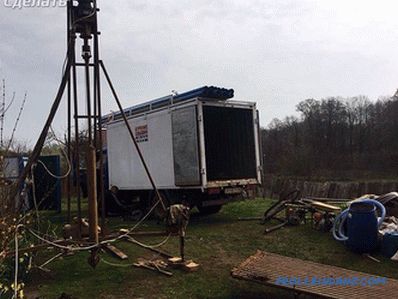
If the soil is rocky, then a chisel is used in percussion drilling. With powerful blows, the chisel breaks / breaks away particles of solid ground. Crashed particles are lifted out by the sludge.
If the work is done on hard ground, the casing pipe will not be able to cut the soil on its own. Therefore, you will need to use special movable cutters, which will expand the diameter of the trunk.
In order to lower the cutters, the cutters should be folded so that the device fits into the casing. Upon reaching the desired depth under the influence of springs, the device is brought to a working condition, thereby cutting off the soil from the walls of the trunk. As a result, the casing is lowered.
What if there are intermediate aquifer lenses while drilling? In this case, the installation of the casing. If this is not done, water will simply flood the face, which will impede the work. To do this, the lower edge of the column rests on the soil layer, which is below the water level. After siphoning the water and zhelonkom eliminate breed.
Important nuances
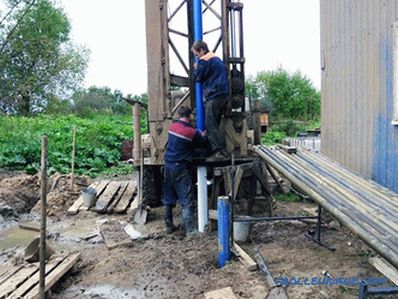
Before and during the percussion drilling process, you should observe some of the nuances described below:
- Immediately before drilling is recommended to dig a hole with sides of 1.5 * 5 m to a depth of 2 m. This is necessary so that in the process of drilling the soil does not collapse. Strengthen walls of the hole with boards from boards, and build a drilling rig above the place of work.
- For manual or pneumatic impact drilling, the evenness of the face should be observed. This can help elongated projectile. The optimal length is 2 m.
- A cable or rope must have an adequate margin of safety.It must withstand the weight of the shock bar and the drill string. In addition, it must withstand the load on the gap when raising the projectile, which is hammered into the soil.
- Given the fact that the projectile can jam, the diameter of the cable is recommended not less than 10 mm.
Drilling with water
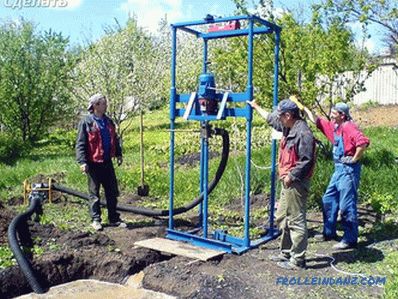
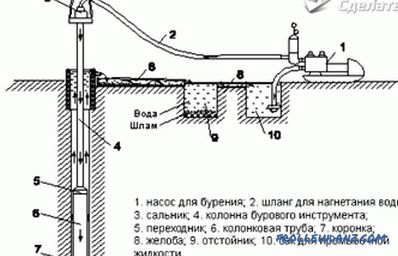
Strange as it may seem, you can get water from the ground by the water itself. More precisely, to formulate it, then water is used for drilling under high pressure. The principle of this technique is that under high pressure water is able to break up the rock found on its way, destroying it into particles, and then washing it out. To carry out water drilling work, it will be necessary to prepare the following equipment:
- water tank;
- electric generator;
- hoses able to handle high pressure;
- hydro drilling installation.
In this work, the main thing is to properly organize the drilling process, since the installation itself does not have complicated technical subtleties. Then you can learn more about the technology works.
Drilling process
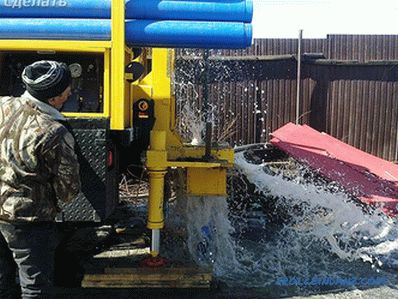
First of all, it is necessary to perform drilling at a shallow depth in any way. Drilling is performed to the extent that the casing enters up to half of its length. After that, organize the water supply to the tip of the drilling rig. The installation itself is lowered all the way into the casing. After turning on the generator, an electric motor starts working, which supplies water through a hose. This motor can create a lot of pressure. The pressure itself is further enhanced by narrowing the hose to the end of the installation.
The flow rate of water is fully proportional to the diameter of the outlet cross-section. And due to the high pressure of water, the process of leaching of rock particles is carried out.
Due to the pressure inside, sand and water rise from the well to the outside. During the drilling, the operator is required only to lower the drilling rig in time to the casing and to create translational or rotational movements of the rig. In the process of advancement, it is necessary to build up the casing in time. The entire drilling cycle is repeated.
As regards the use of water, both flowing and previously used fluid are used for drilling. But there is one nuance. If during drilling to use water according to the principle of a closed cycle, the drilling process is significantly accelerated. Moreover, water, which has sand particles in itself, is capable of assisting, under pressure, great destructive actions. The only problem that may arise is the clogging of the hoses and nozzle.
Drilling without installation
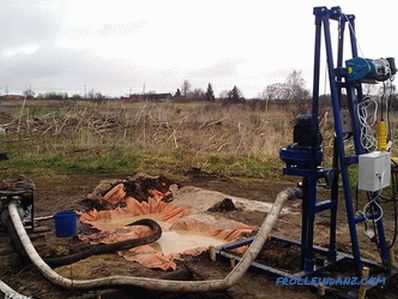
If you do not have special equipment, water drilling can be carried out without it. For this you can use homemade devices, but they do not have such high reliability. The only advantage is ease of operation. So, for this you should prepare such material:
- metal pipe;
- compressor;
- several pumps.
Take the pipe up to 1 m long, it is desirable that it be thick-walled. At the bottom of the pipe fix 2 or 3 tubes of small size. They should organize the flow of water. A pump is mounted at the top of the pipe. The drilling process itself is similar to the one described above. At the same time, it is necessary to turn on the pump for supplying water and pumping it to the surface.
As you deepen, a heavy load will be applied to the pump. Therefore, craftsmen recommend using 2-3 pumps at the same time. Especially when the depth of the well reaches 25 m.
With the use of valves
This method of drilling is popularly called the “Barbarian method”. This is due to the fact that the equipment is quite rough handling. More advanced samodelkin used for drilling water, more technologically advanced compressors and valve system. They allow you to extract water to the surface without overloading the electric motors. By reducing the pressure near the tip of the drill water pressure increases significantly.
Drilling on clay soil
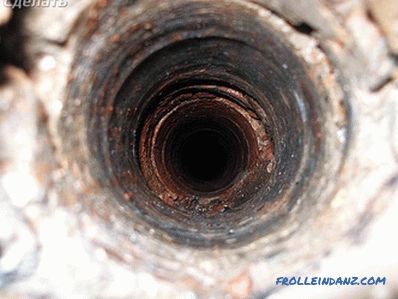 on clay soil
that water drilling can be performed under any circumstances. But it is not. For example, it is difficult to drill by this method in clay soil. In such a case, a toothed tip is put on the drill. As a result, two similar technologies are combined: conventional drilling and hydro-drilling.
The drilling process boils down to the fact that the tip of the drill gradually damages the surface of the soil, and water erodes the rock. When clay soil such technology is most in demand.
The disadvantage of this system is that it is difficult to guess the drilling density of one or another section of the rock. For this reason, soil is washed out from under the casing and from its outer side. But you can solve this problem simply by adding crushed stone.
As a result, the casing pipe will have an additional fastening with the walls of the well. And the crushed stone itself prevents sand from entering the cavity of the well, fulfilling the partial role of a filter. However, after a while, the sand will start to penetrate anyway, so there is no way to do without cleaning.
We recommend reading:
- how to make an Abyssinian well;
- how to organize a pond at the cottage.
Video
Charts
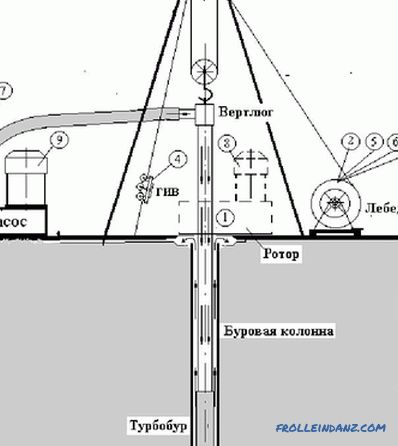
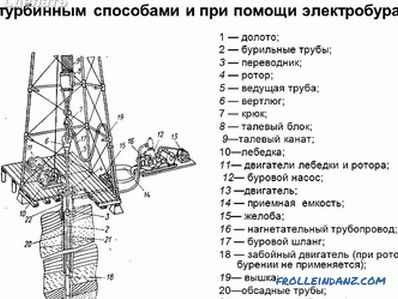 Drawing of the drilling rig
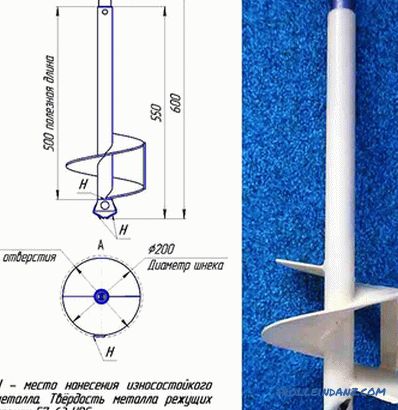 Scheme of the drill
 Core drilling pattern
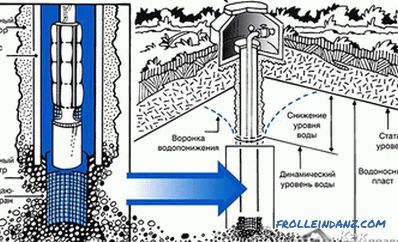 Well operation pattern
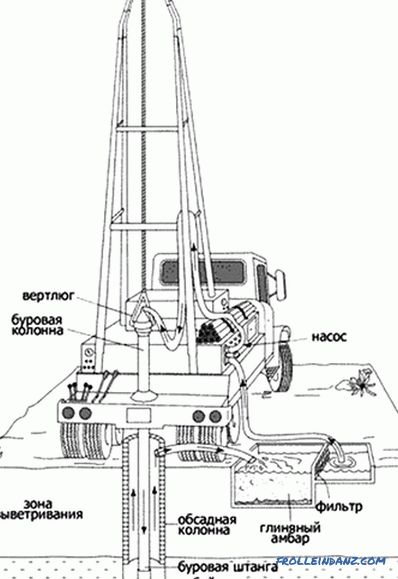 Rotary drilling with flushing
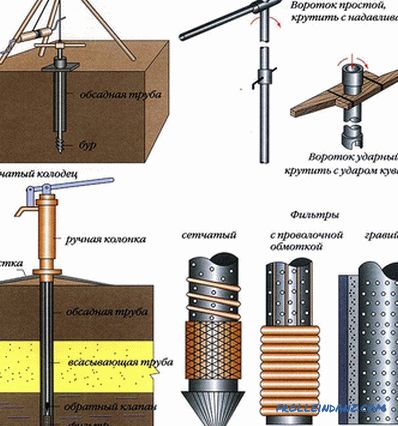 Scheme of manual drilling of a well
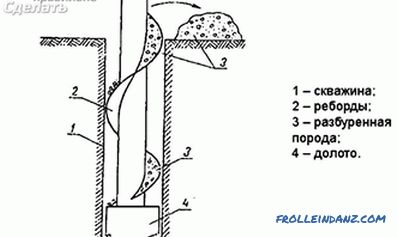 Scheme of auger drilling
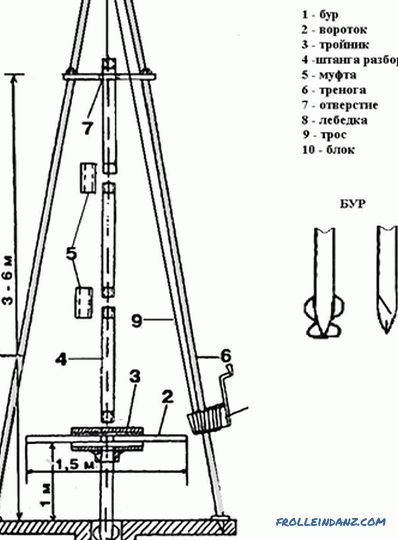 Scheme of auger drilling rig
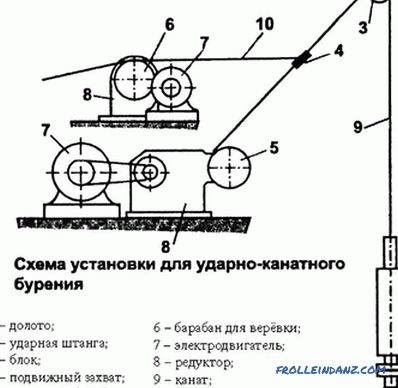 Drilling rig installation
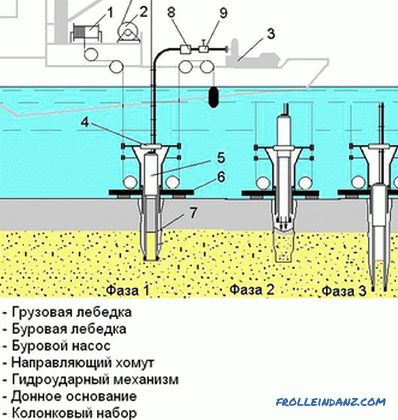 Technological scheme of the well
