It is possible to build a lumber house with your own hands in a shorter time compared to houses made of stone and brick, in addition, they are much cheaper, in particular, also because they have a small weight, which is not involves the construction of the foundation of deep penetration.

A drawing of a two-story house from a bar.
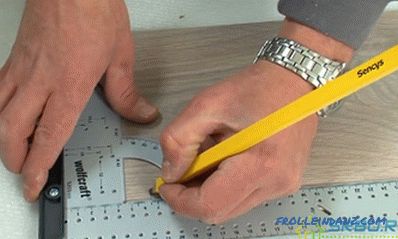
Construction of the house should begin with the drafting of the project, in the process of which it is necessary to take into account that for the erection of load-bearing and external walls it is necessary to choose a timber, whose thickness varies between 180-275 mm. When constructing internal partitions, a material whose thickness ranges from 90-170 mm should be used. However, if you want to save money, then the internal partitions can be made not from a bar, but from a frame lined with wooden panels, which are made in imitation as a beam. If there is no desire to independently engage in the drafting of a project, you can order it from a company specialized in this business. The average price for a project is about $ 10-12 per square meter. The final price for a log house starts at $ 20,000.
Tools and materials

Figure 1. Connection diagram with a root spike.
- ruberoid;
- shovel;
- pegs;
- cant;
- thread;
- wood;
- gravel;
- sand;
- cement;
- brick break;
- vibrator;
- metal crutches;
- jute;
- windproof film.
Construction of the foundation for a log house
The wooden house can be installed on a bored pile or strip shallow-deeper foundation, can be used as a base and slab foundation.
In order to equip a strip foundation, it is necessary to start marking for the foundation trench. In one of the corners it is necessary to place a wooden peg, and from it you should stretch two threads at an angle of 90 °, which will determine the direction of the foundation. Having measured the necessary distance from the first peg, you should hammer in another 2, according to the same principle it will be possible to mark the remaining side of the base. In order to check the geometry of the figure, you should pull 2 diagonals, the length of which should be equal to each other.

Figure 2. Diagram of the longitudinal connection on the keys.
Then next to each peg from the inside, a square with a side of 50 cm should be marked. With the pegs it is necessary to note the angles of the obtained squares for each corner of the foundation; houses.
Now you can excavate along the contour marked with threads. The depth of the trench should be equal to 50 cm, along the perimeter it should be checked how even the recess is.
Then there is a pillow to be made, which will consist of a layer of sand of 10-15 cm, it will have to be leveled and tamped. Then you can begin to manufacture a reinforcing frame, which will need to be placed in the inner space of the trench. Under the reinforcing frame in the corners and in the central part of the pit, it is necessary to mount linings that can be equipped from a brick battle.
After you can start making shields for the base. To do this, fit the board 25x150 mm, perfectly cope with the task and laminated moisture resistant plywood. When arranging the formwork, you need to monitor the stability of the elements and their reliable connection. Therefore, it is recommended to make a bunch of boards in several places above and below.

Figure 3. Half-tree connection diagram.
It is important to equip the ventilation holes in the walls of the foundation of the house, which will guarantee the dryness of the underground at any time, for which it is permissible to use a piece of timber wrapped with roofing material. This liner must be placed between the shields. As soon as the poured concrete hardens, the tab can be removed, and a hole will be formed in its place.
Concrete should be poured gradually, after each formed layer it is necessary to compact it with a vibrator. Concrete will begin to gain strength during the month, only after the expiration of this period, you can proceed to the installation of the rims of the house, but you must first waterproof the bottom trim. To do this, the surface of the foundation must be covered with several layers of roofing material, it is possible to make a coating with bitumen mastic, which should be covered with a waterproofing. Starting to build a log house, the lower beams must be treated with antiseptic compounds that protect the wood from rot, mildew and fungus.
Now you can begin laying the strapping beams, which can be fixed together in several ways. The conjugation, which is called the root spike, is shown in Fig. 1. Connection of logs can be made by the “butt” method (Fig. 2), but the “half-tree” conjugation is illustrated in Fig. 3.

Beam orientation schemes.
In the construction of wooden houses, the first crowns should be connected to the base with steel crutches, which can be replaced with studs installed through wooden plugs. It is necessary to drill about 2 through holes in the beam, the diameter of which should be equal to 10 mm, it is necessary to go 5-10 cm deep into the basement. After the first row has been laid, it is possible to lay insulation in the form of jute, hemp or tow, only after that you can proceed to the installation of the 2nd row of beams.
The bars during the construction of such houses should be fixed by means of dowels made of wood.
For what near or in the place where the material will mate, you need to drill holes, the diameter of which must be equal to 40 mm, while their depth is one and a half beams. The dowel should be 2 mm larger than the diameter of the hole, and its length will be 4 cm less than the depth of the hole itself. After nogil need to drive inside. If you decide to provide additional mounting, the beams can be fastened using steel brackets.

Diagram of the gable roof of a log house.
To ensure greater strength of the walls, it is necessary to drive in the dowels almost the entire height of the openings of windows and doors. It will be necessary to drill a hole designed for the dowel, in the process of which an elongated drill is to be used.
If a log house is built from laminated veneer lumber, then such material undergoes high-quality drying in the factory, but this does not exclude the need for additional wall insulation, which is called a caulk in the case of wooden houses.
Arranging the roof of a log house
As soon as the installation of the wall box was completed, it should be covered with beams, which should be initially temporarily installed in order to be able to designate their locations. Now you can temporarily remove them, and in the designated places make a cut in the half bar, which will be necessary to install the floor beams. Installation of these elements should be made on the horizon level. Now it is permissible to proceed to the arrangement of the truss system for the roof. For her, originally to make a template.
Two boards for this purpose need to be lifted upward, having established them on a place of rafters. This will allow to adjust the angle of inclination, then it is necessary to strengthen the boards between each other, to form in the lower part of the recesses for the support. These templates are useful for trimming and fitting the remaining rafters, which on the ground after manufacturing will have to be combined into one design, it is called a farm, it will then need to be lifted to the top.

Warming scheme for a log house.
The above-described trusses should initially be made in quantities of 2 pieces, install them at the beginning and at the end of the house and stretch a thread between them to mark a single horizontal level of the truss system. The rest of the farm should be attached to the tensioned thread. On the resulting system you need to fill the boards, which make up the crate, it will have to lay hydro and wind protection, and then you need to start installing the roofing material.
If you want to build a log house correctly, then you need to warm the attic space and the roof well. Thermal insulation of the under-roof space assumes at the initial stage the arrangement of the floor on the logs in it, which must be insulated afterwards.
What kind of insulation to choose for a log house?
When thermally insulated log houses, moss can be used, this material is environmentally friendly, perfectly able to cope with temperature changes, at high humidity, although it absorbs moisture, but it is not inclined to rotting. It is characterized by a long service life. In the process of house insulation, moss should be used, having previously plentifully wetted it, then after drying the material will acquire uniformity and will be able to fill all cavities and grooves.
Wooden houses that were tilled during the construction phase, after a while, need to be re-insulated again, as the wood shatters, forming new slots. Using moss, caulk house again will not have to. However, it is worth considering that such insulation has too high a cost.
If you decide to prefer tow for caulking, then the process will be the most time consuming if you compare it with those that use other heaters. A timber, drying out, gives off some of the moisture to the tow, which is capable of absorbing it from the environment, which contributes to the onset of the rotting process of the material, which eventually turns into dust. Such a heat insulator will eventually have to be disposed of in order to fill the gaps formed with new insulation.
It is possible to make wall insulation with modern materials, including sealant.Its cost is much higher than the listed options. This material can be used in tandem with tow. At the same time, the house will initially have to be dug with natural material, and when the walls form cracks and will need to be re-caulked after the house shrinks, the grooves can be sealed with sealant.
Save it will allow the initial laying in the gap of the cord, intended for insulation. It is worth considering that the market presents different types of sealants, each of which corresponds to a different width of the seam. As another advantage of such a modern material, you can highlight the aesthetic component, because the grooves after processing will look neat. In addition, the re-cauldron is no longer needed.
Tape insulation
Caulking can be carried out with tape insulation, thermal insulation with this material can be considered the most simple and less labor-intensive method. It is not necessary to cut it into separate strips, it also makes the process of work easier. Work should begin with unwinding the tape. To do this, go to the end of the log house, put one end of the tape on the ground and begin to unwind it, while you need to move to the other end of the end. It is important to ensure that the tape is not stretched or twisted during the caulking process. Now you can go back to the beginning of the ribbon, take it to the end and begin to tuck it from the end between the crowns. You can use a tool that has a name that is identical to the process, a caulker.
Once you have reached the other end, you should stop, leave a tape reserve of 20 cm, only now the tape can be cut. At the next stage, you can begin to caulk the tape deep into the grooves. This should be done in several stages until the tape disappears between the logs. Caulk should be, making movements directed diagonally. One tape for the groove will not be enough, the process should be repeated again. After the caulking process outside is over, you can proceed to the work on the insulation inside. The house needs to give an aesthetic look to the construction process and make it comfortable to live in. Warming will help in this. After 1.5 years after construction, you can proceed to the finishing work in the house.
Search
Related Articles
The thickness of the floorboard with the substrate and the layers + Video
When choosing a floorboard, pay attention to its thickness. Indeed, much depends on this parameter. Thus, the thickness of the floorboard determines, for example, the installation height of the entr...
How to insulate a well - warming a well with your own hands
It is becoming more and more prestigious to live outside the bustling city, but the problem of providing the site with clean drinking water is scaring many. To solve it, it is necessary to build a w...
How to eliminate the clog of the toilet - how to eliminate the blockage in the toilet
How to eliminate the clog of the toilet, and is it possible to prevent it? In fact, clogging of the toilet bowl is quite a natural phenomenon, and it can occur even if the plumbing is not used too i...
Kitchen in modern style - 50 interior design ideas
A modern-style kitchen has always been very popular among interior designers. Perhaps the reason for this lies in the fact that this style is compatible with almost anything. This allows the homeown...
Bath from foam blocks with their own hands
A bath is a structure that, by its definition, has to be environmentally friendly, warm and comfortable. For a long time, steam rooms were made of wood, and it is just such a bath that today represe...