A bath made of a bar is much lighter than a log, and accordingly, the installation process will be easier. Unlike a log, a timber has an affordable price. In the article we will tell how to build a bath from a bar with our own hands, we will give step-by-step instructions, drawings, photos and video materials.
Creating a project
The first step in construction is design. A decision must be made regarding the design features of the bath. This may be the simplest one-storey project or a house with an attic, or a sauna can be equipped with a cozy veranda. Also pay attention to the choice of timber, as it is profiled, planed or glued.
 The bath plan with an attic
In the design process, it is determined how many rooms will be in the building, and what should be their size. The main indicator of the durability of the bath is a quality foundation. Therefore, at the design stage, it is necessary to create a scheme for the foundation of the structure.
The Russian bath consists of a steam room, a waiting room and a vestibule.
 Plan of a one-story bath
Approximately 4 m should be provided for each person in the steam room 2 .
It is also worth determining where the furnace is. Its foundation must be laid simultaneously with the main foundation.
What kind of wood is better to build a bath
The durability of the bath will depend on the quality of the timber. You should pay attention not only to the quality of the wood itself, but also to the period of the year when it was harvested. Timber used in the construction process should be harvested in winter . Then the tree is laid, so that it has a period of otleivaniya. Its duration is 1 month. Only then can the material be processed in accordance with all requirements.
For a bath, you should use a bar that does not even have microcracks. The fact is that in the process of shrinkage of the log they can be the cause of the collapse of the wood. Building material with bluish spots and a wormhole cannot be used for the construction of a bath.
The tree species also plays an important role.
It is recommended to spread the lower row of larch, and the remaining rows can be replaced with a bar of any coniferous species. This is simply explained: larch does not rot. Over the years, it only improves its performance, becoming stronger and harder.
Laying the foundation for a bath - the main options, construction technology
 Column foundation from blocks
Stages for the construction of the foundation:
- For the manufacture of a columnar foundation, you must first set up pillars along the perimeter and corners. The distance between them should be about 2 m. It is usually made of brick. Under each pillar, you need to pour a pad of concrete.
- To arrange the strip foundation, pour concrete around the perimeter of the future structure, in accordance with the indicators of soil freezing. The depth of the pit can vary from 55 to 70 cm. It is necessary to additionally warm the foundation from all sides.
Whatever type of foundation you choose, you should lay two layers of waterproofing material. In this role may be ruberoid. The part of the foundation that protrudes above the blind area must be at least 15 cm, and the width must exceed the width of the timber by 10 cm. When pouring the foundation, we should not forget about the mortgages from the reinforcement. This is necessary for the subsequent attachment of the foundation with the first salary.
We recommend reading the article about building the foundation for a bath in the article: http: // kakpravilnosdelat. ru / fundament-dlya-bani-svoimi-rukami /
Bookmark the logs' crowns - the main points
When assembling a bath you should have no difficulties, even if the design is completely improvised. The secret of success lies in the accuracy of the work. Do not rush to finally fix the crowns. Pre-check the flatness of the timber horizontally. For this you need to use a level.
The weight of the walls and roofs will fall on the first row of the boards, so they must be the thickest compared to the next. The recommended section of the first row of bars is 20 * 20 cm . Subsequent can be 15 * 15 cm . Their length should be completely the same.
Laying the first salary of a log house begins with the placement of thin wooden racks along the base. All of them must be pre-treated with an antiseptic. Their thickness is about 1.5 cm, and the distance can vary from 25 to 30 cm. Holding this event protects the bars from rotting and moisture penetration. So, increase the life of your building. Mezhreyechnoe space should be filled with insulation or foam.
 Laying the bars of the first crown
The beam should not be laid too tight, because over time the bath will give necessary shrinkage.For the treatment of the first row, you can use machine oil or a modern antiseptic preparation.
Ways to build walls
 Building a log house
When building walls, for a start lay the crowns, which should be leveled, and then fasten the pins or metal pins. Pre-make holes for them with a diameter ideally matching the diameter of the mounting pins. The distance between the fasteners should be 1.5 m. The hole should pass through the bar on top and capture the half lying below. Into the holes, drive in the pins, which are equal to the height of the two bars. Now carry out the laying of insulation. Lay the top layer in place.
In this way, all crowns should be laid, except for the last two upper ones. The latter should not be tied together. At the end of construction, they will need to be temporarily removed to install the ceiling beams.
Bond fastening can be done in another way, for example, using submerged nails - without caps. Ordinary nails can not carry out this process, because over time they spoil the wood with rust.
 Fastening dowels
Wooden shkanty can also serve as fastening elements of the timber, their cross section should be 18 * 18 mm. The length depends largely on the size of the beam, but should not exceed 25 cm. Pre-drill holes in the bars equal to a diameter of 21 mm, and then drive the dowels into them. They must be installed in a checkerboard pattern. Drill through the timber.
 Clamping knot
To avoid the slightest deformation and the formation of cracks in the bars as a bond to the structural elements of the walls use the "Force" spring assembly. It looks like a screw with a compressive spring embedded inside. The fastening system does not allow for the appearance of gaps, due to the strong pressing of the bars to one another.
 The device of the spring assembly
Jute, tow or moss can act as an interlayer insulation. These materials do well with their insulation problems.
Due to the fact that the jute unwinds gradually in the process of laying, it is convenient to work with it. It is easy to fasten it to the bars, for this you can use a stapler or nails.
 Jute Thermal Insulation
It is not necessary to caulk at the end of the shrinkage period when warming the intergate space (to fill with insulation with a gap in the walls of the bath) construction. However, if the bath was insulated with moss or tow, then you will have to caulk all the cracks formed. For this, a caulker, a hammer and a wooden shovel are used.
Openings for windows and doors
 Making a window opening
You can do installing window and door frames either in the process of building walls or after completion of construction. Leave the gaps between the bars in places where later there will be window and door openings. When the walls are ready, you can cut through the opening of the required size. To do this you need a chainsaw.
Installation of boxes in the process of building walls can be risky, because over time the wooden structure will shrink.
 Casing scheme
Now you should prepare the walls for the shrinkage period. On top of the last rims of the walls lay a series of boards having a thickness of up to 5.5 cm. Then cover them with roofing material or slate. So, the bath should be left for six months.
Which of the following tips do you consider important? Maybe you are ready to share your experience? Then write comments to the article.
It is important to know:
- a stove for a sauna with your own hands (drawings);
- how to make shelves in a bath (drawings);
- wooden floors in the bath with their own hands;
- how to properly heat the bath.
Video: construction of a bath from a bar from scratch
Photos
 Construction of a bath from a bar
 Bath 100 * 150
 Bath 100 * 150 with a veranda
 A tiny bath from a bar
 A small bath
 A small bath from a bar on screw piles
 Big bath
Drawings
 Bath 6 * 2.3
 Project of a bath 4 * 4 from a bar
 Bath 4 * 4
 From a planed bar 4 * 4
 Bath from timber 5.5 * 4 m
 Project 6 * 3
 Plan 4 * 6
 Project of a bath from a bar 4 * 6
 Bath 6 * 4 with a terrace
 4 * 6
4 * 6
 Bath 6 * 4
 6 * 6
6 * 6
 From a 6 * 6 planed bar with a terrace
 8.53 * 7.51
 A bath of 4 * 9 in size with a terrace
 A variant of a two-storey bar from a bar
 Mobile bath 5. 3 * 2. 2 of prof. bar with an entrance from the end
 Another example 5. 6 * 2. 2 of prof. of the timber
 Options for planning a log house 5 * 3
 Plan with an attic
 Guest house-bath
 Planning 6 * 3 with residential attic
 Project 7 * 6 with a veranda
 Draft planning of the first floor of a two-story bath from a bar
 Drawing of a bath from a bar
 Another drawing
 Ready project
Search
Related Articles
How to make a bed with your own hands from wood
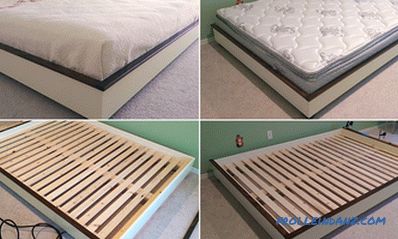
I didn’t take the tools in my hands for a long time, and my hands were longing for work ... Well, it means it's time to make something new. Join me and you, dear readers. This time I will tell you h...
How to choose linoleum for home
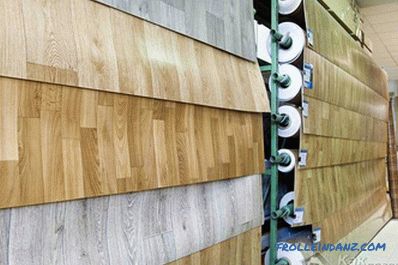
Linoleum, despite the abundance of other materials for finishing the floor, is still in demand. This is due to the fact that it is very durable, wear-resistant and cheap. In addition, there are vari...
How to make a staircase to the second floor do it yourself
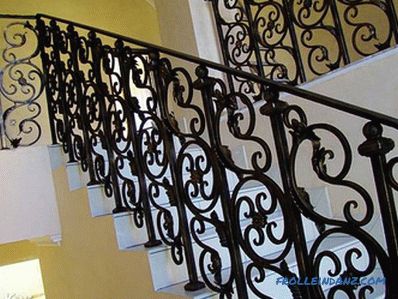
When a house is built in several floors, there is a need for a ladder to move between them. The flight of stairs can be ordered ready or done by yourself. Choice of project As in the construc...
Installation of wooden doors: the rules for installation
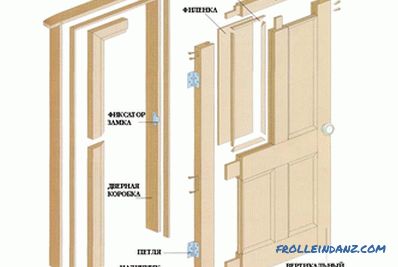
Wood is usually used for the manufacture of interior doors. Entrance wooden doors are a rare phenomenon due to insufficiently durable and reliable material. Therefore, the installation of wooden do...
How to choose linoleum for an apartment
The abundance of floor materials confuses anyone who faces a problem of choice. Yet, despite the emergence of modern flooring, practical and versatile linoleum remains popular and in demand. For an...