A bath of a bar is built with its own hands in several stages. Most people choose wood as a finishing material for good reason. Wood has excellent technical characteristics, which gives it an advantage over other materials. Baths can be built from logs or bars. The latter option is due to ease of installation and reliability of the design. Make a bath of timber should, adhering to the installation scheme. Among other advantages of this material, the timber has the following advantages: ease of installation, most of the work with such material is carried out without an invitation from a specialist.

Plan of the bath from the bar.
The technical characteristics of the timber have such advantages as minimal shrinkage, the ability to keep warm, there is no need to buy a finished log house (you only need to purchase material), it will be cheaper to trim a bar with a bar, the material is of various shapes and sizes that is convenient for the selection of individual buildings.
A bath from a bar with its own hands can have individual dimensions, so the work must begin with measuring the length and width.
Now that you have decided on the dimensions, you can select a material. But before finishing should be familiar with the features of wood. For example, material procurement occurs from December to March (so that the timber becomes durable and resistant to external adverse conditions). The tree that you have cut down should lie for at least a month, and only after that can you make a timber. Logs are stored in order, the gap between the logs is 5 cm, they must be stacked (in packs).
Saunas from a bar: a step-by-step instruction

Figure 2. Connection diagrams for end cuts with a margin.
Any construction work begins with the purchase of the necessary tool. You will need:
- electric drill with a set of drill bits for wood;
- hacksaw (for wood);
- electric jigsaw;
- mallet;
- hammer;
- hatchet;
- stapler (construction) with a set of brackets;
- tool for sawing bars at an angle;
- tape measure;
- level;
- joiner's square;
- ruler for measuring and drawing a log;
- rope;
- plumb;
- pencil.
For the installation work of the wizard often use a special foam as a sealant. The disadvantages of this foam are high price and fast loss of color (it turns yellow). In addition, its disadvantage is that it is destroyed by exposure to sunlight.
To lay the boards with foam it is necessary to follow a special scheme of work. If you make a bath with your own hands, it is advisable to use conventional seals.
How to choose the right bar?

Scheme for working with dowels.
The beam is made of wood and has the shape of a rectangle, there are 3 types:
- normal;
- glued;
- profiled .
The profiled type of bars is distinguished by the presence of a groove on both sides. This prevents the formation of cracks in the joints. In the process of installation, the timber may crack and shrink. In this case, the glue bars will help. They consist of small boards that are pre-glued together. This material is durable and resistant to any mechanical and natural adverse conditions.
Since the glue bar is treated with a special solution, protection against moisture penetration, mold, rot and other bacteria is provided. A bath made of profiled and glued timber can compete with the buildings of professionals.
The optimal dimensions for building a sauna from a timber are the boards 150 * 150 (for the outer part of the bath) and 150 * 100 (for the interior).
How to start the installation of the bath?

Wax bath thermal insulation scheme.
Any installation work begins with a plan. Make a construction project: location, its parameters, structural features, material, accessories and tools. After that, it is necessary to sort the timber according to the following criteria:
- the presence of deep cracks;
- signs of deformation;
- dark blue color covered with fungus.
Bars for the construction of baths should be free from visible defects, the surface should be flat and even. If the material has a convexity, then it can be processed with a special construction tool.
A bar on which you have found traces of decay or the presence of bugs and insects, burn it. Otherwise, normal boards can be hit, and then the material is not saved.
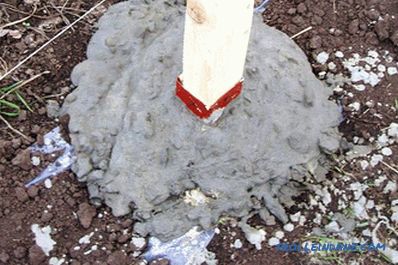
Foundation for a bath
The first stage of the work is to build the foundation for the future bath. Its strength will affect the quality of the whole structure. If the installation is done incorrectly, the bottom can be rotten. Treat this part of the work with special attention.

Scheme of the foundation for a bath from a bar.
The foundation for a bath is of 2 types: columnar and concrete. In the first case, grooves are made in the ground, into which concrete blocks are then inserted and covered with sand. Derivatives from the column base - columnar grillage, columnar-tape.
Concrete foundations are the best and most reliable option. Technology of laying concrete: the material is poured over the surface, and then 2 layers of roofing material are laid, which are previously glued to each other.
The bars, which will be laid out the lower part of the wall, should be treated with antiseptic.
Walls for a bath from a bar
In order to lay out the walls, you need to take care of waterproofing. This is done to protect the bars from moisture.
You need to cover the base of the foundation with bitumen and only then lay the roofing felt. When it cools down, put another layer of bitumen, and then roofing felt. This process is done in the event that the provision of a waterproofing bath is planned.
If the bath is based on laminated veneer lumber, the next step is laying the rails to prevent the foundation surface from touching the material. This ensures the ventilation of the tree, which prolongs its service life and protects against the occurrence of rot.
First, the crown is laid, then the insulation. To accomplish this, tow or jute is used. Collecting the walls of this material, you should not make a dense lining. The tree tends to sit down in thickness, but the length remains the original. Insulation serves as space filler.
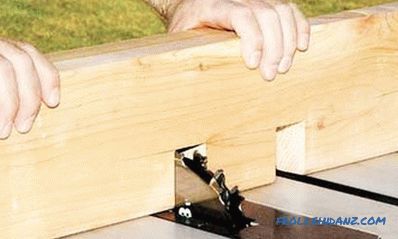
According to the plan outlined earlier, choose the number and size of the bars. Consider the overlaps on the corners and cuts that are used to install the walls. You make a sample from a reiki, then prepare a timber for it (for 2-3 crowns). The markup on the sample should be clear and easy to use. Connection diagrams for end cuts are shown in fig. 2.
The process of fixing the bars for the bath is performed as follows:
- Stack the timber and adjust it to the location.
- Drill holes in 1.25-1.50 m increments in the already lying timber and in the new one taken.
- Remove the new timber. Take the dowel (the height of the dowel is equal to the height of 2 bars) and insert it into the hole of the lower beam.
- In accordance with the length of the material you lay insulation.
- Put the timber back in place, align the holes, check the evenness (horizontal position) and insert the dowel, hammering it tightly.
To complete the construction, boards with a thickness of 4–5 cm are laid on the surface of the bars as flooring. Roofing material, slate or metal tile is used to cover the roof of the structure.
The blocks for the doors are installed on a row of strapping in the washing compartment at the floor level, the window block is installed at the height that you like.
Preparation of the bath for shrinkage is the last stage of work. The continuation of this period is about 6 months (sometimes more). After shrinking, you can begin work on the arrangement of the structure.
What to do after shrinking?
After passing half a year, you can begin to do logging. For the job you will need a caulker. The scheme of work is as follows: you roll the tow into a special bundle, and then push the crowns between the bars. If you use tape insulation, then you can not do this work.
A made bath can not be used soon. It is necessary to equip it from the inside, install doors, windows and its other elements. However, the result of your own work will please you. Bath, built with his own hands, will last you a long time. You can combine the bars with other material to create an aesthetic appearance.
The process of building a bath takes a lot of time, but does not require special skills in the field of construction. If you do everything correctly, the material will not deteriorate and will not be modified.
Didn't find the answer in the article? More information on the topic:
-

Floor alignment nuances
Leveling the floor is quite possible to do it yourself. What tools are needed for this? Ways: cement and dry screed, self-leveling floor. Which option is better?
Search
Related Articles
How to fix the wall paneling to the ceiling
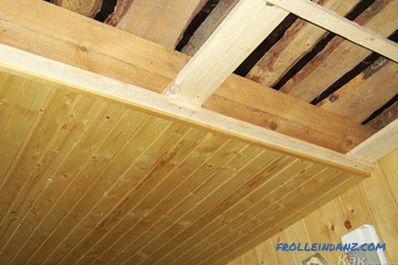
Different materials are used for interior decoration. But, despite all modern developments, popularity of lining does not decrease. This material has many advantages. This is the ease of installatio...
How to repair a mosquito net - repair the skeleton of a mosquito net
As you know, all living things love the light. Tom is not an exception midges, mosquitoes, flies, and more. In order to protect your house from insect invasions, mosquito nets can be installed on op...
DIY circular table: step-by-step assembly instructions
The circular saw is a productive, convenient and maneuverable tool, with which various construction and finishing works are carried out. If you need to perform large volumes of tasks, it is quite d...
How to make a fence from the fence
Metal, wooden or even plastic narrow strips from which a fence can be assembled are commonly called a picket fence. However, despite this "generalized" name, the fences made from them can end up bei...
Decorative columns in the interior - use
Long since the columns were and remain an integral part of the classics, made in the spirit of antiquity. Decorative columns in the interior, created in a classic style, give the room grace and luxu...