The devices often required in everyday life and household can be made on our own using step-by-step instructions, thereby saving your own budget. If such a useful thing as a do-it-yourself stepladder is made of wood, then its technical and safe characteristics will in many ways surpass the factory production, which offers lightweight aluminum structures for use.
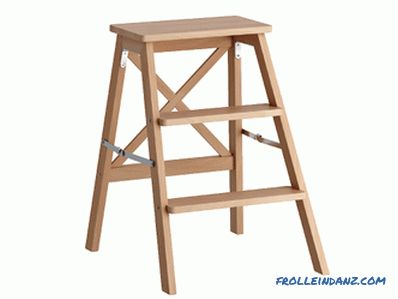
A handmade wooden stepladder will serve as much as purchased products.
Wooden stepladder with your own hands
You will need:
- wooden blocks with a section of 5x3 and a total length of 14 m;
- metal steps: this can be both spokes and plates, total length - 10 m;
- spokes for greater safety;
- fasteners - nuts, bolts, screws;
- plates for fastening legs among themselves;
- metal chain - 1 m 20 cm;
- epoxy glue.
Tools:
- Bulgarian or metal shears;
- a handsaw;
- a wrench;
- drill;
- tape measure and marker.
Stages of work and their features
Scheme of a wooden stepladder.
Before you start to make a stepladder, you should sketch out an approximate sketch for its manufacture. It is necessary to immediately put down all sizes. Work without a sketch can only afford a highly skilled master. You should not think that a do-it-yourself stepladder is a thing that requires a superficial attitude. Firstly, the safety of working at height depends on it, and secondly, it is very convenient when you do not need to constantly measure the workpiece, you just have to look at the sketch.
Next, wood is cut. 4 blanks 175 cm long each will be required. Basically, the length is determined by the height of the work to be done: if a stepladder is needed in the garden, then one should proceed from the size of the trees, but one cannot climb it too high either, other means will be needed. For work on the roof, this kind of ladder is used, such as a ridge ladder. It is distinguished by the fact that the second half of the folding bed is thrown over the roof, and bars are nailed for resistance to the tops.
Then the staircase blanks are cut by the grinder. It is better to use a metal profile for this than round elements, again for the safety of the worker. A foot on a flat profile will be much more stable than on a narrow cylinder. The blanks should be in the same quantity for both sides of the ladder - factory made only on one side, but this model will have two working ladders. This is convenient if the work requires two people, or access to hard-to-reach places requires an approach immediately.
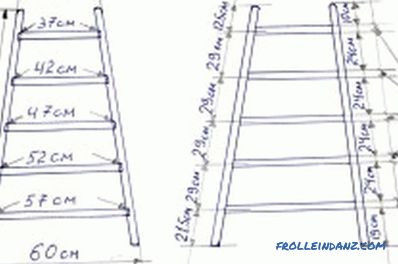
Drawing of stepladders with dimensions.
The length of such elements depends on the distance between the long lateral bars. The upper ends should be 40 cm apart, and the lower ends should be 60. There should be two blanks of 57, 52, 47, 42, and 37 cm in length. That is, the distance between the steps is approximately 27 cm.
Then, in long elements, drill holes along the diameter of the steps, if the elements are round, and fix metal corners for flat ones. The drilling depth should not be less than 2 cm. In the same way, holes for the spokes are made slightly lower. Then the design is assembled without the use of bolts to see all the flaws and then immediately fix it. All elements are processed, because the material may be spoiled by mold or fungus.
Collect the stairs. To do this, epoxy glue is poured into the recesses; round steps are driven in with a wooden hammer. Then with the help of fasteners mounted needles, which are tightened with nuts from both sides. Profile steps are attached with a wrench. After assembly, the glue takes time, so blanks are delayed for a day. If the installation went without it, then it's time to do the plates.
One part of the elements is fastened to the tree, and then the metal ears of the structure are fastened together so that it can be folded or opened freely. Perfect for such a thing plates from the mechanism of the old sofa.
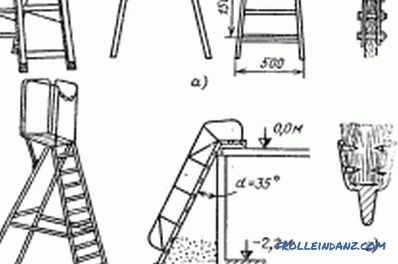
Types of stepladders.
Next, you need to take care of your own safety - the metal chain is cut into two pieces with scissors and screwed with the ends to opposite elements. It will not allow the stepladder to decompose completely if the legs begin to slide on the surface. Naturally, this is done at the bottom of the stairs. At what distance the owner himself decides, but usually it is the length of the whole chain, that is, when folding the legs together form a regular square with a side of 60 cm. The legs are preferably “shod”, otherwise there is a risk that the ladder will slip on a particularly slippery or wet surface. Installation is over.
To take a stepladder for a long time to please the owner, she can give an external gloss, carefully sanding with fine emery paper and covering it with varnish.
For storage, you can soak it with used engine oil so that the gardening ladder can stand untouched by mold or fungus all winter.
Extra amenities
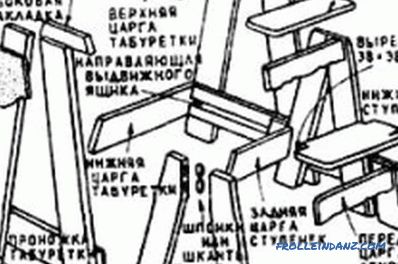
Wooden stepladder assembly scheme.
In order to make work with the use of a stepladder convenient, you can make additional structural details of a wooden staircase. For example, a few hooks nailed to the ends of long elements will not allow you to hold a bucket in your hands, but hang it near, thereby freeing yourself from gravity and increasing the speed of work.
Next you can make a wide step at the top to put this bucket or stand with both feet, reaching especially high places. Then a handle should be attached to the stepladder for greater safety.
Errors in the manufacture of the ladder
- To prevent skewing when inserting the stairs into the holes, they should be drilled in parallel with the other side. That is, the work should be carried out immediately on both elements. For this you need to use long drills.
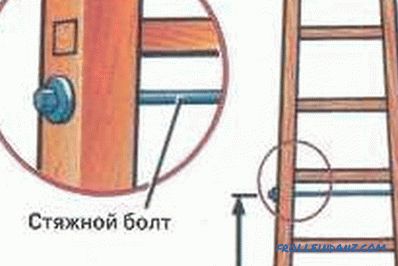
- When mounting the nuts, one should not forget about the washers, they will help ease the installation and make tightening stronger. If the holes are made large, the bolt head will not tighten inward, but remain on the surface, and the tightening gain can be varied.
- It is also impossible to neglect the installation of the spokes: tightened on both sides with nuts, they will not allow the steps to fall out of their own grooves. If the factory studs could not be reached, you can cut the threads on any steel elements.
- You can use a nylon cord instead of a metal chain. But the iron is stronger, and the cord with a heavy load will tear.
- It is necessary to put rubber knobs on the legs, even if the stepladder is securely chained. You can use plugs for anything or wrap non-standard ends with several layers of electrical tape on a woven base. Then you can be sure that the ladder with an iron chain does not slip at the most crucial moment.
Thus, having applied all the correct actions, a home-made wooden stepladder can be used on any work related to height: gardening, repair in the apartment, even for screwing in a light bulb would be most welcome. The models provided by the manufacturer cause some complaints about the lightness of the aluminum profiles from which it is made, and the wood will be much more reliable and stable.
Didn't find the answer in the article? More information on the topic:
