Wood is one of the simplest and most inexpensive in the processing of building materials. Making wood scaffolding with your own hands is quite simple. The production of scaffolding will consist of 5 successive stages, having completed which, you will receive a structure that is completely ready for work. Tools necessary for work:
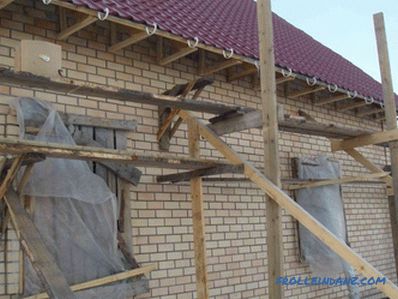
Wood scaffolding is much cheaper to do on your own than to buy in specialized stores.
- screwdriver;
- planer;
- drill;
- wood saw;
- tape measure.
Preparation and selection of materials
The construction of scaffolding is such that for different parts it is necessary to use several types of wood. In order to prepare the bearing piers, you will need a timber of at least 10x10 cm, otherwise you will not be able to perform hard work from such forests. The platforms themselves are made of rather thick boards (preferably at least 50 mm in thickness). Stiffeners are made of boards from 25 mm in thickness. It should be remembered that the wood used must be treated with special agents that protect the material from rotting and mildew. It is desirable that there are no cracks and knots on the material, then the scaffolding will last longer. For safety reasons, you can also add rail fences.
Calculation of the dimensions of the frame and the beginning of the collection
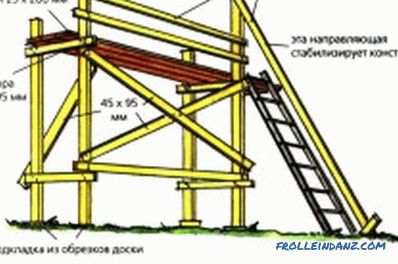
Scheme of wood scaffolding.
In construction there are restrictions on the minimum allowable width of the scaffolding, it should be at least 50 cm. The recommended length of the scaffolding is 3-4 m, and the safe height should not exceed 6 m, otherwise scaffolding may tip over when working. When selecting a material for supports from a bar, one should give preference to a solid rather than a composite one, as this will increase the strength of the future product. To increase the stability of the whole structure, the end sides are best performed at a converging angle.
Scaffolding with your own hands can be collected from a small amount of materials. At the beginning of the first stage, two six-meter support bars are laid on a horizontal surface. The distance between them is equal to the planned length of the future structure. Two of the same beam stacked next to the same way. At the same time, the upper ends of the pair of timber should converge slightly, i.e. if the distance between the lower ends of the pair is 3 m, then the distance between the upper ends should be 2.4 m. This is necessary to increase the stability of the structure. Further, the sidewalls are attached to the supporting beams, which will serve as a support for the flooring (ordinary screws are used for fasteners). Mount the supports from the inside. There will be 4 sidewalls in total of timber, as it is not recommended to make scaffolding above three "floors". Three sidewalls will be used for flooring, and one, the bottom - to strengthen the strength.
Connection in a single design and final installation
Next, you need to connect the lateral trapeziums that were obtained in the previous step with side cross members. If you nevertheless decided to collect the scaffolding with your own hands, then in order to avoid injuries and loss of accuracy during docking, this operation should be carried out together or together. It should be remembered that sustainable wooden scaffolding should be pyramid-shaped, but the angle of convergence should not be large. The side rails are fastened with self-tapping screws, this is justified by the fact that after the completion of construction work, the wood scaffolding can be quite easily disassembled by unscrewing the screws and folded for storage.
The last step in assembling wooden scaffolding with your own hands is the creation of scaffolds and fences. Boards designed to assemble the flooring, nailed or screwed to the transverse bars. To create a kind of "ladder", you can fill additional cross-beams on the sides of the scaffolding, which will be convenient for climbing up to the upper floors.
If you plan to perform work on the ground (not a solid surface), then each support must be made a “knot” in the form of a pin, for attachment to the ground.
Didn't find the answer in the article? More information on the topic:
-
How to make furniture yourself
How to make furniture yourself. What are the materials, and what is their difference? Variants of the drawings, as well as a description of the manufacture of an example. What else do you need to know when deciding to do this kind of work?
-
How make a wooden frame for drywall
A wooden frame for drywall makes it possible to hide the imperfections of the surface. It needs bars. Their thickness depends on the size of the future design, but not less than 40 mm.
-
Construction of a wooden ceiling
Instructions, how to make a wooden ceiling in the apartment with their own hands.What may be required for installation, features and other aspects of the work.

