When planning to make a wicket with your own hands, it is impossible not to take into account the existing barriers and gates. Depending on what construction materials were used for their construction, you need to choose the material for the gate.
Types of wickets
The main types of wickets are:
- wooden wicket,
- corrugated wicket,
- metal wicket.
Everything you need to make a wooden wicket
The most common option is a wooden wicket. The hands that make quite simple. Its cost is low, even when using high quality boards. If you buy less expensive boards of coniferous trees, the gate will be even cheaper.
") Wooden gate
Wooden gate
For a wooden gate you will need:
- 10 -11 boards in the size of 200x14x2 cm;
- two boards in the size of 200x15x5 cm;
- door handle and latch, canopies for wickets;
- mounting material - about 40 screws;
- wood antiseptic;
- wood primer and lacquer;
- cement, sand and water for making concrete mortar.
Of the tools you will need:
- planer, chisel, hammer, hand drill;
- screwdriver, drill, pencil, tape measure, building level and material for skins (numbers 25-16 for the first stage, and 10-9 for the final stage of processing).
Manufacturing and installation of a wooden wicket
Initially, you need to install support posts. They are driven in at a distance not much larger than the planned width of the gate. The standard width of the gate is 1 m, and the height must be at the height of the whole fence.
") Wooden wicket scheme
Wooden wicket scheme
Asbestos-cement supporting columns are driven into the ground to a depth below freezing, with the necessary concreting.
It is necessary to attach the sidewalls of the wickets, which are wooden beams with fences in height, to the prepared and installed asbestos-cement pillars with self-tapping screws.
") Manufacturing Instructions
Manufacturing Instructions
After preparing the supporting pillars and sidewalls, you can proceed to making the wicket itself. First, the boards need to be treated with antiseptic. It will protect the wood from the influence of temperature changes and precipitation, prevent rapid decay or damage to the tree. After that, the boards are laid out on a flat surface in the form of a gate, observing the required width and height. Two crossbars are packed across them - from the top, departing from the edge not less than 20-30 cm, and from the bottom at the same distance. For greater rigidity, and therefore strength, it is also necessary to fill the strut - part of a small wooden bar, placing it on the diagonal of the wicket leaf - from the beginning of one crossbar to the end of the other.
In order for the gate to work, that is, to open and close, you need to attach loops to the gate both on the sidewall and on the gate itself. Metal hinges are susceptible to corrosion, so it is necessary to lubricate them from the inside with grease and from the top - with bitumen varnish. For a longer wicket service, repeating this operation is necessary once every one or two years.
") Gate
Gate
After attaching a part of the hinges to the canvas of the gate and the counter parts on the sidewall, you need to plant the gate on the hinges and attach the valve and handle with screws.
All that is needed for the manufacture of a metal wicket
") Iron
Iron
Metal the gate with own forces can be made of a professional flooring or a metal sheet.
Forged products are almost impossible to make on your own without any experience or special equipment.
Building materials and tools
") Framework for metal wicket
Framework for metal wicket
For arranging the wicket from the profiled sheet you will need:
- metal profile to create a wicket frame, wicket canopies, fasteners;
- profiled sheet at least 1.5 mm thick;
- asbestos-cement or metal pipes with a diameter of at least 10 cm;
- metal protection against corrosion - waterproof enamel paint;
- primer for metal;
- welding machine with electrodes with a diameter of 1.6 up to 5 mm; pencil, tape measure and level;
- Bulgarian for metal, shovel and hand drill.
As well as in the case of a wooden wicket, the supporting pillars are installed. As a wicket leaf, you can use a professional sheet of the desired width. Initially, a frame is being prepared - it is connected using a welding machine - around the perimeter of the entire profiled sheet. During the welding of a metal base under the wicket, a place must be provided for a mortise lock.
") Wicket from corrugated
Wicket from corrugated
Unlike the frame, the profiled sheet must be fixed with self-tapping screws with a rubber gasket - its use will prevent the early destruction of the material in the attachment points.
From the upper left corner of the frame to the lower right, it is necessary to attach a strut of the same metal profile from which the frame is made.
") Wicket installation pattern from corrugated
Wicket installation pattern from corrugated
Since the wicket from the profiled sheet on the metal frame is much heavier than wood, canopies need to be used more powerful: for example, with a steel bearing inside.
The final step in mounting the gate will be its priming and painting.
Video
For an example, watch the video on the production of metal gates:
Photos
") With decorative elements
With decorative elements
") Made of wood
Made of wood
") Wicket from aluminum profile with filling with rolling shutter profile
Wicket from aluminum profile with filling with rolling shutter profile
") Wicket made of metal and wood
Wicket made of metal and wood
") Garden gate
Garden gate
") With an unusual design
With an unusual design
") Gate with a lock in a metal frame
Gate with a lock in a metal frame
Search
Related Articles
Which floor is better to choose
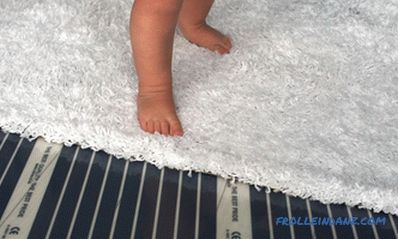
The idea of a heated floor is not an invention of today. It was used by the ancient Romans when they built their luxurious baths. And today we are happy to go barefoot on a warm laminate or tile,...
Installing security cameras do it yourself

Today you can see that surveillance cameras are being installed in the most busy places of cities. Coming to any private house or even to the door of the apartment, you also notice that you are unde...
Do-it-yourself wooden bricks: can it be made?
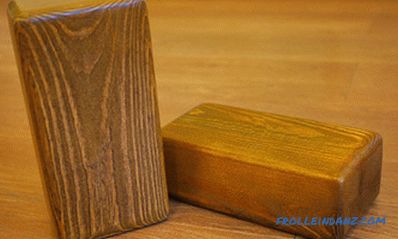
Brick is a traditional building material that has been known for more than one century. Technical progress does not stand still, new items periodically appear on the construction market. Russian in...
Warm floor under linoleum on a wooden floor
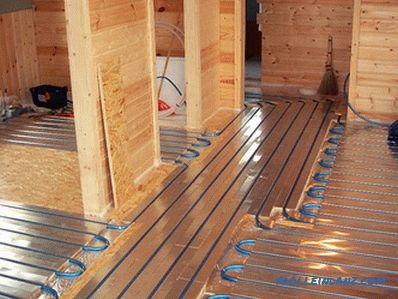
Earlier, the arrangement of a heated floor was a pleasure not cheap, and only in the bath he could pay for himself. As for our days, now the situation is quite different. This technology has spread...
How to paint a cast iron bath - painting a cast iron bath
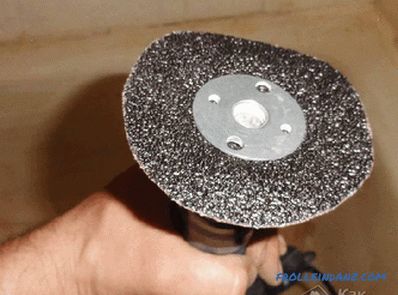
After a certain time, the enamel coating applied to the surface of your bath usually loses its “original” appearance. At the same time, well-defined chips and cracks form on it, the protective ename...