More and more people are choosing suspended ceilings for their apartment or house. They are plastic, metal, wood. The first ones are called tension ones and are installed with the help of a heat gun, while the other two types are made of metal plates and rails made of wood, and fixed on a frame. Wooden rack ceiling installed in living rooms, in the kitchen, offices, restaurants, bars, etc. It has its own characteristics.
")
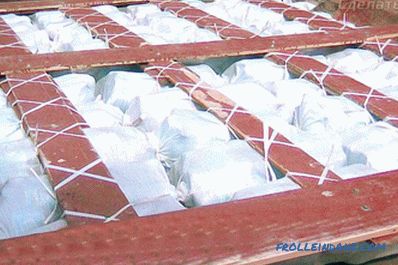
Rack suspended ceiling.
Benefits:
- long life;
- does not harm health;
- aesthetic appearance;
- under it can hide electrical wires;
- hides the unevenness of the ceiling;
- simple installation;
- the rails come in different colors and sizes.
Disadvantages:
- they are afraid of pests;
- they do not like water;
- they burn well.
")
Rack ceiling layout without stringers.
Positive features are two times more than negative ones. Especially since you can fight with all the minuses. There are various impregnations for insects that spoil the wood, and fire and moisture protection compounds that do not allow the material to burn quickly.
The ceiling of the rails can be badly damaged if neighbors are flooded from above or a leak appears in the roof, but in this case any finishing material will deteriorate: the paint will peel off, the wallpaper will come off, the plastic ceiling will drain.
Types of wooden slatted ceiling
They are divided into:
- solid - the slats fit snugly together;
- open - there are between the plates distance;
- closed - there are gaps, but they are hidden with the help of decorative inserts.
A chandelier can be attached to the ceiling or spotlights can be built in. The length of the rails is 2-3 m, width is from 5 cm, thickness is from 2 cm. The length of the bars is the same, width is 2.5-5 cm, and the height in section is from 4 to 5 cm. The slats differ among themselves in classes:
- C - the lowest, which affects the quality: the plates may be uneven, but the cheapest;
- A and B - the most common, good quality, average cost ;
- premium (extra) - slats made of expensive wood, without knots, chips and damage, very expensive, not everyone can afford to buy them.
Materials are made of pine, linden, cedar, oak, aspen.
The procedure for installing the ceiling is
")
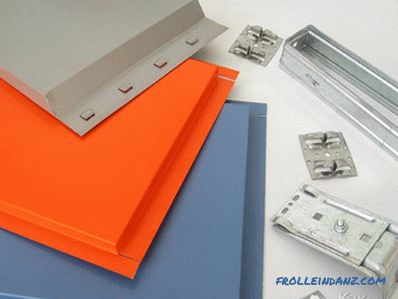
Tools for mounting a slatted ceiling.
This is a simple job that anyone with minimal decorating skills can do.
The tools required to install the ceiling cover are in almost every man's house:
- level, tape measure, simple pencil;
- drill or screwdriver, screws;
- steel corners;
- jigsaw or saw;
- hammer and small studs;
- thick threads or ropes;
- wooden bars;
- slats.
The first stage of the installation is the measurement of the length, width and height of the suspended structure. The minimum distance from the top is 5 cm. If you plan to make built-in lamps, then the distance from the ceiling should be greater than the lighting device itself. Next you need to make notes using a level and a pencil and connect them with a rope. The next stage of work is the fastening of the corners to the walls and the bars to the ceiling with the help of a drill and self-tapping screws. The distance between the bars is from 45 to 70 cm, the distance from the wall is from 10 to 25 cm. When attaching, use a level so that everything is level.
Then you need to stretch electrical wires through the crate. They can be hidden in a special metal or plastic tube, just attached to the ceiling with electrical tape or steel brackets. The next stage is the mounting of the rails. They can be laid horizontally, vertically or obliquely. If you choose the option of installing the material diagonally, then you need to start with the longest rail, which is mounted in the middle.
Reiki is attached to the bars on the screws, and between the slats are connected with grooves and small studs. On the first and last rail, you need to saw off one side of the grooves so that they fit snugly to the wall. If you decide to arrange an outdoor or indoor ceiling, then the slats do not need to join. In the process of working in the ceiling, you need to cut holes for lamps or chandeliers with a jigsaw, and then install them.
Didn't find the answer in the article? More information on the topic:
Search
Related Articles
How to build a dock with your own hands
For people living next to a river or pond, convenient access to water was always a pressing issue. Previously, for these purposes, bridges were built along which it was possible to pass to the tied...
Facing the facade with metal cassettes - installation technology of metal cassettes (+ photo)
When choosing a modern variant of finishing the facade of a new building or reconstruction of an old one, it is worth considering metal cassettes. This type of decoration protects the walls from moi...
construction from the foundation to the roof
Construction from natural materials is becoming increasingly popular today. Eco-friendly houses, as a rule, are erected from wood, they are also called frame houses, since their construction is car...
How to glue the ceramic curb on the bath
For the purpose of waterproofing and decorating joints formed between the wall and the bathroom, it is common to use the so-called corners and borders. They are made of different materials. For thos...
How to make a polycarbonate veranda
Want to make an attractive continuation of the house? Then you certainly need to do the arrangement of the veranda. One of the inexpensive, but very durable materials used for this is polycarbonate....