We are accustomed to meet with a similar design solution on windows and doors, but roller blinds for the sanitary closet in the toilet will not only complement, but also improve the appearance of the room. They have good functionality, but how to choose them and how to install them correctly? We will talk about this in the article.
What is a roller shutter
Roller shutters are an interesting engineering solution that can serve not only for protective purposes, but also to serve as a decorative element. In appearance, they resemble blinds, but the principle of operation and installation is slightly different. They consist of a box, cloth, guides and locking mechanism. According to the installation method, they are distinguished:
- Laid on external. The main unit is mounted above the opening, which will be closed.
- Built-in outdoor. The box is installed directly in the opening. At the same time part of the usable space is lost.
- Overhead internal - very similar to the first option, only all the elements are located indoors.
- Built-in internal. Installing this option means turning the main unit inside the room. At the same time it is mounted inside the opening.
 Mounting options
Besides these types of arrangement, there are also combined options, everything will be depend on the needs of the owner, as well as the design features of the opening. Material used for manufacturing:
- Plastic. It has a relatively low price. Plastic is quite fragile, so it is easy to damage, and it is also highly susceptible to ultraviolet radiation.
-
 Aluminum Aluminum. The profile of this material can be made by the method of rollers, as well as extrusion. In the first embodiment, the blanks are rolled with special rollers, so that they acquire the desired shape. During extrusion, hot soft material is pressed through the forming holes. Such products have greater strength and resistance to various influences. Inside the profile can be foamed insulation, which provides a certain thermal and sound insulation.
 - Steel. This type of roller shutter can be made with perforation. This makes it possible to reduce their weight. They are mounted where necessary to provide protection against hacking.
- Tree. Impractical material for such purposes, but rather expensive. It is used in mansions, where the elite appearance plays a big role.
Lifting mechanisms are divided into:
- Electric. In this case, a special engine is mounted and a control panel is included. All that is needed from the user to open or close a roll is to press the corresponding key.
- Manual. There are several ways to implement it: tape, using a cable, cardan. The principle is reduced to the presence of the handle and the mechanism of connection with the main shaft. Rotating the handle in one direction leads to raising the curtain, in the opposite direction - to lowering.
- Spring. There are no additional items. The spring system automatically directs the force into the correct vector. The user is required to raise the blinds to a certain level or lower, then everything happens automatically.
 With the spring-inertia mechanism
For the bathroom is better not to use electrical mechanisms. On the one hand, this is an unjustified waste of funds. On the other hand, this is a certain risk of electric shock, since there is always a large amount of moisture inside such a room.
The advantages of using the bathroom
 Access to sanitary units
When you enter the toilet, pipes and joints that are located at the far wall immediately catch the eye. Often these elements look very unpresentable. In order to hide them, apply roller shutters. But there are other advantages to installing this design:
- Access to valves and connections when the need arises.
- There is no need for special skills to use the barrier structure.
- Corrosion resistance (relevant for some materials).
- The ribbon is hidden in a box.
- Additional noise insulation of risers and feed pipes.
- Easy maintenance. This includes the convenience of cleaning, as well as the lack of need for painting.
- Ability to select individual colors.
There are some weaknesses:
- Some inconveniences when mounting in a small space.
- It is often difficult to combine the appearance of roller shutters with an existing finish.
- Sufficient cost of the product.
Making the right choice
 With printing
Roller shutters are usually made on an individual project. For wet rooms, an aluminum product is perfect.Although plastic is also very well tolerated by moisture, but over time, the material turns yellow, and dirt that is difficult to remove can become clogged in small scratches. If you decide on a colored tape, then it is better if it is a double layer. If desired, the manufacturer can cause a print in the form of a picture you like (although this will slightly increase the final cost).
A spring system is perfect as a lifting system. It will be easier to install, and its use will not cause difficulties. Additional locking mechanisms can not be installed, unless, of course, for the blinds do not plan to install a safe. It will be more convenient if the box is deployed in the direction of the pipes. This may take some extra space, but the appearance will be more attractive. Try not to save on the profile, but there is no need to take the most expensive, because most of the time the partition will be in the closed state.
It is desirable that the measurements for the future design should be carried out by professionals from the company that will be engaged in manufacturing. In this case, all wishes and pitfalls will be taken into account.
Do-it-yourself installation
The scope of delivery usually includes an aluminum frame, a canvas, a box, and consumables in the form of caps, guides and self-tapping screws. Be careful when unpacking, so as not to damage the appearance of each of the elements. To do this, try to cut the packaging material on the side or on the technological slots in the modules themselves. Carefully inspect all components for integrity. After that, wrap them back into the packing material and take them out as they are installed, so you will avoid the appearance of scuffs and dents. For the whole process, we need the following tools:
- drill and drill bits for metal;
- punch;
- side cutters;
- tape measure;
- marker or pencil;
- dowels, screws;
- level.
 Mounting the roller shutters
Before you start work, you need to prepare a place. It is better if it is possible to use a table on which it is more convenient to carry out the marking and to drill holes in the profile.
- The first step is to check the level of the walls on which the guides will be mounted. If necessary, excess putty and mortar are knocked off with a hammer and cleaned with a spatula.
- In the case when there is a probability of formation of large gaps between the wall and the profile, it is necessary to carry out alignment with the help of putty or plaster. Minor can be hidden with sealant.
- If the plane of lowering the web intersects the toilet drain pipe, then an additional bar must be installed. Before it will roll down. It is in the bar will need to make a hole under the pipe. In the roller shutter is impossible. On the one hand, it will spoil its appearance, and on the other, it will destroy the integrity of the whole structure.
- The next step is to mark the guides. After you get them out of the package, you need to see if the rubber seals are pressed in. They are on the sides inside. If they move freely, then using a side cutter, you need to slightly flatten the groove on both sides. If you do not do this, you can disrupt the performance of the entire system. This will happen if these inserts are wound on the drum.
- With the help of a tape measure we mark 10 cm from the edge of each side. All the other holes mark up with a distance of 40-50 cm.
- The marks carry out drilling. Initially, this can be done with a drill, which will be the same diameter as a screw or a little more. At the base from the inside of the slats we make a sample, where the heck will go.
- T. since the profile wall is double, it is necessary to drill the front one with a 12 mm drill bit so that the cap can safely pass and press the bar against the wall. Do not worry about the appearance - there are special plugs that hide these flaws.
- Next, we apply the prepared profile to the places of its attachment and transfer the marks to the surface of the wall. Using a perforator, drill holes in the brick. Install the dowel. Straps are not fixed.
- Unpack the box and remove the front cover. In the side faces or in the back wall (everything will depend on the method of installation), holes are drilled for fixing on the wall.
- Plastic transitions are installed, which will direct the movement of the web from the coil to the aluminum profile. They need to be fixed according to the labels, if this is not done, then over time the curtain will break them and wear down on sharp corners.
- Racks are fixed to the box. This must be done now, because if you first fix the coil, then it is almost impossible to crawl to the points of articulation.
- The whole structure is tried on at the installation site and screwed with screws into the ready-made holes.
- Unpacked canvas.In the bar, which is the base of the curtain, we install two latches, then rewind the entire scroll so that the top edge is accessible to us.
- Metal holders are mounted on the curtain, which serve as connectors with a drum. They are simply inserted into the top link.
- Next, coil the spring. To do this, 6‒8 turns of the drum. After that, one person holds the tension, and the second hooks the metal curtain. Carefully releasing the roll, we give him the opportunity to wind on the crossbar.
- If you feel that the tension is not enough, then you can wrap a whole skein inside the structure several more times.
- The canvas is gently inserted into the guides and lowered to the bottom. The tension level is checked again.
- Two holes are made in the upper part of the base plank, and the handles are screwed on.
- Caps are installed on the holes in the profile, the slots are sealed with a sealant.
 Sequence of installation of roller shutters
We are sure that you will be able to cope with the task of high quality installation by yourself. The main thing is not to hurry and not to neglect the meticulousness of measurements. The result will be a pleasant reward for the effort.
Video
You can watch the video installation manual below:
Search
Related Articles
How to hide the pipe from the hood in the kitchen

The hood cleans the air in the kitchen from fumes, smoke and odors during cooking. Therefore, without a doubt, this appliance is an important element of the modern kitchen. When purchasing a headset...
How to choose linoleum for the house or apartment + Video
Today linoleum can be seen everywhere. In cafes and supermarkets, hotels and kindergartens, office buildings, hospitals and schools. This floor covering is appropriate in almost every room. Our apar...
Homemade circular saw: construction (video)
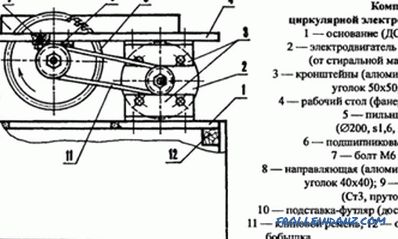
The circular saw is a convenient and functional tool for cutting wood pieces. You can use it to cut sheets of plywood, saw boards, cut timber, baseboards, platbands, etc. But for a large amount of...
DIY landscape design (+ photos)

Landscape design is a series of activities aimed at improving the territory. Using natural ingredients, you make changes to the appearance of the site, thereby creating a unique cozy atmosphere. To...
What is better metal or corrugated roofing for your house + Video

There are two very popular roofing made of steel profiled sheets. One of them is cheaper, the other is more expensive, and they both serve from 20 to 60 years (depending on the manufacturer). It se...